¶ How to Use the OmioCNC
If images are hard to read due to pixelization, it may be due to browser compression. Click/press on the image to see a full screen image.
¶ Quick Start Guide
- Turn on machine (deactivate E-Stop if needed)
- Make sure the machine is not blinking 'Reset', if so, press the 'Reset' button
- Secure part to the bed of the machine
- Zero the X and Y Axis
- Zero the Z axis
- Plug in Flash Drive
- Select file
- Press green 'START' button
¶ In Depth Guide
¶ Turning on Machine
If the screen on the OmioCNC is off, press the red power button to the 'I' position
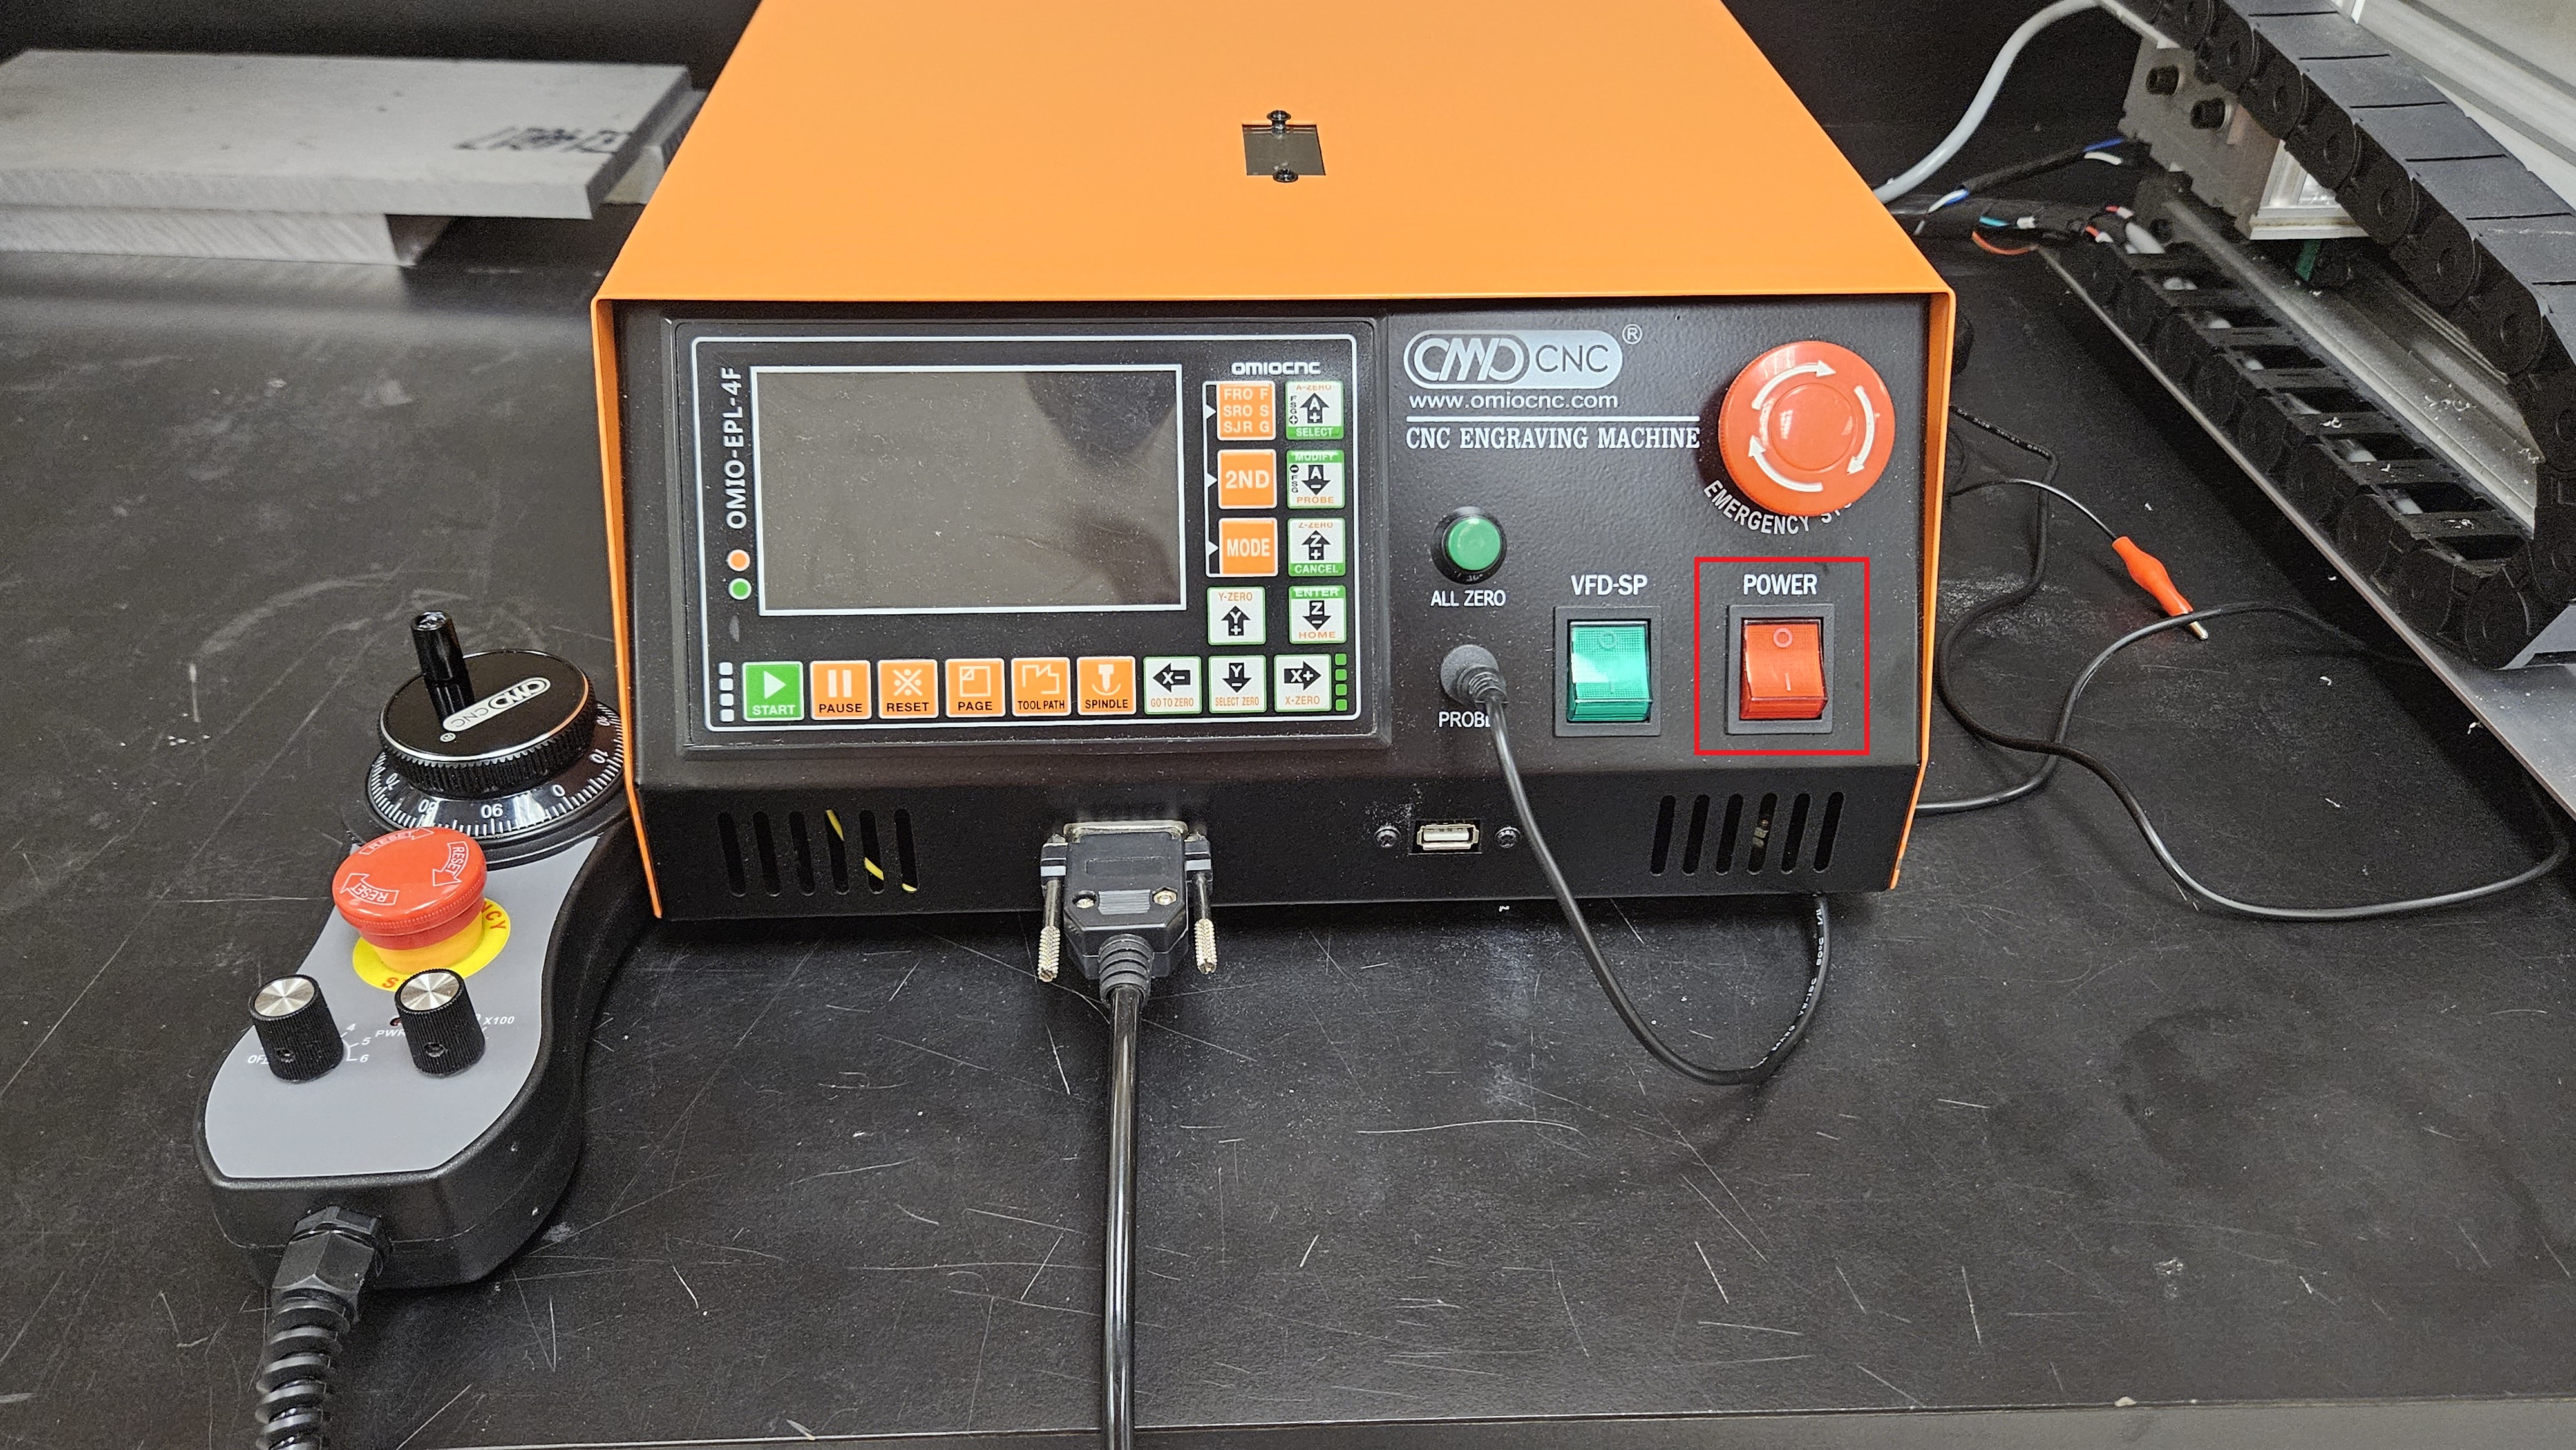
If the screen is still off, the E-Stop may have been used. Twist the E-Stop Knob to the right

Occasionally after turning on the machine, the reset button will be blinking. You cannot run a part when in 'Reset Mode'
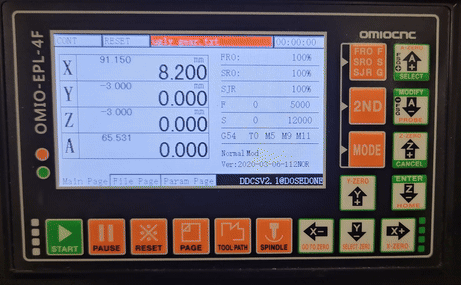
To fix this, press the 'Reset' button on the bottom. Afterwards, it will say 'Ready' on the top

¶ Zeroing The Machine
- Secure part to the bed of the machine with clamps
- Check Fusion or Solidworks to see where you set the origin, and make a mental note of it, the origin we set now must be the same
- Take note of the coordinate system on the top right of the machine
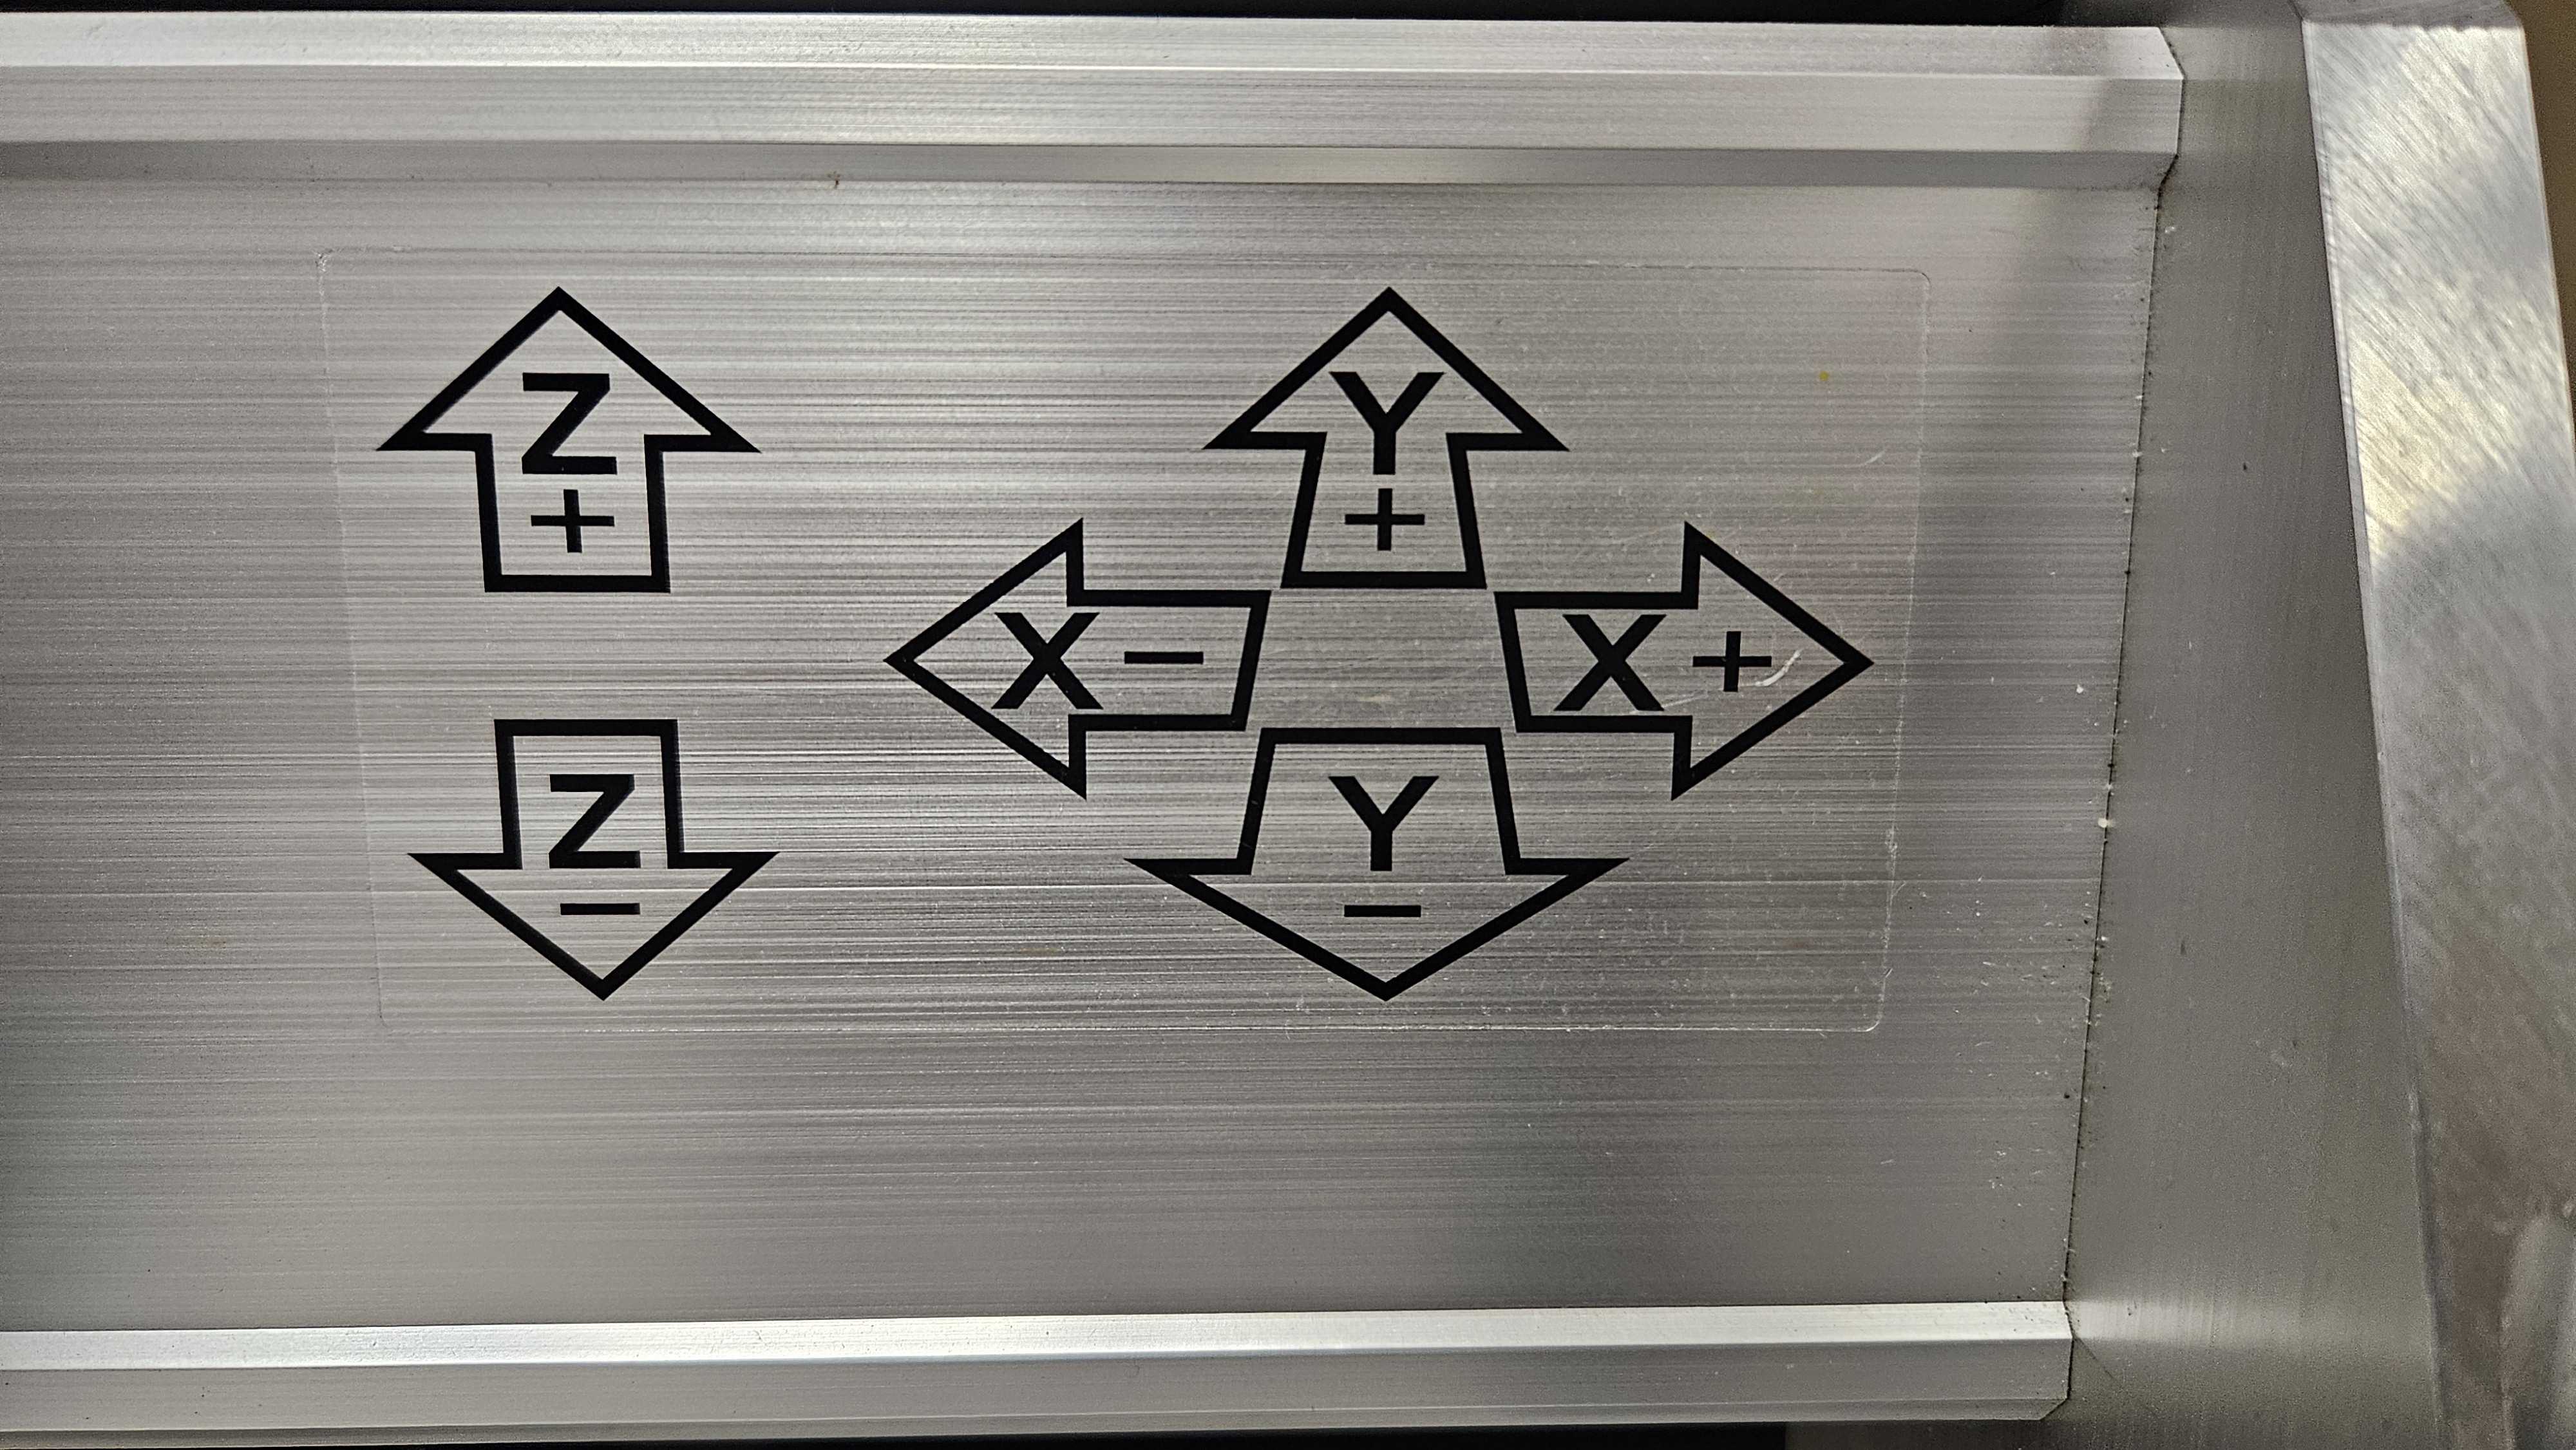
¶ Zeroing X and Y Axis
NOTE: The process for Zeroing the X and Y Axis is different from the Z Axis
DO NOT attempt to do the same instructions for the Z Axis!!
-
Press the 'MODE' button twice, or until it says 'MPG' on the top left

-
MPG stands for 'Manual Pulse Generator' and is the handheld device connected to the OmioCNC. Pick it up and ensure it is plugged in

-
To use the MPG
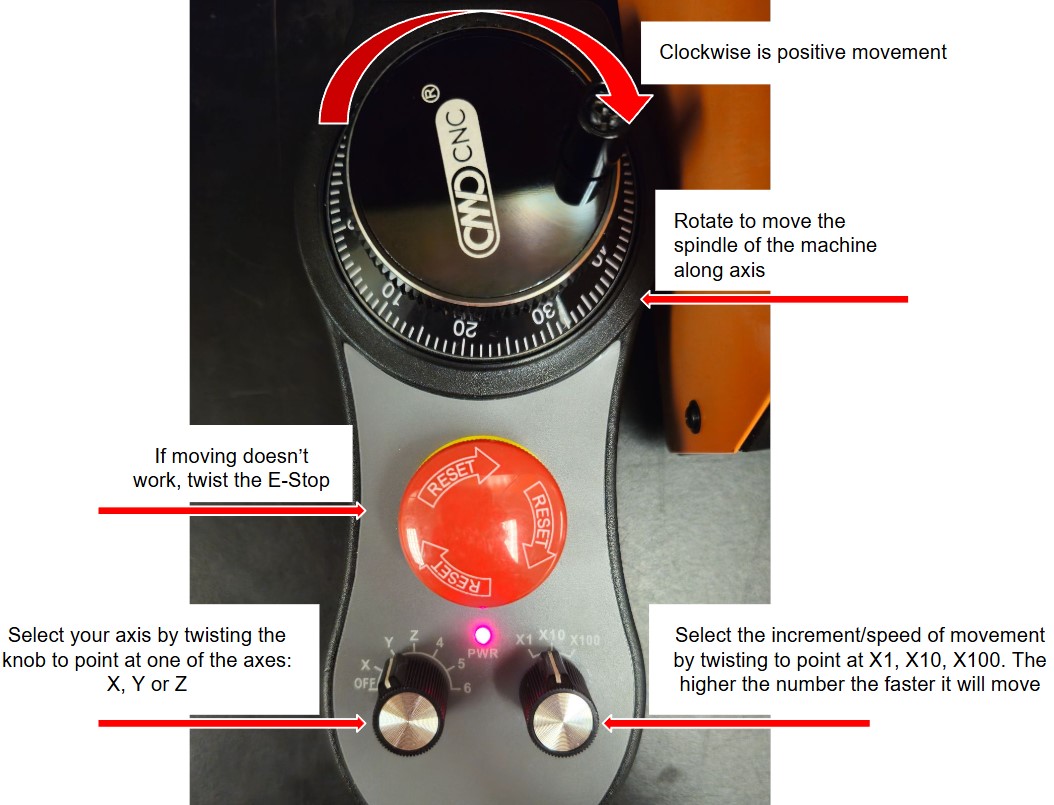
-
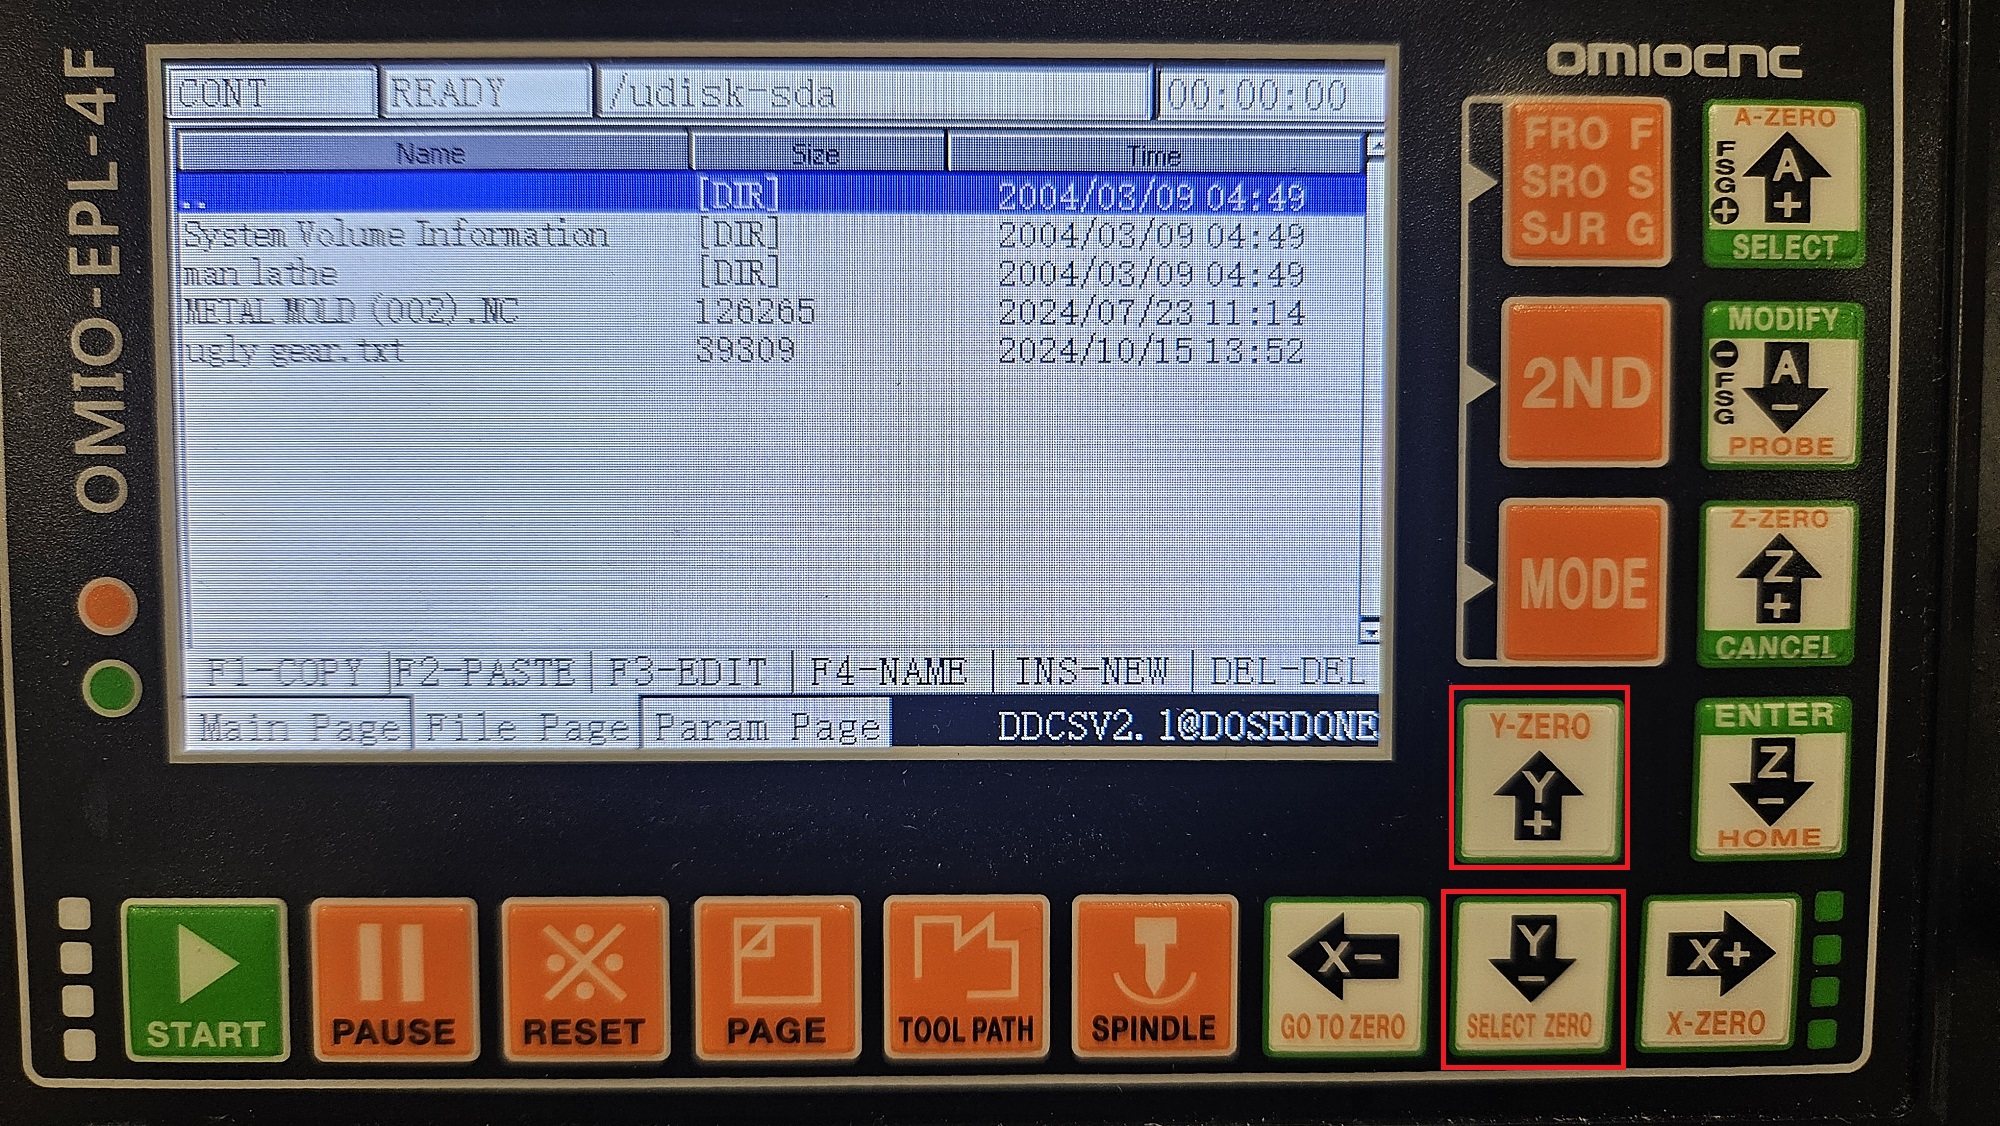
Once at the correct X and Y location of the origin, press '2ND'. After pressing it, the top left should change from 'MPG' to '2ND' Then press the down arrow with the orange 'SELECT ZERO' text underneath it.
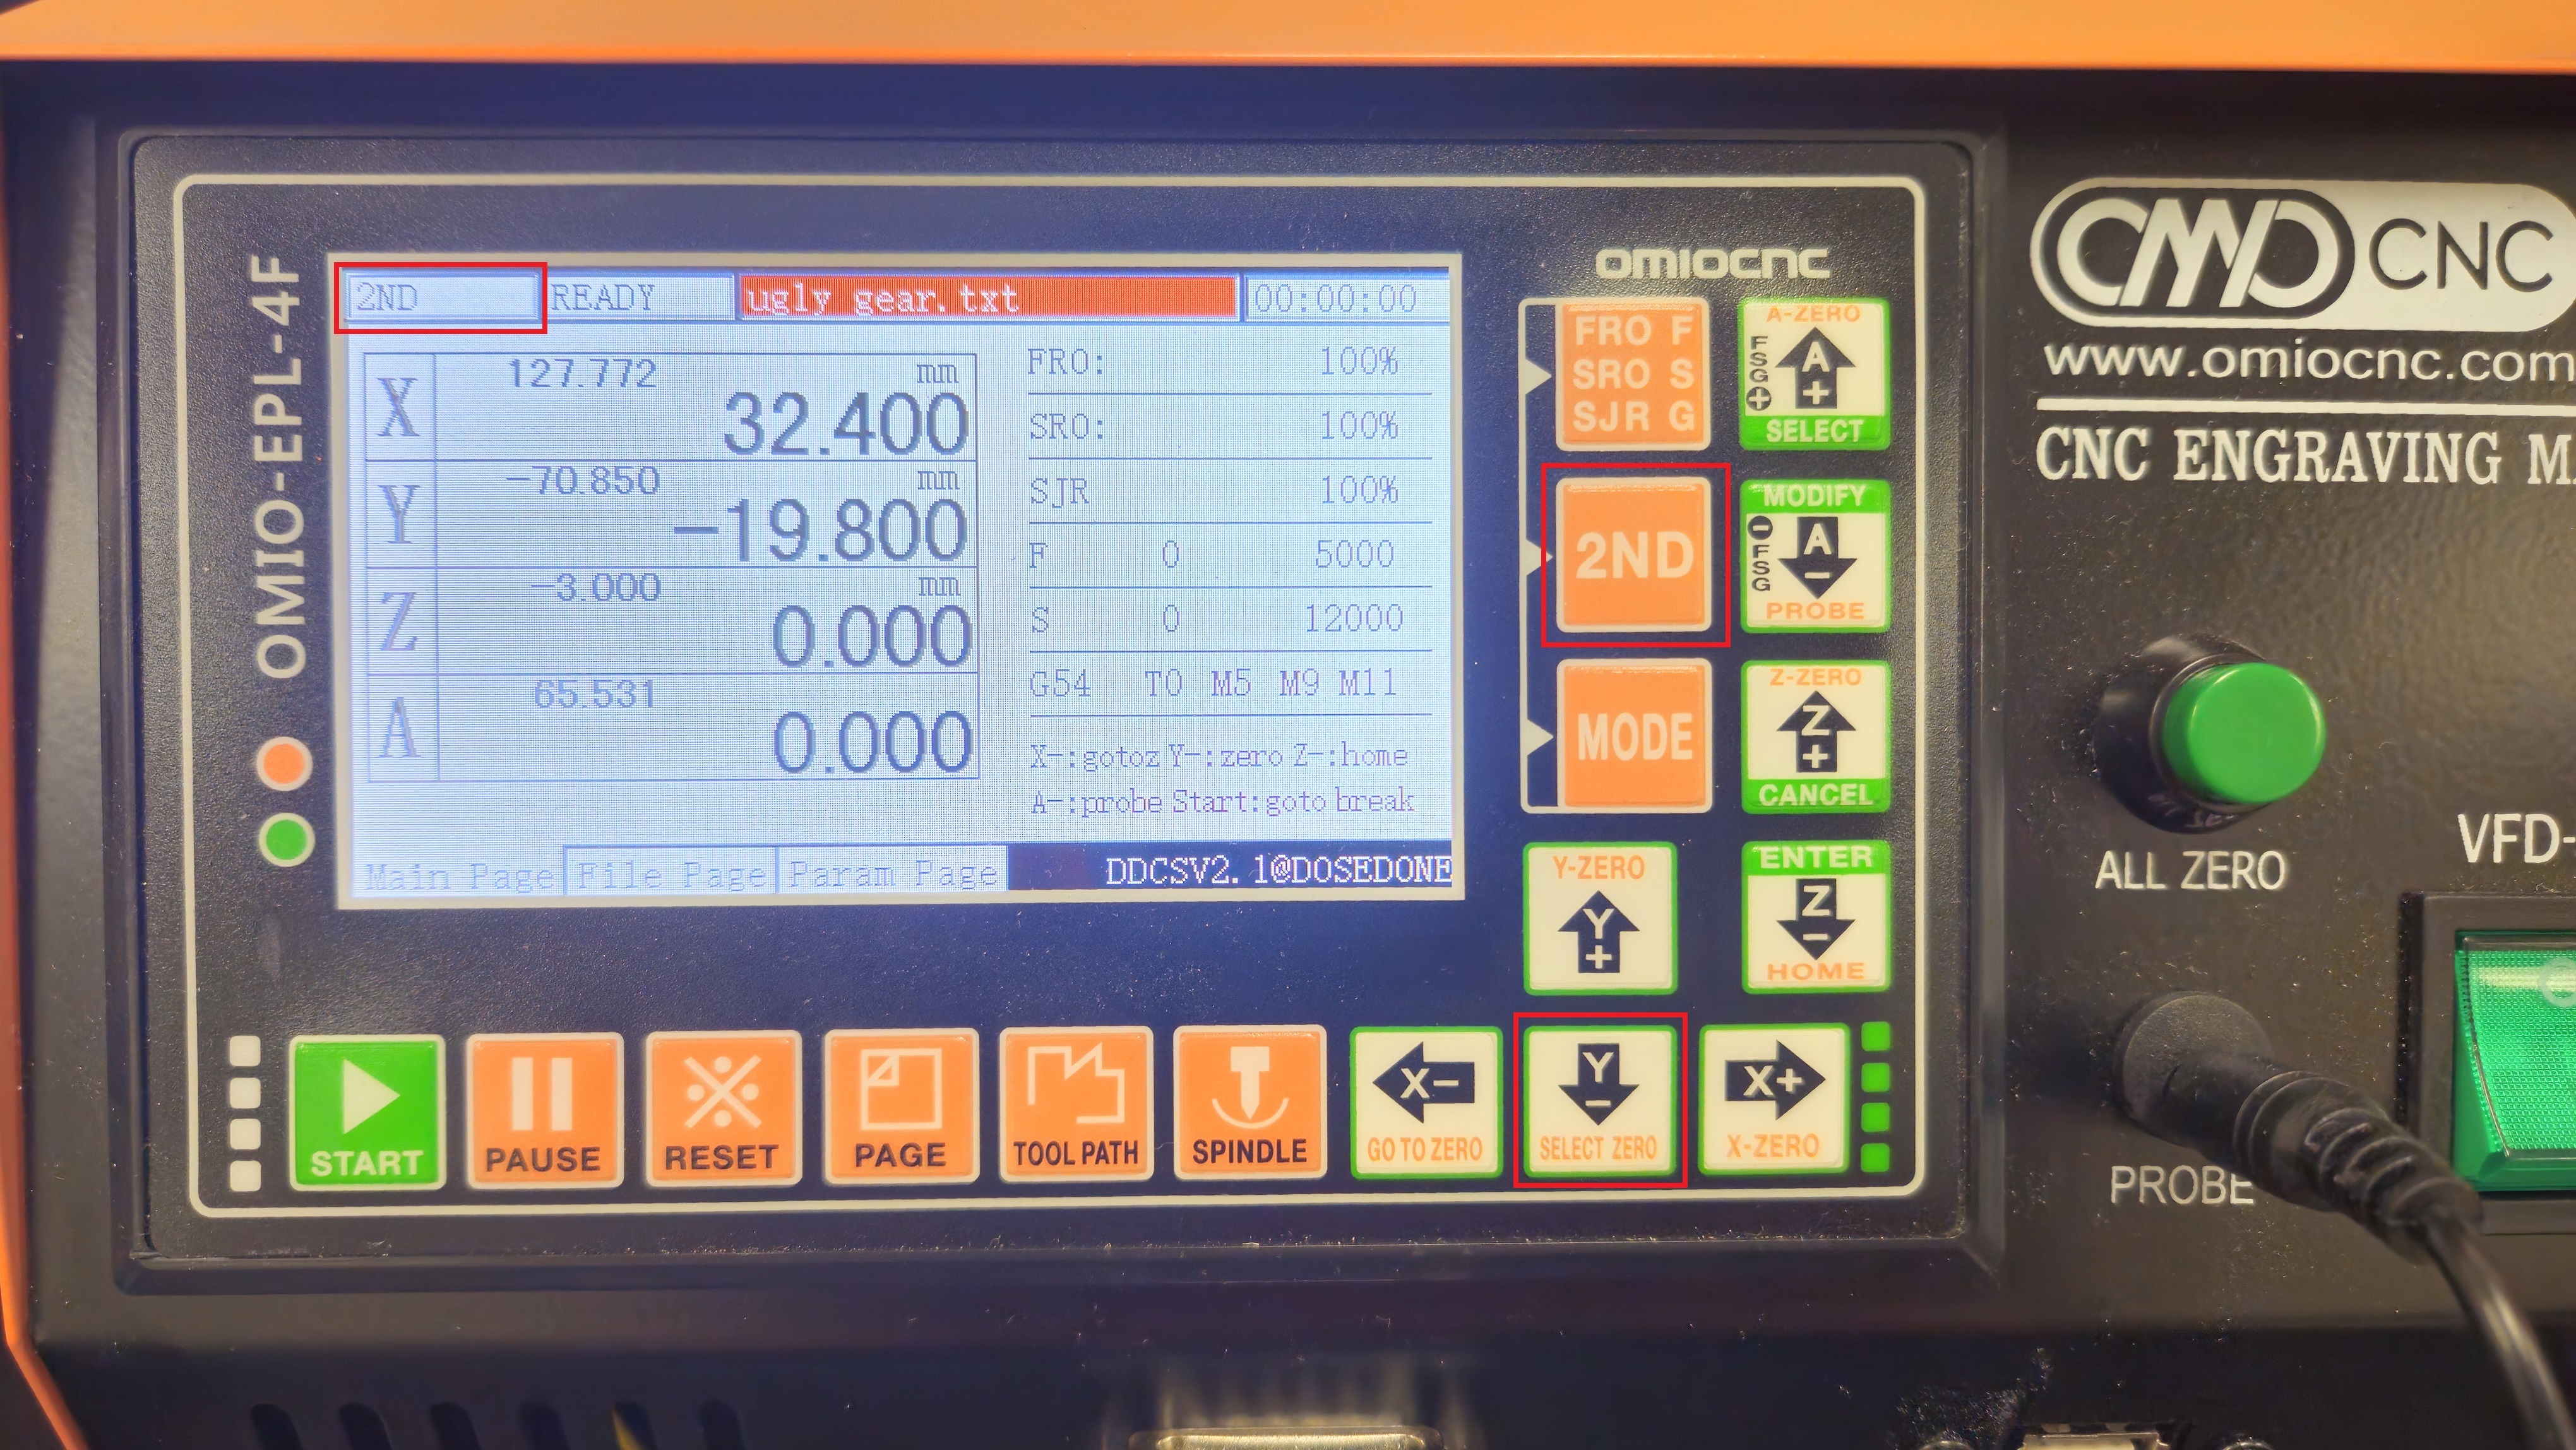
-
Press the right arrow with the orange 'X-ZERO' text underneath it. The text on the X axis should change to 0. Press 'Enter' to confirm
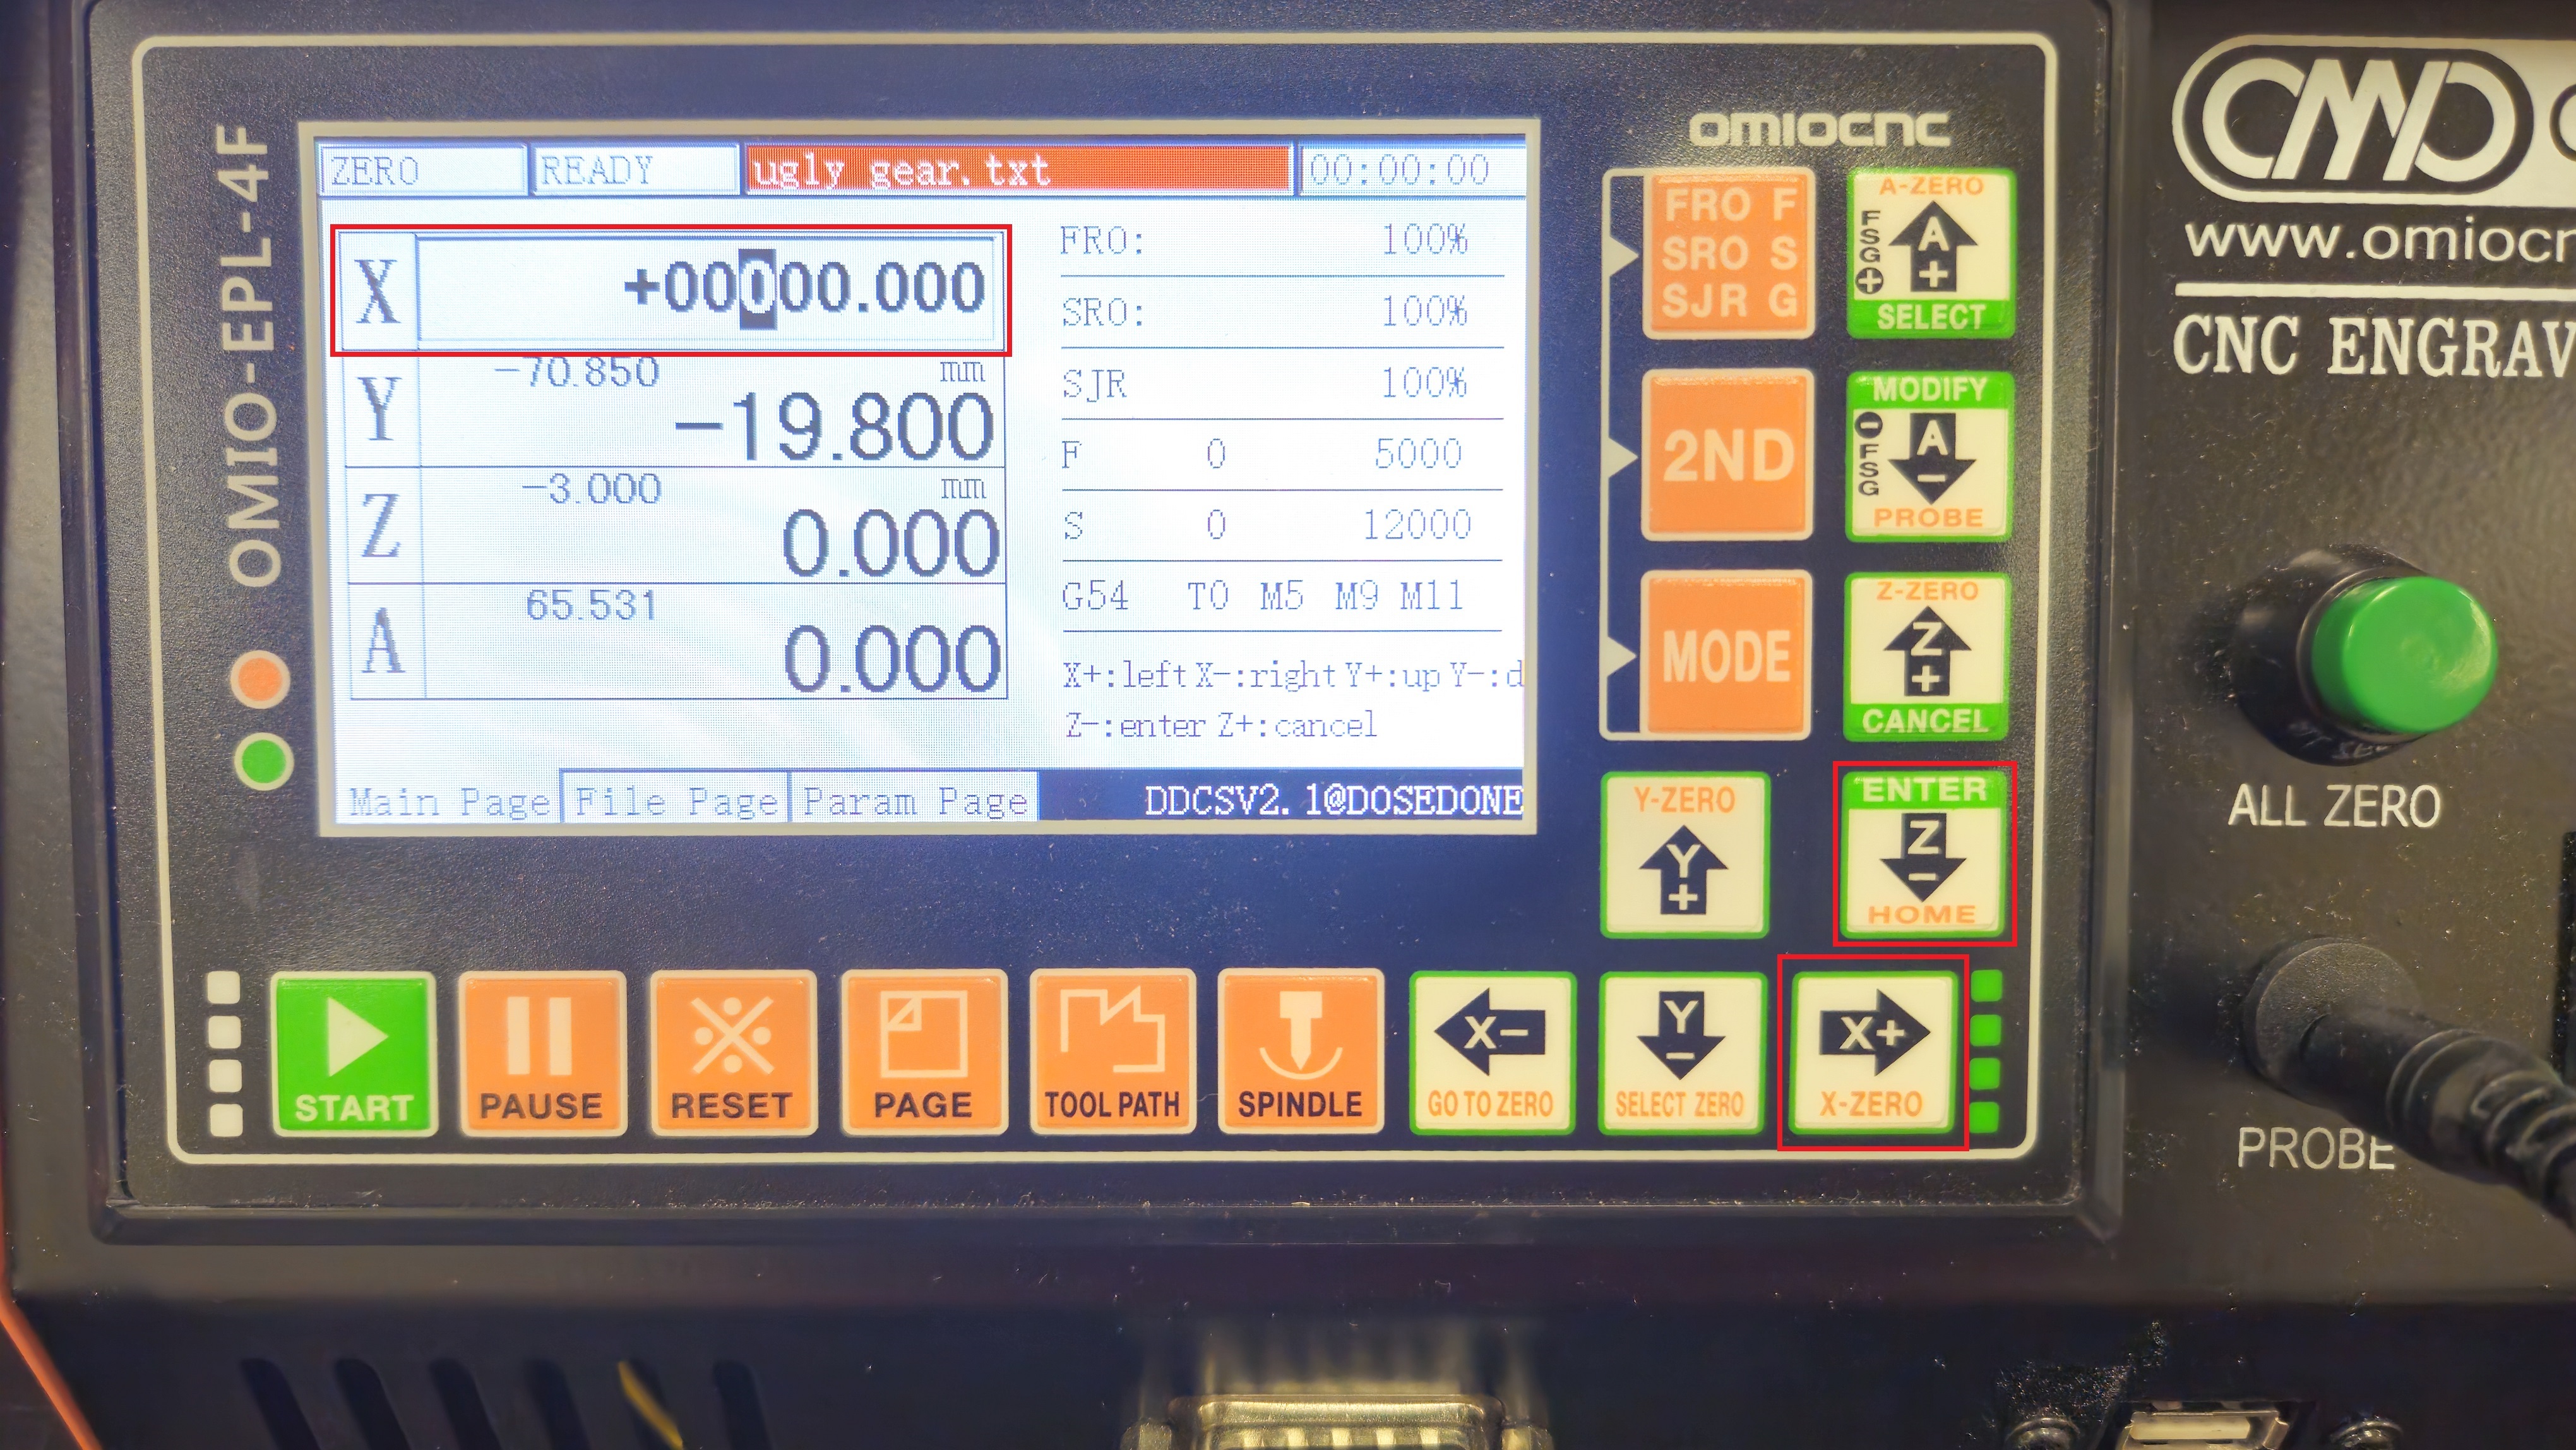
-
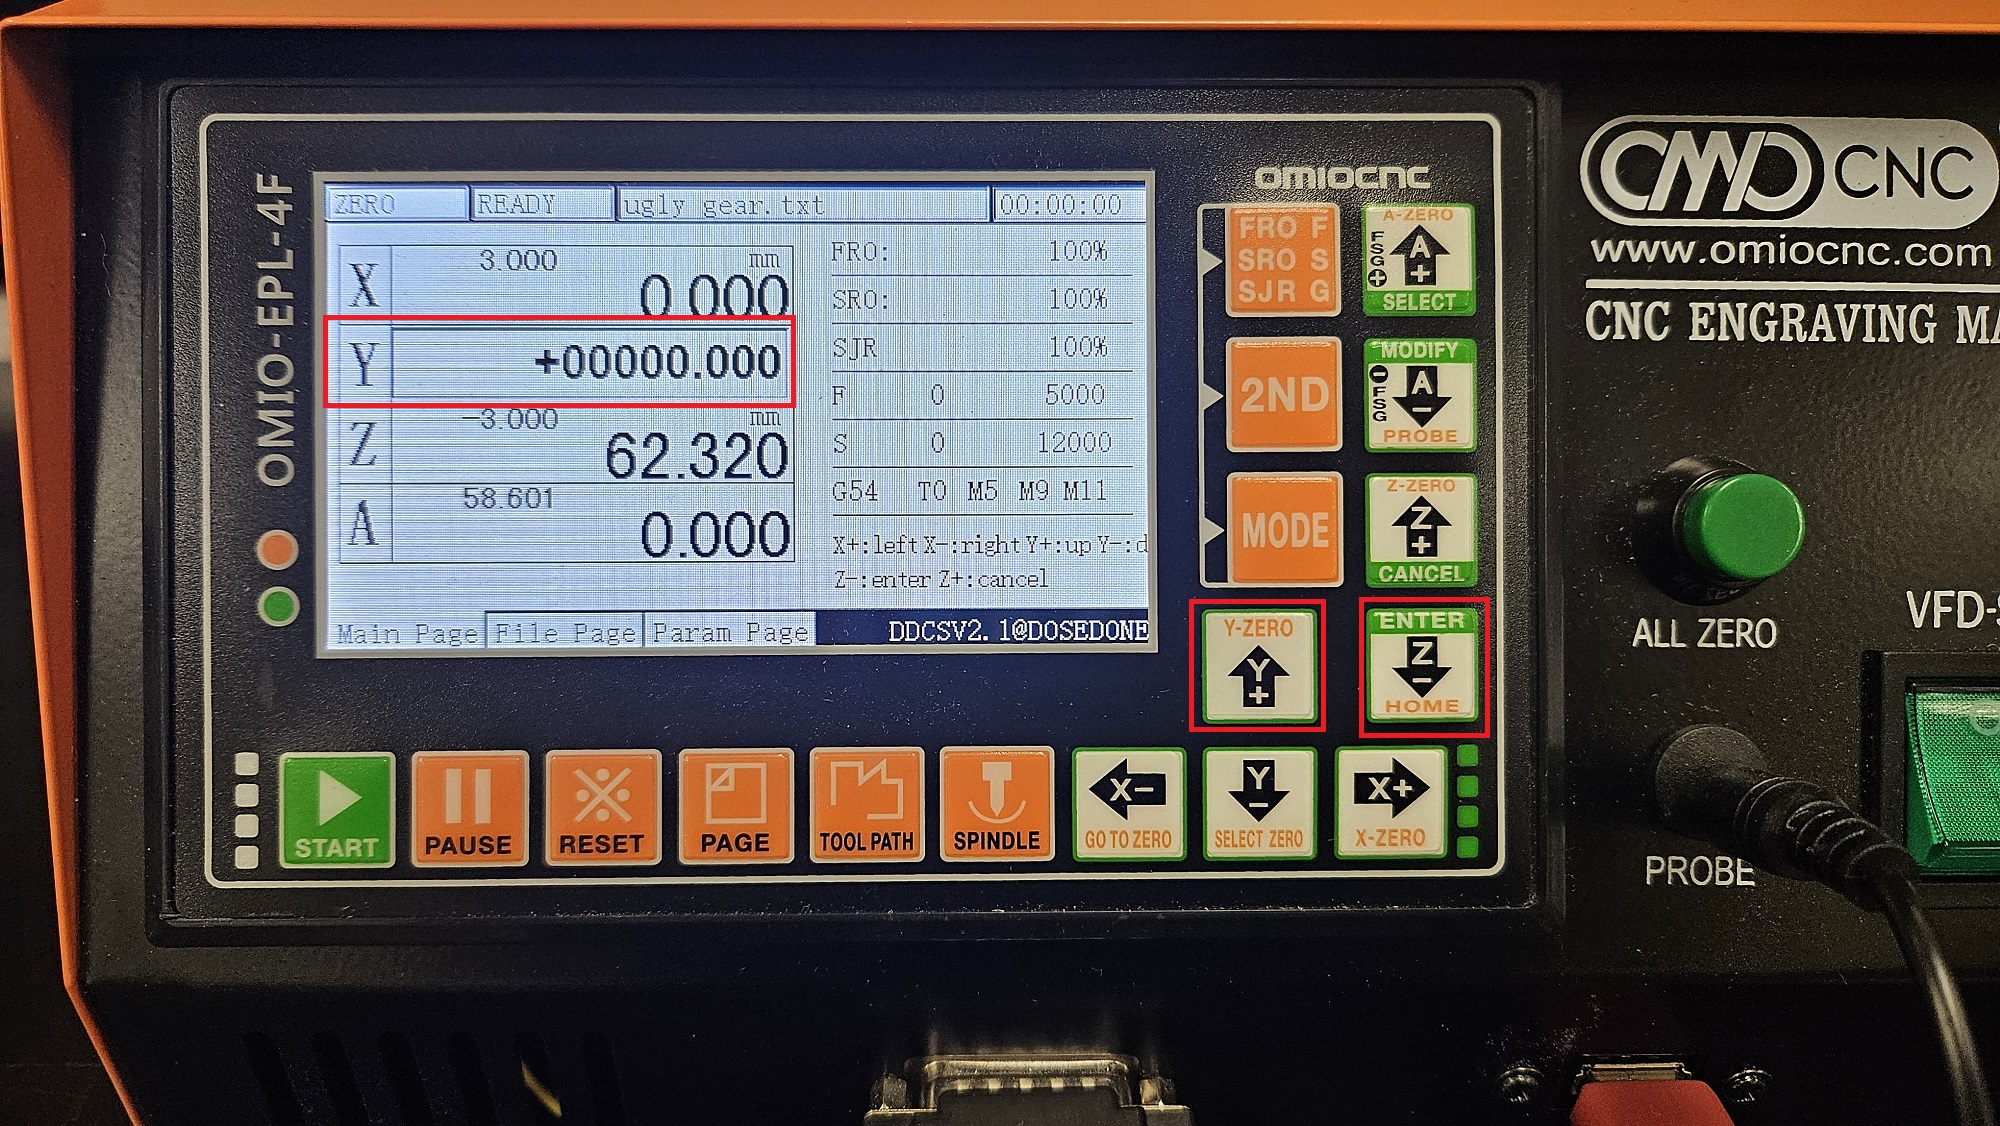
Repeat the same process as step 4, then press the top arrow with the orange 'Y-ZERO' text underneath it. The text on the Y axis should change to 0. Press 'Enter' to confirm
¶ Zeroing Z Axis
-
Find the puck that is next to the OmioCNC and ensure it is plugged into the 'PROBE' on the machine
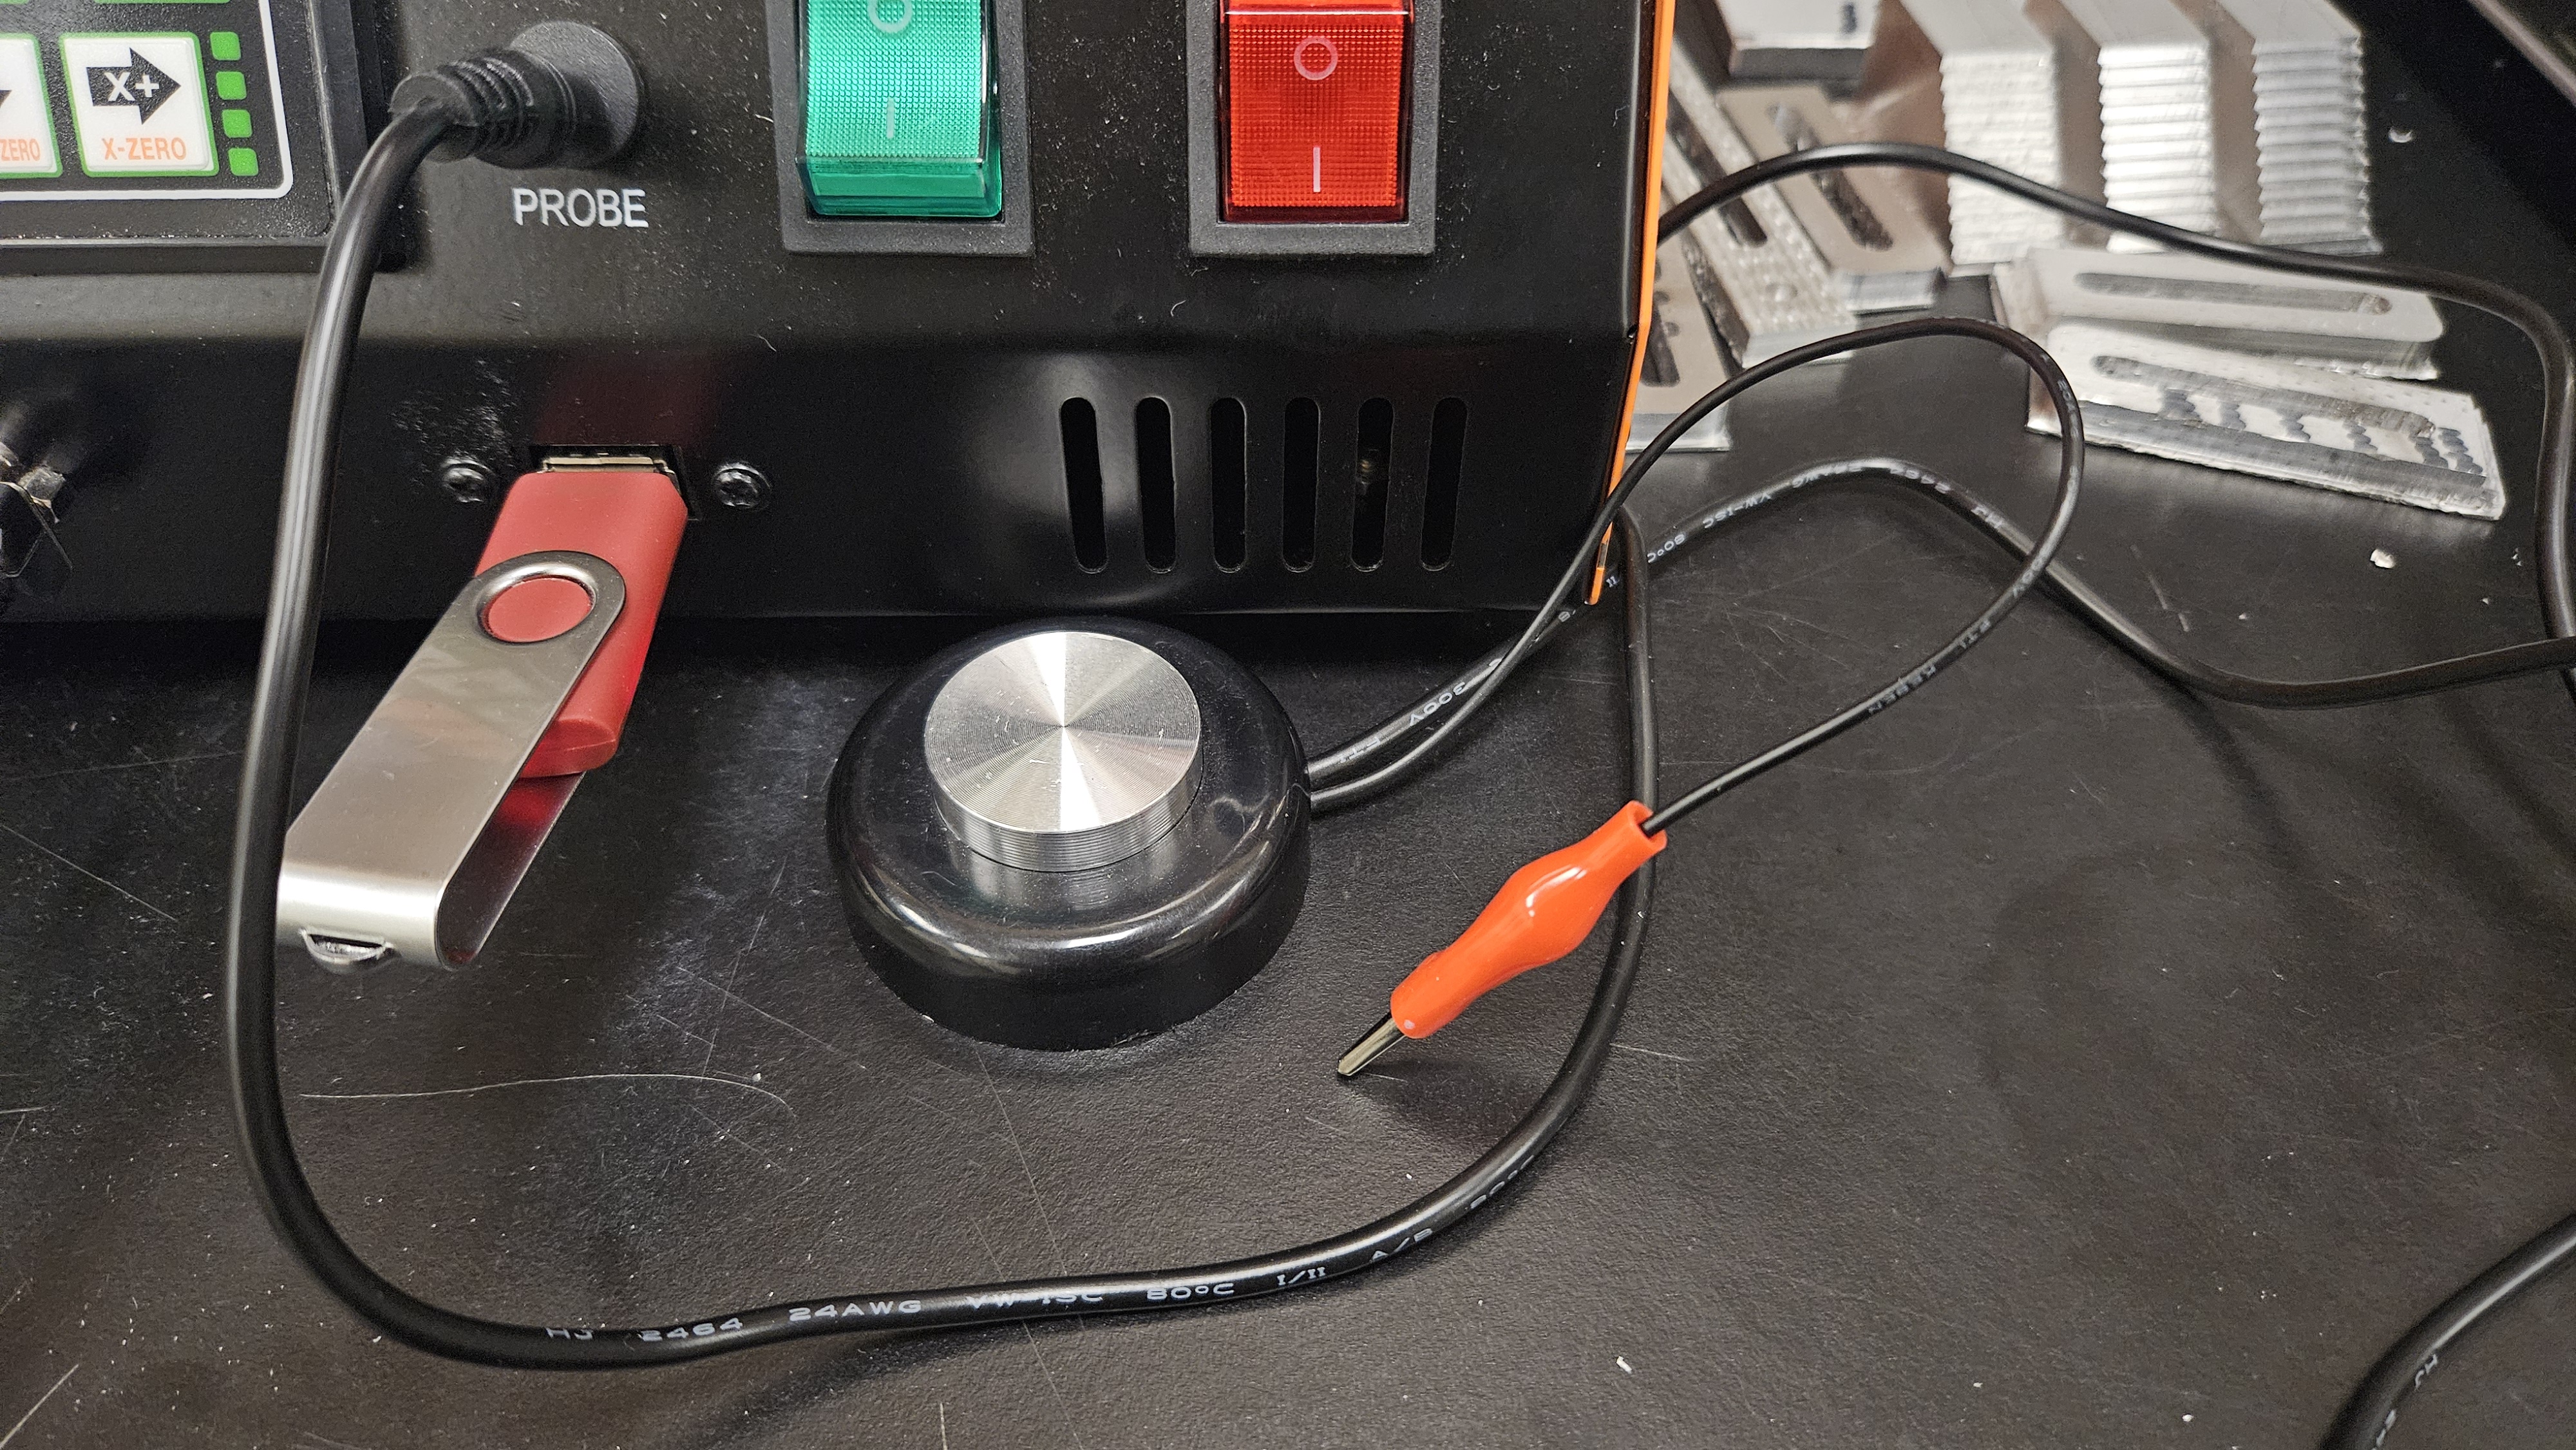
-
Place the puck on the top face of your stock material on the same plane as where your Z zero will be
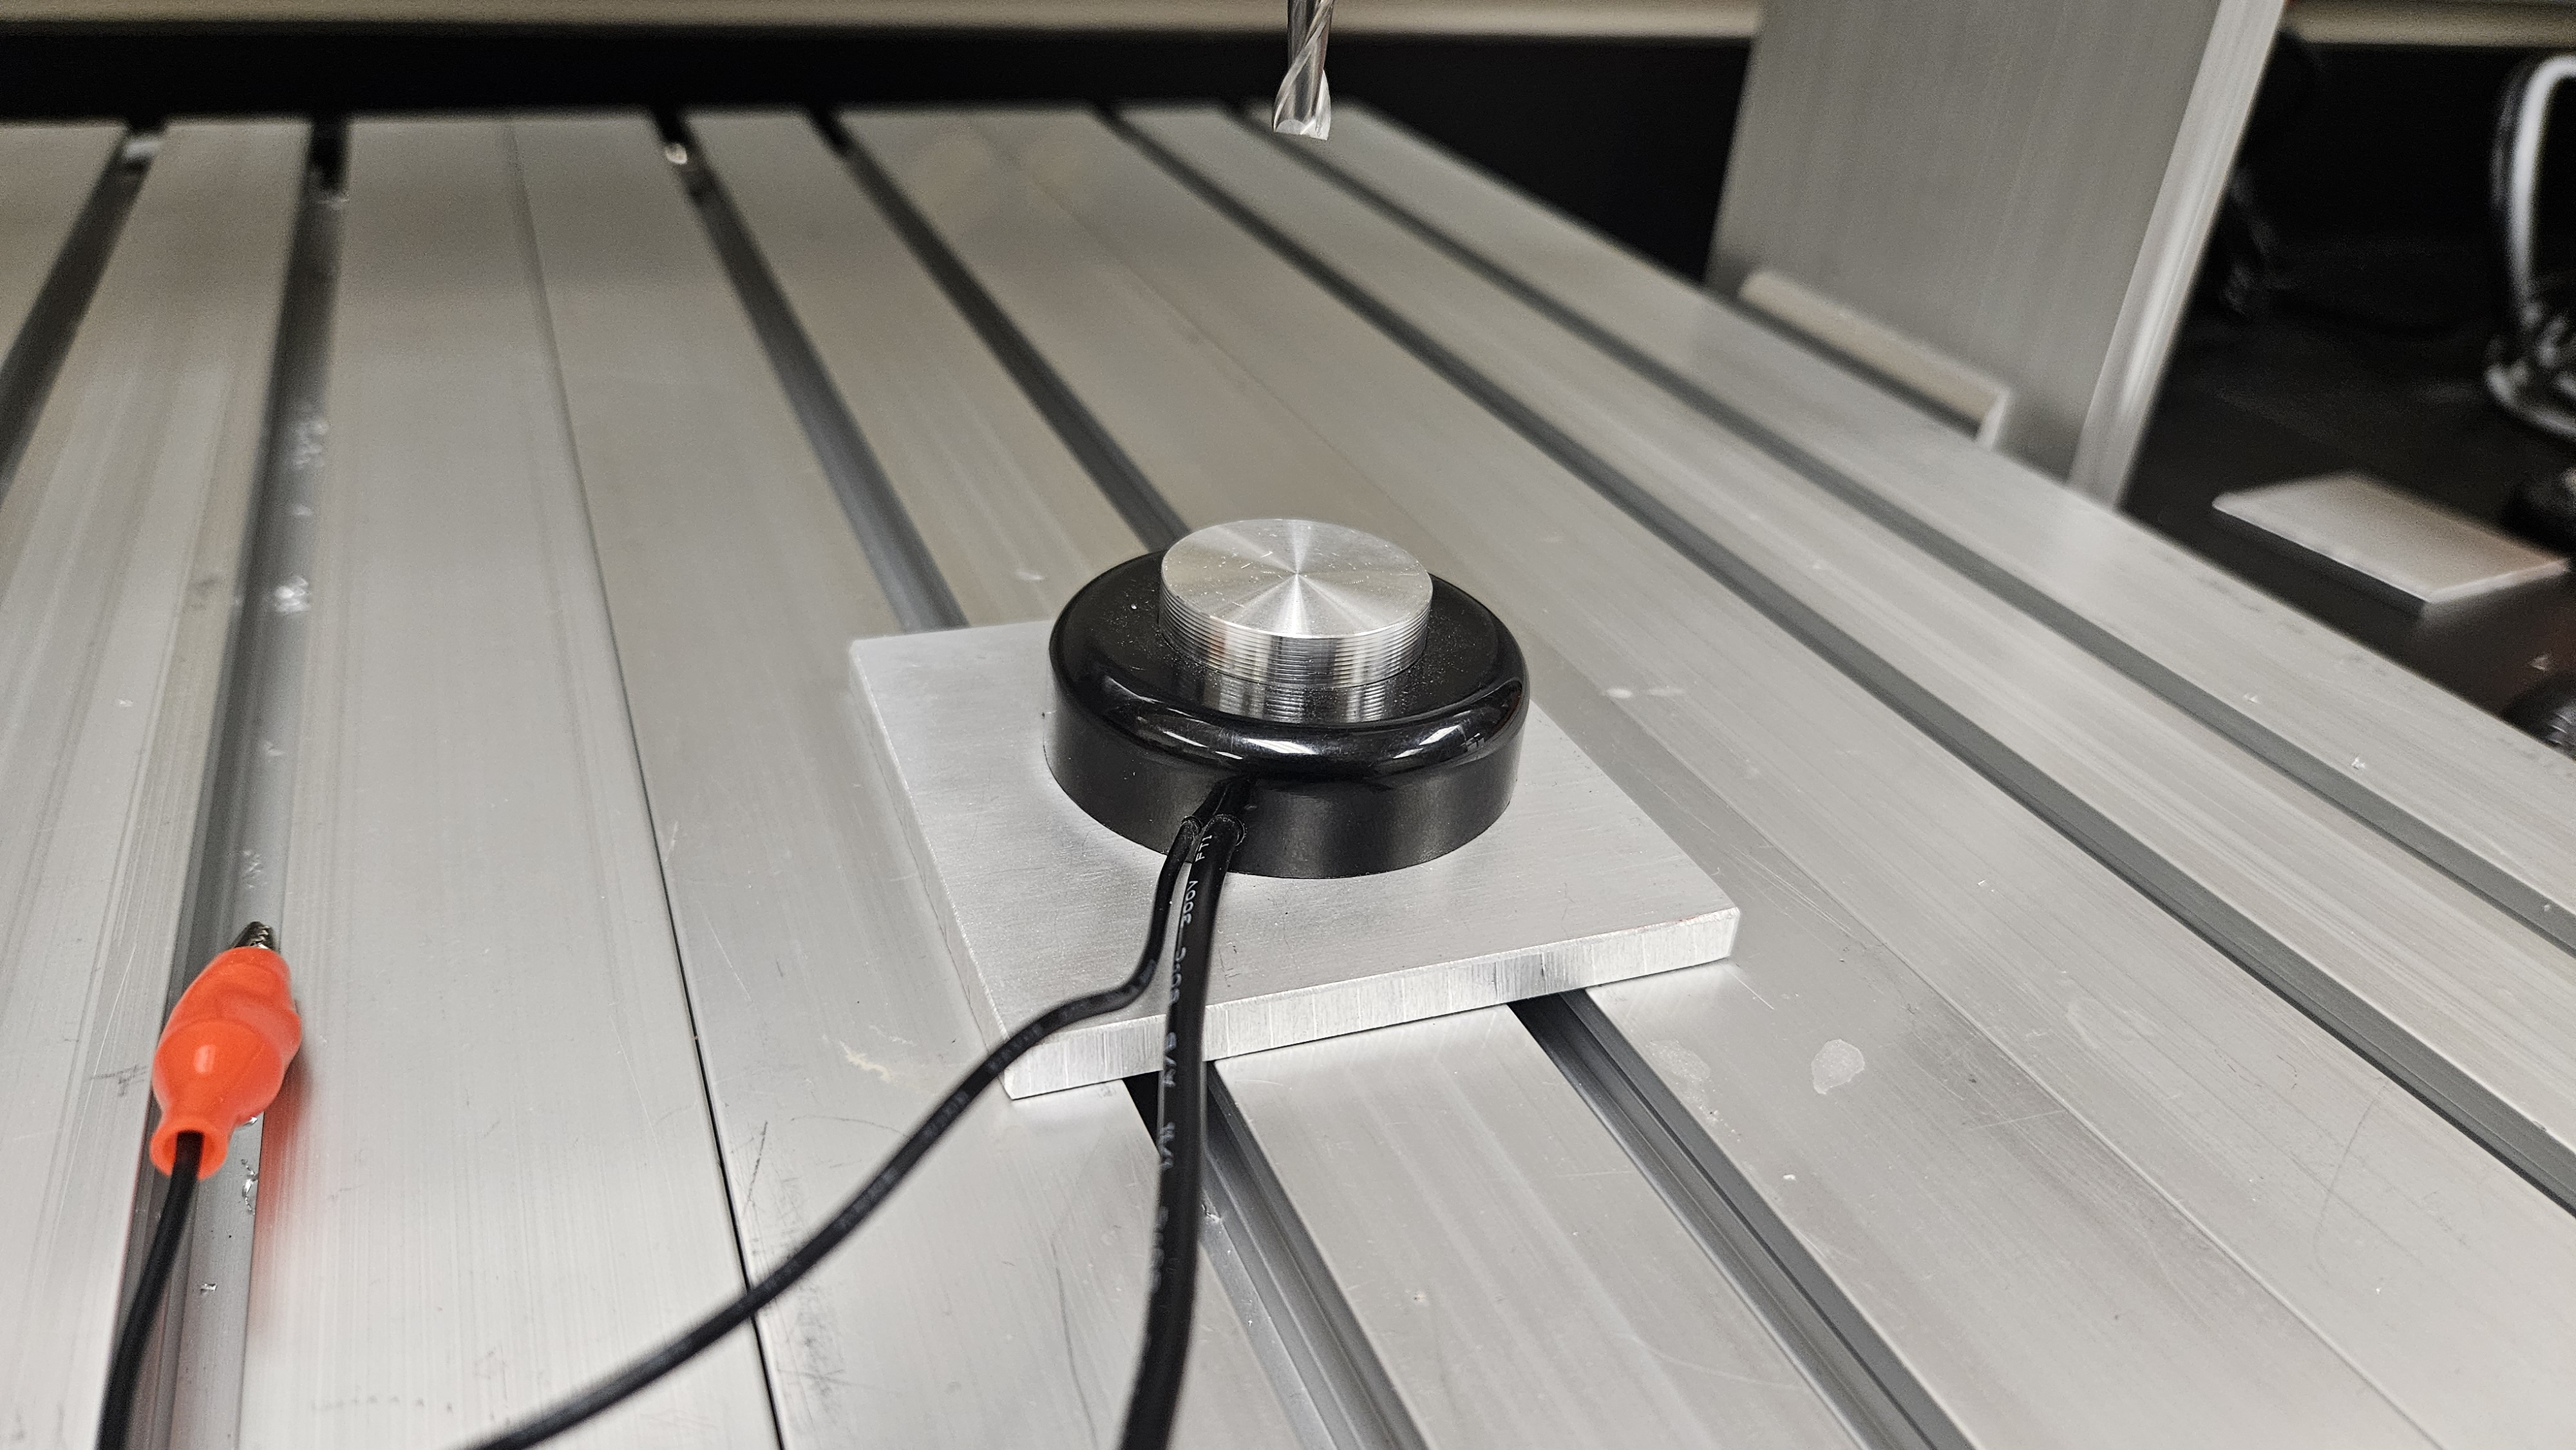
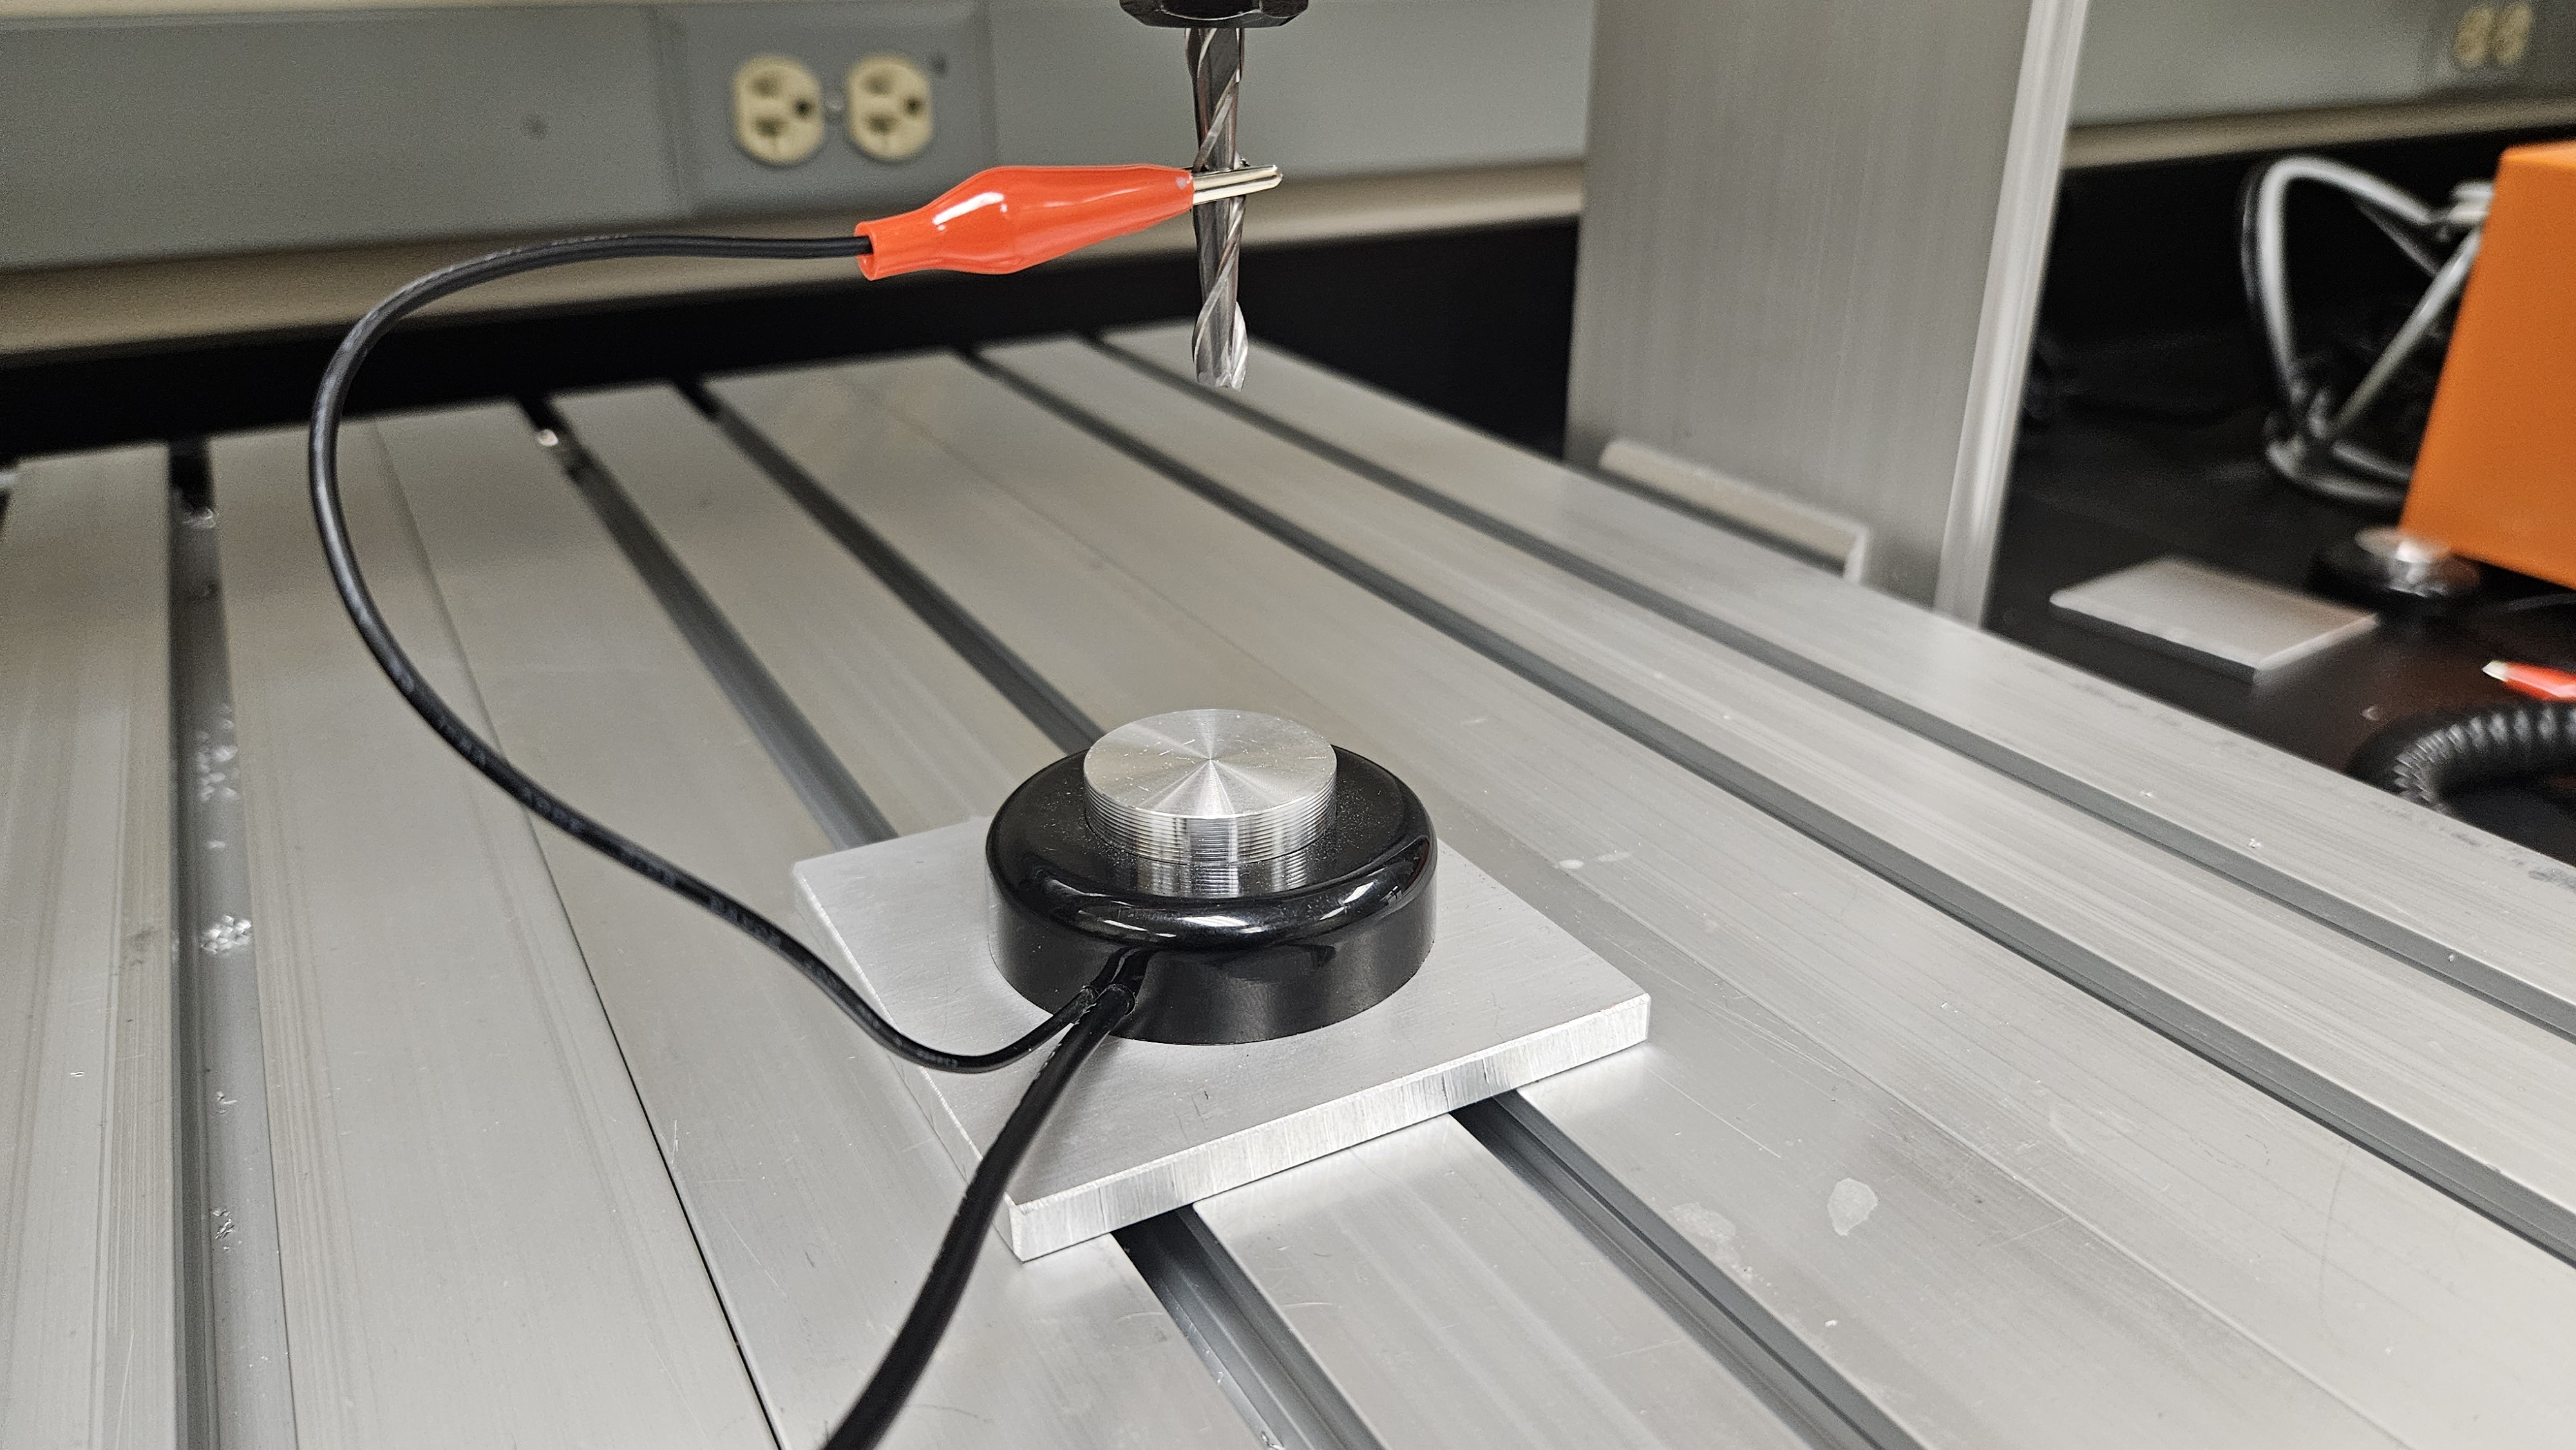
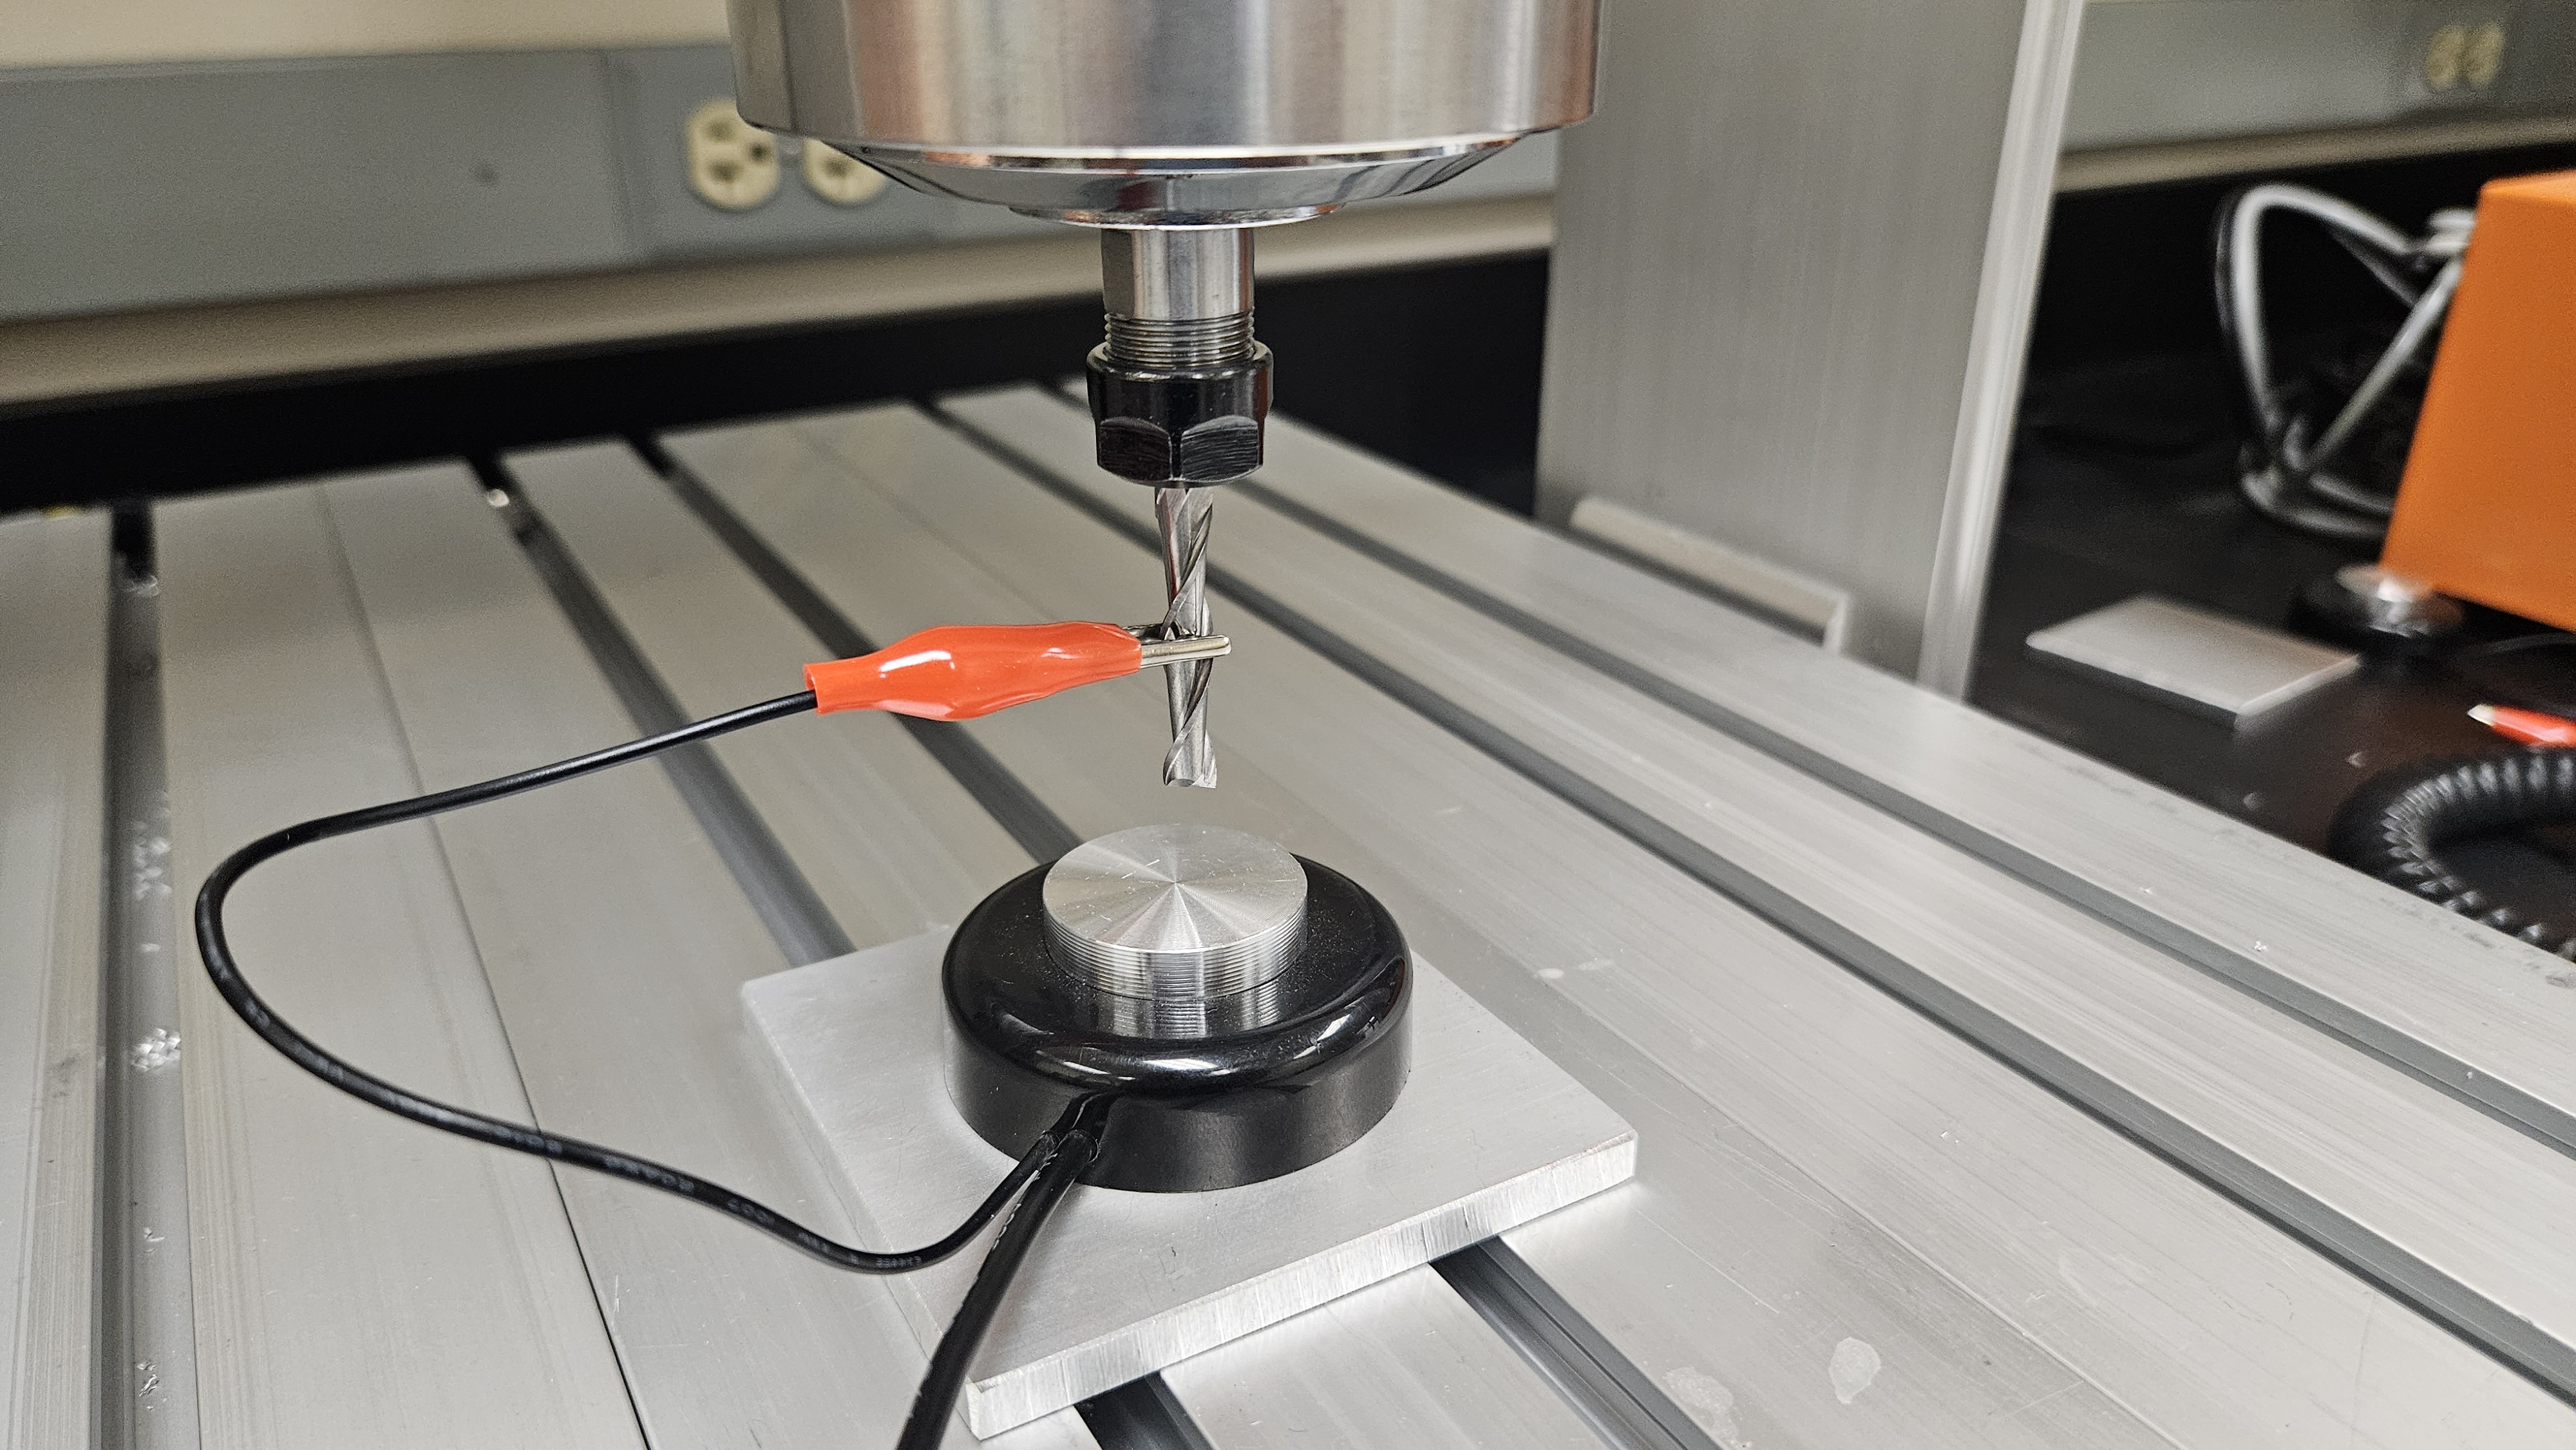
-
Attach the red clip onto the spindle. Optionally, you can use the MPG to bring the spindle down close to the puck, this will quicken how long zeroing takes, but is not necessary as the cord can stretch
Not attaching onto the spindle WILL cause damage!!
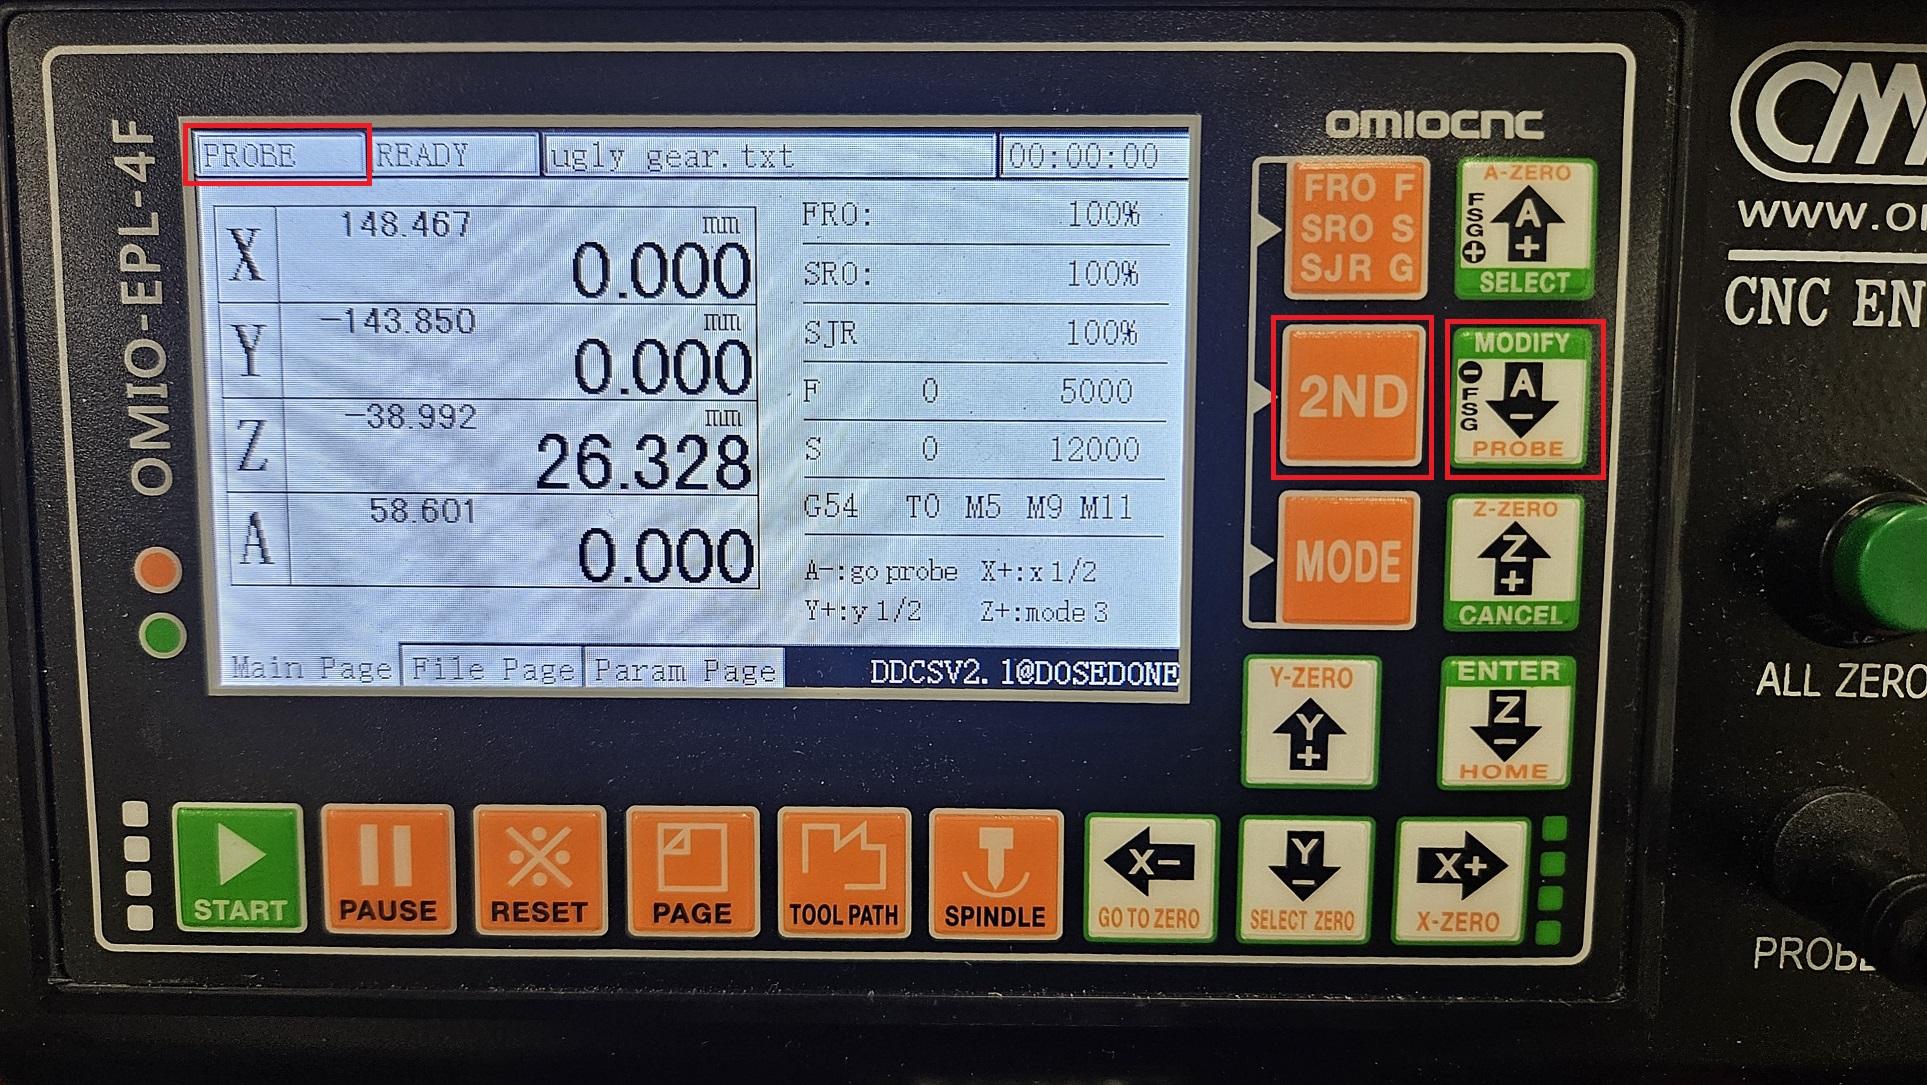
- On the display press the '2ND' button and then press the button with the orange 'PROBE' text underneath it. Ensure in the top left it says 'PROBE', and then press the 'PROBE' button again
DO NOT press the button underneath it that has orange text with 'Z-ZERO', it will damage the puck and the machine
-
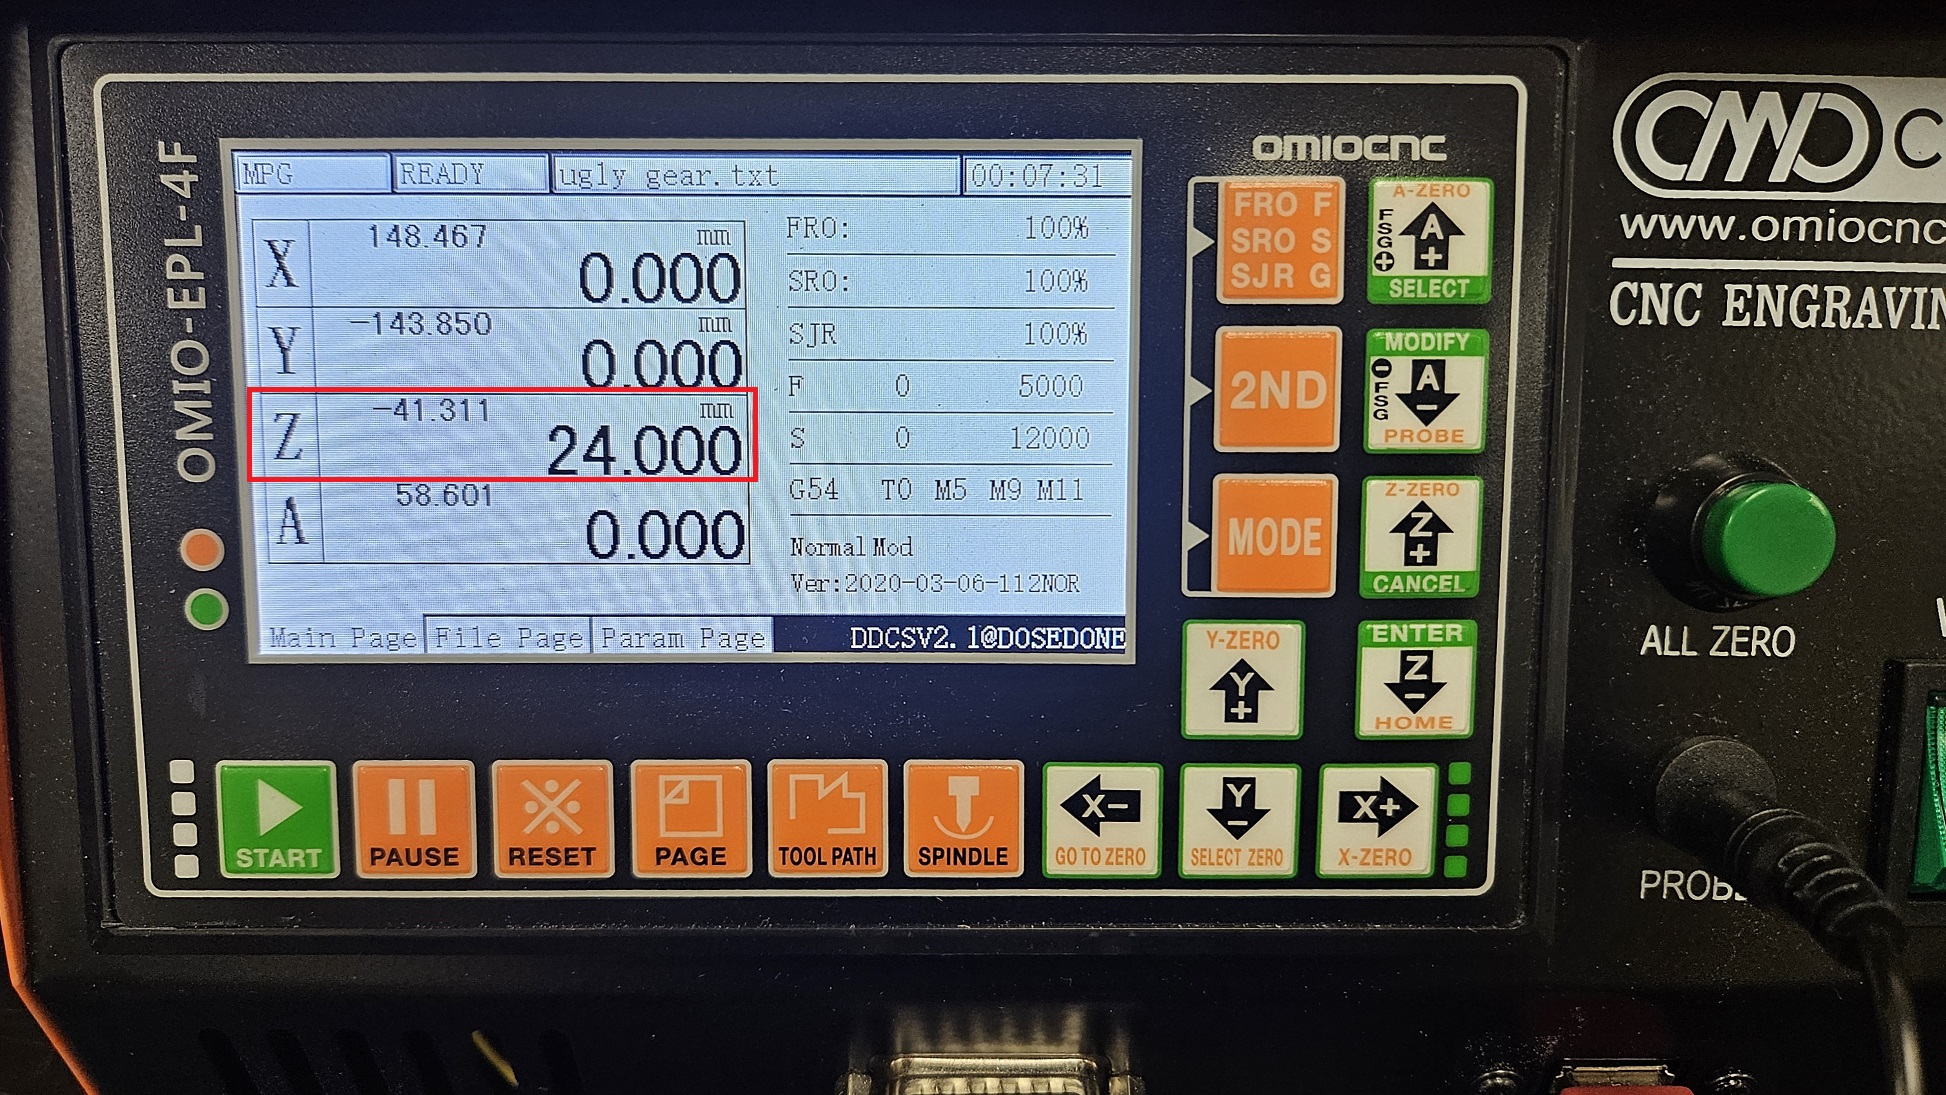
Now the OmioCNC will begin slowly moving the spindle downwards until it touches the top of the probe, and then it will move back up

-
The screen will show the Z Axis as the height of the probe instead of 0, this is for good reason, as you wouldn't want the spindle's natural position to be touching the part
-
Remove the puck and the clip from the spindle
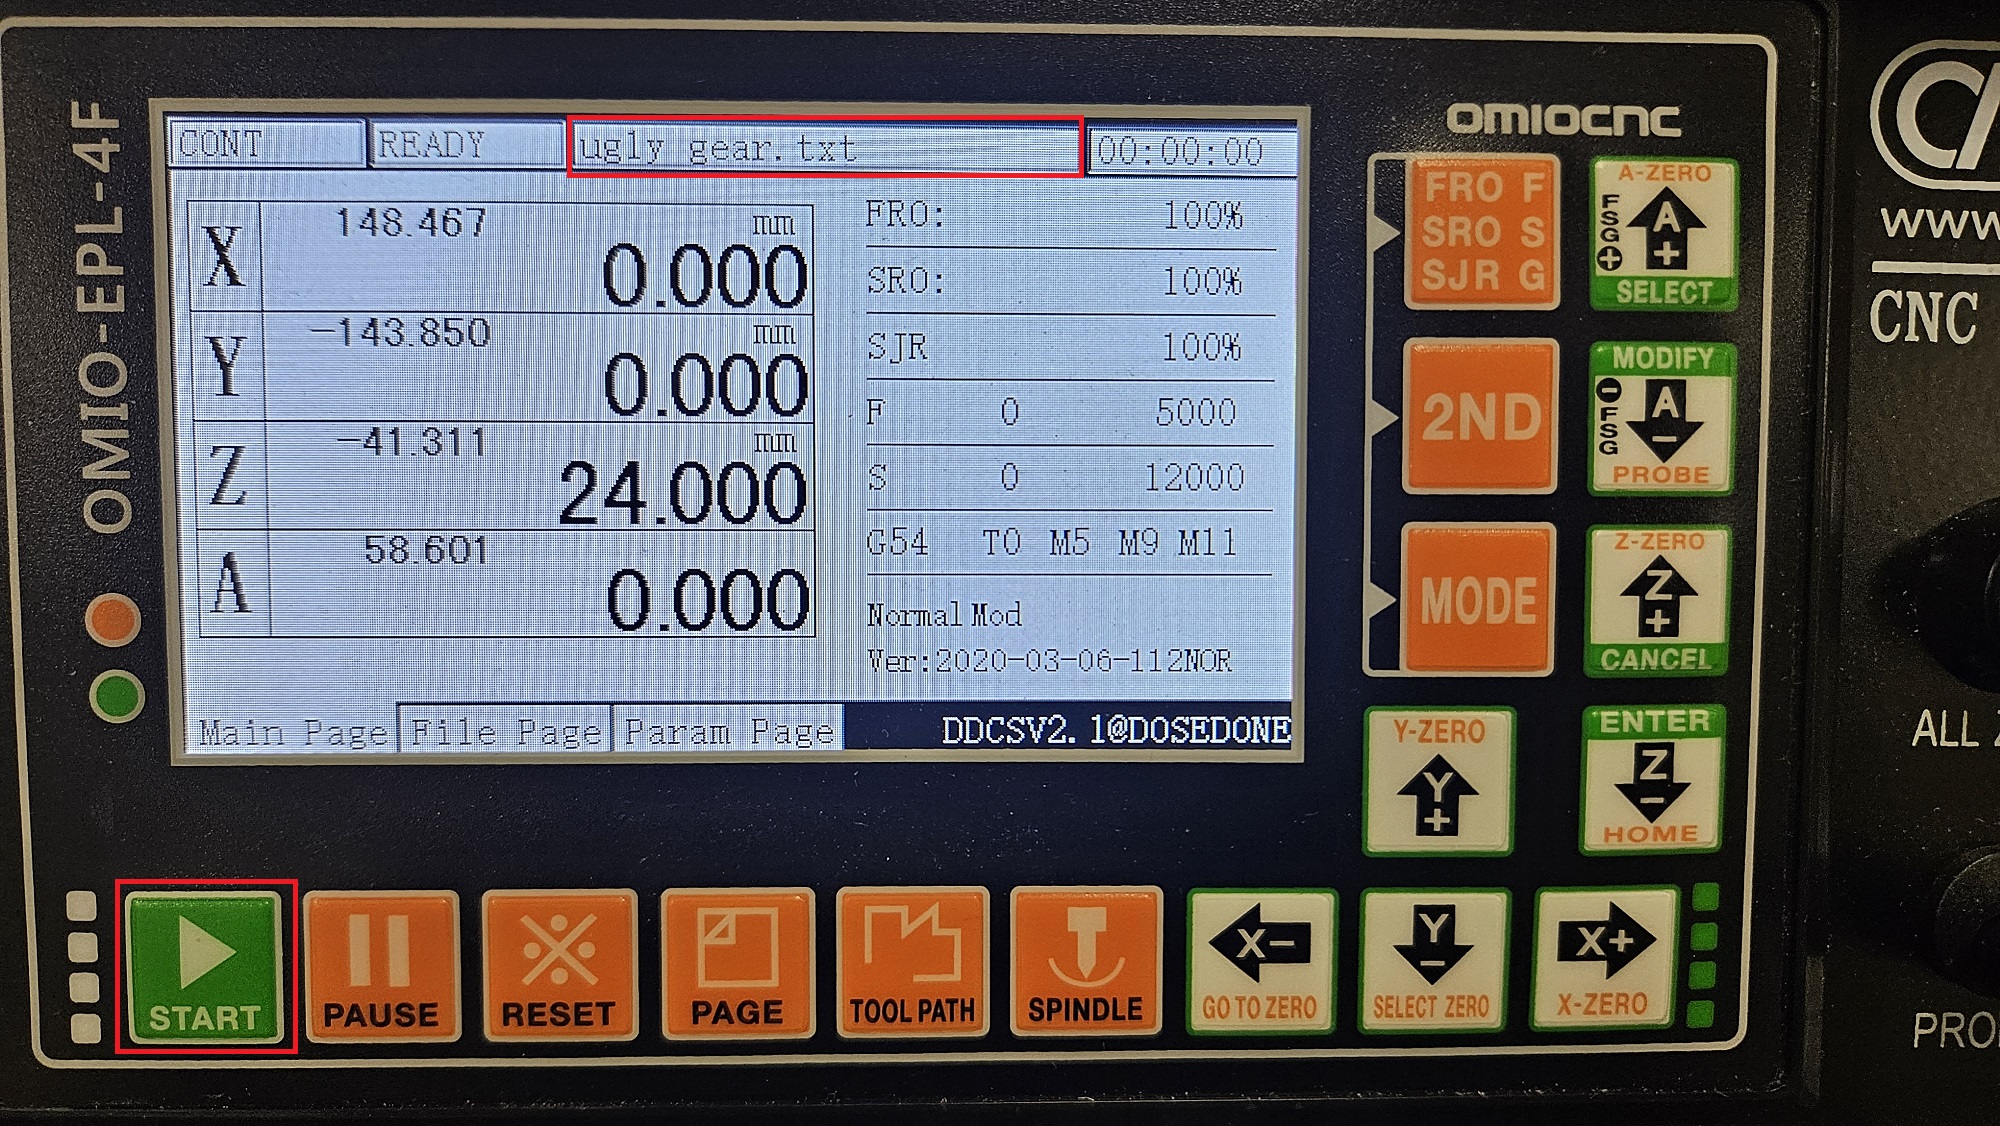
¶ Putting G-Code on the Machine and Starting File
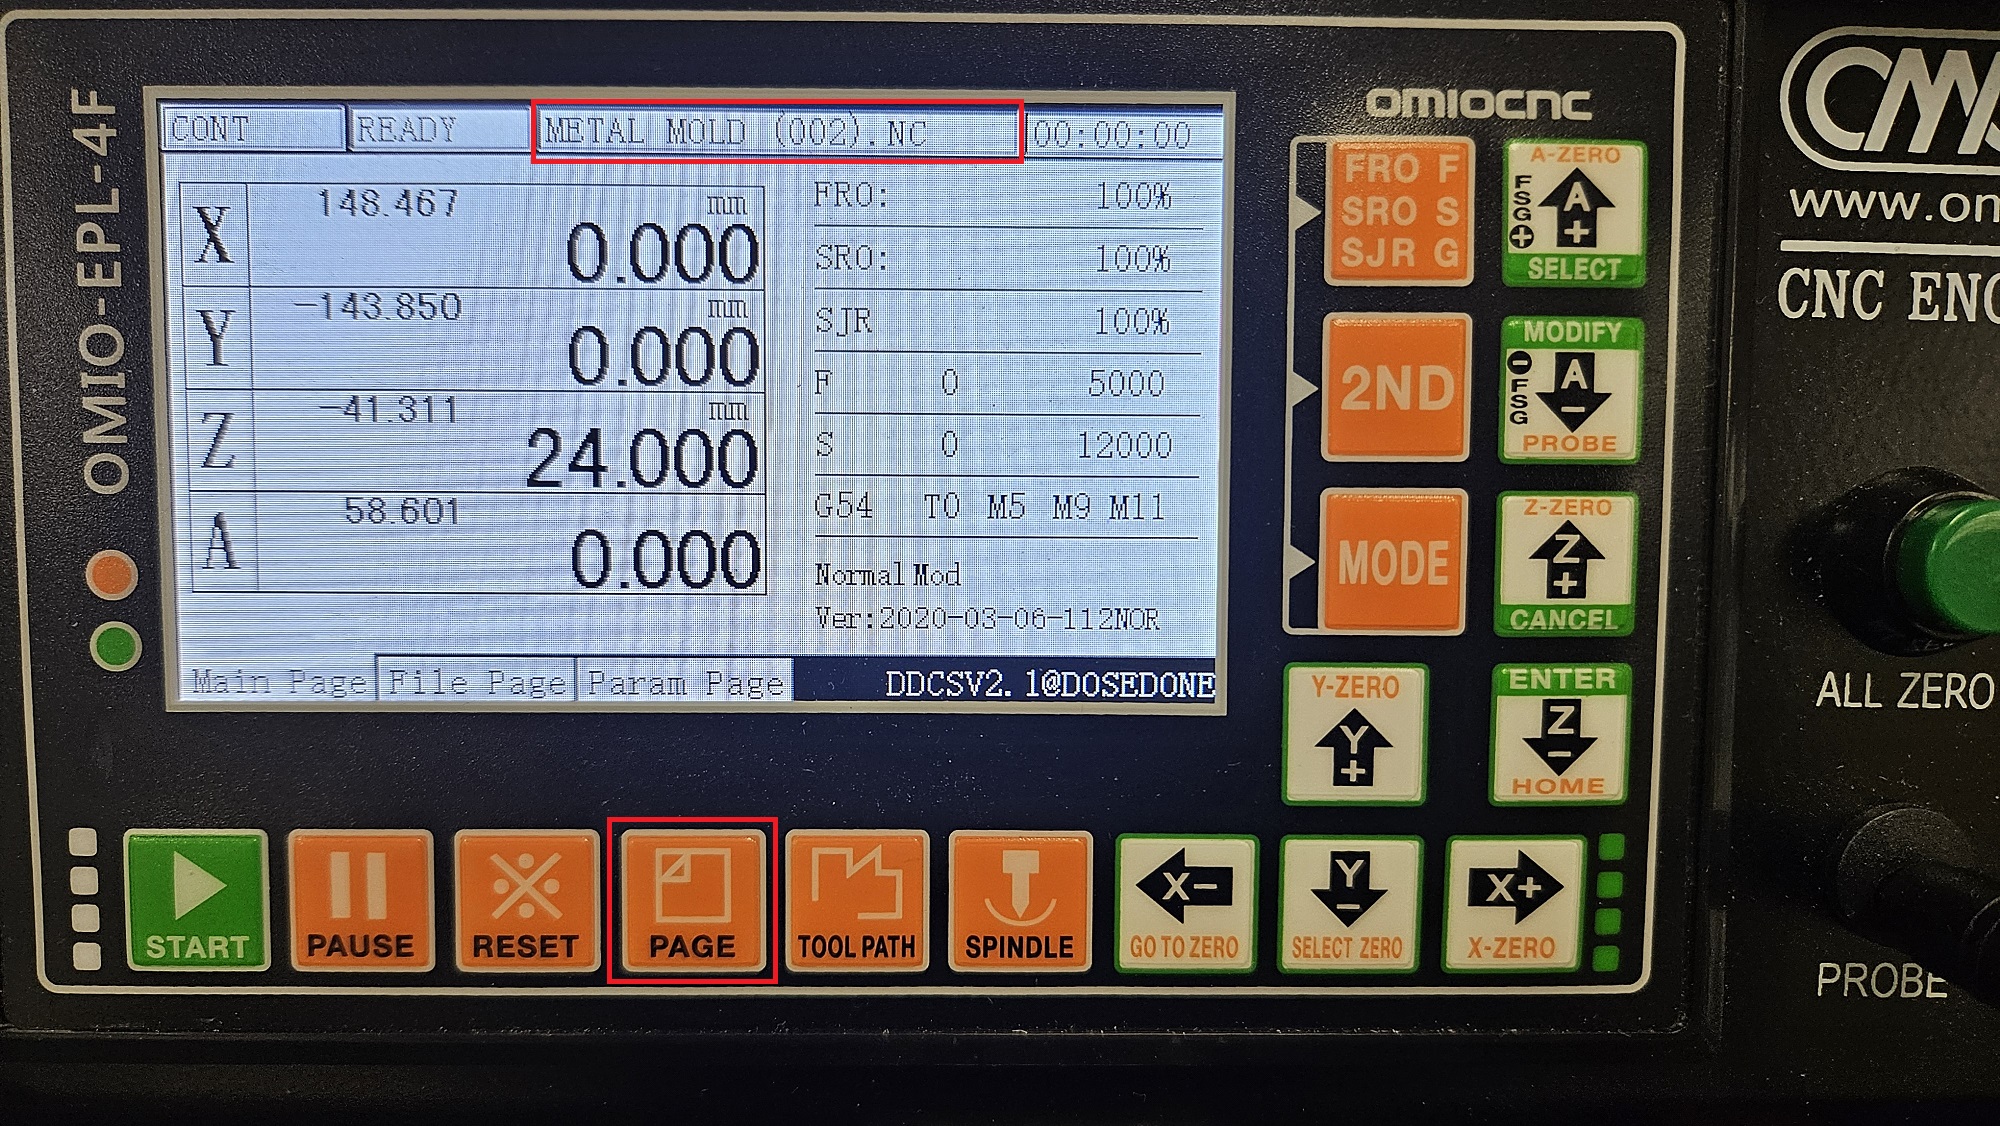
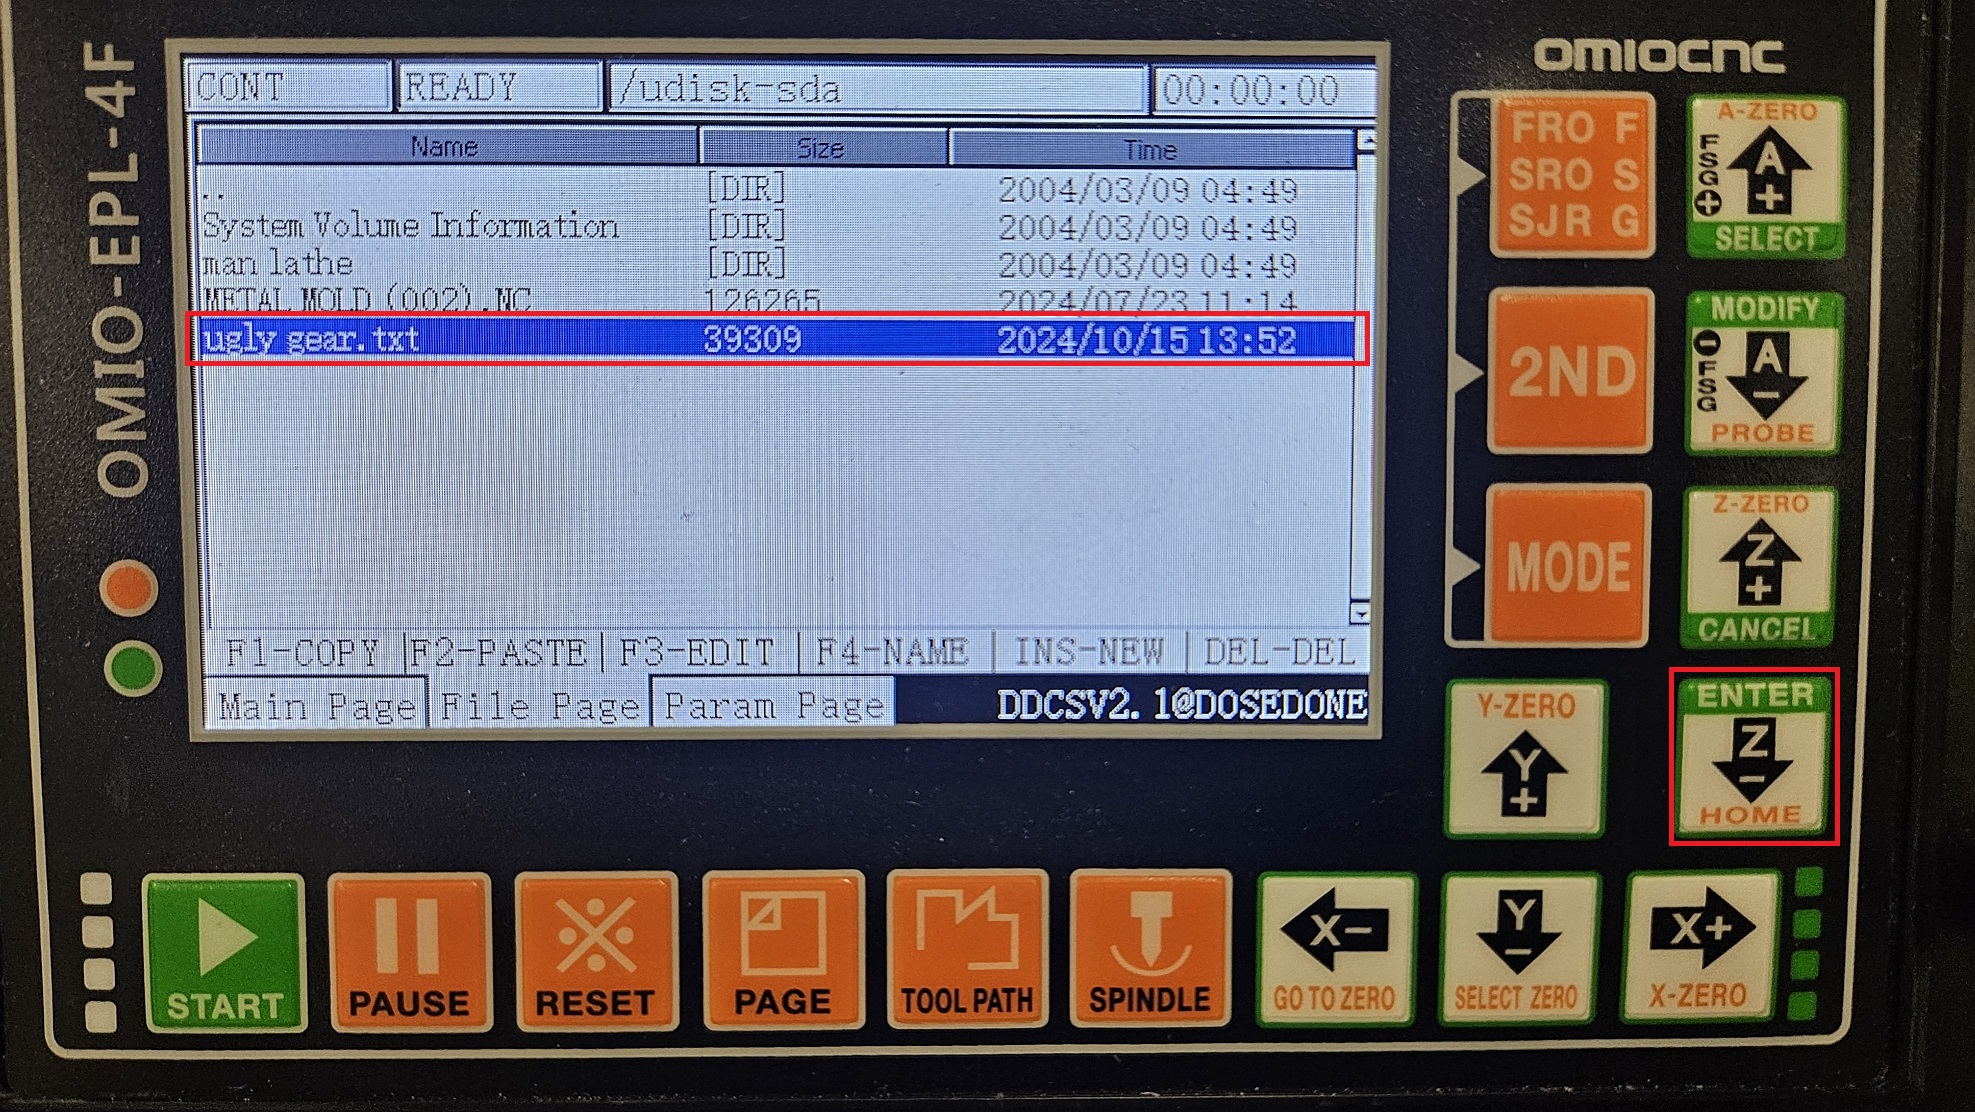
For this demonstration, currently 'METAL MOLD (002).NC' is on the machine, but we want 'ugly gear.txt'. The name of the file currently selected is always shown on the top of the display
-
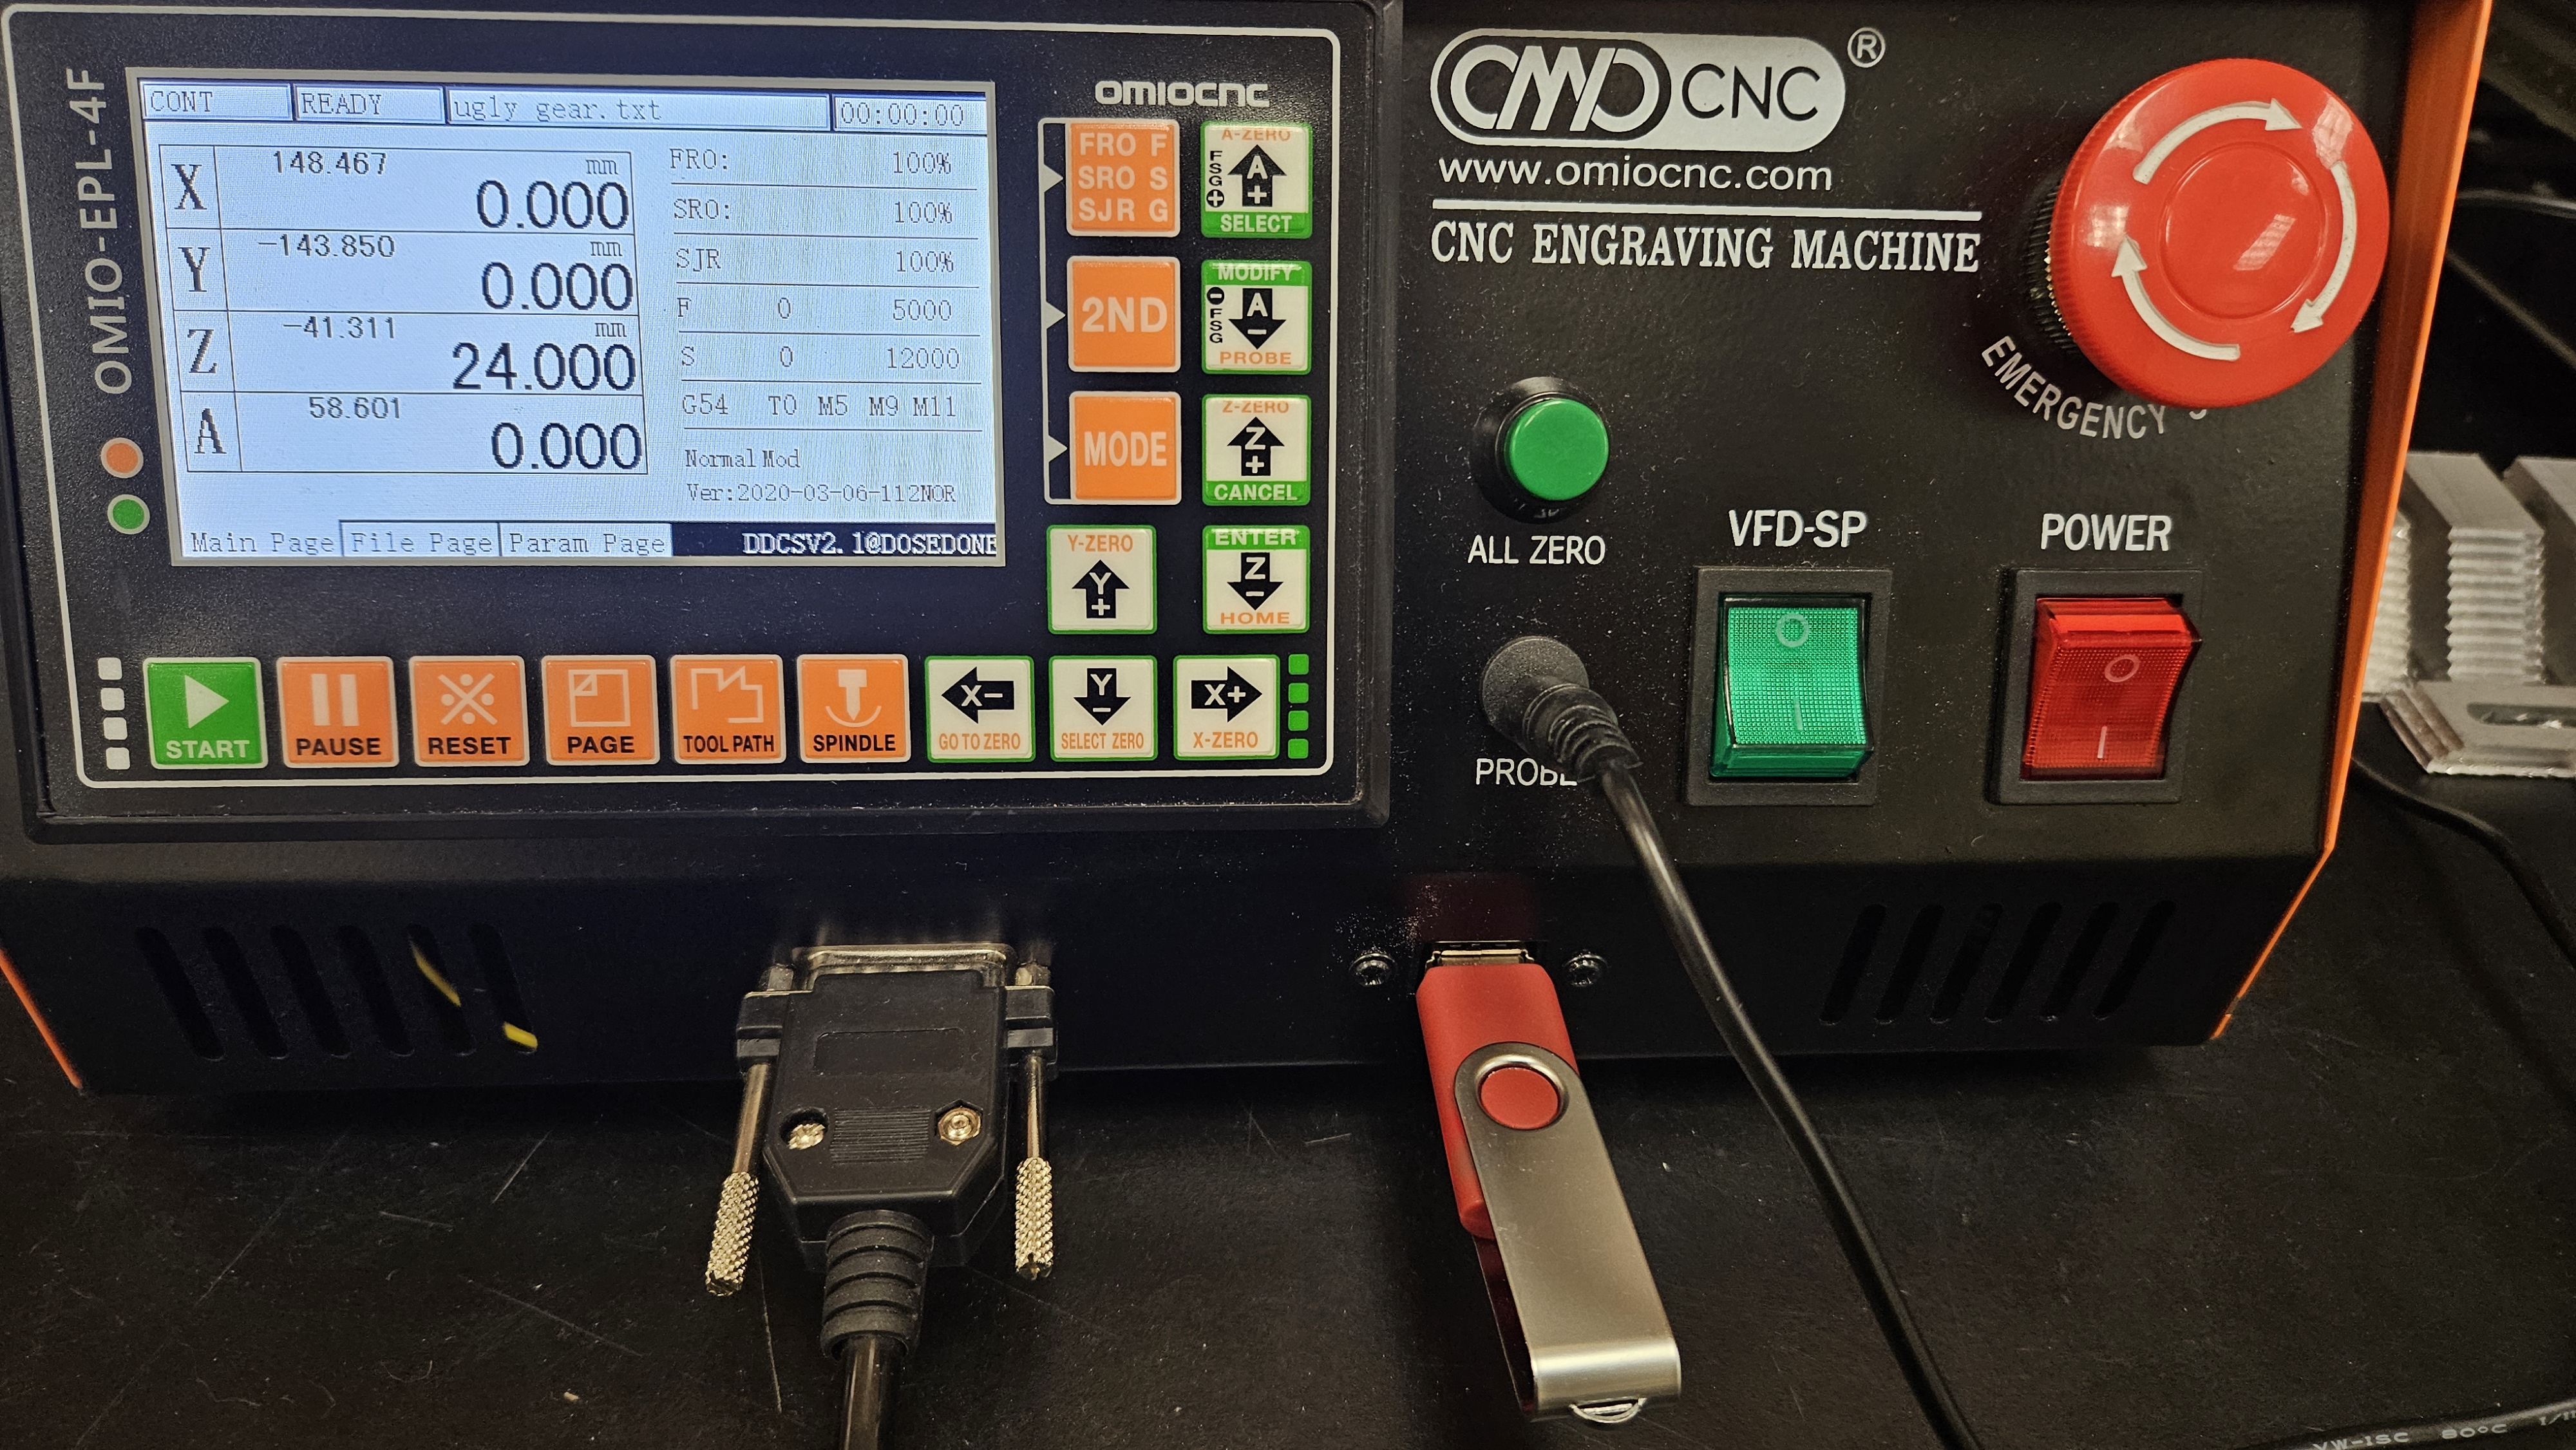
Plug Flash Drive into machine
-
Press 'Page'

-
Use the up and down arrows to find the file you want to use
-
Once the blue line is over the file you want, press 'Enter'
-
Verify your file name is at the top of the machine, and press the green 'START' button in the bottom left