¶ How to Use the OMTech Laser
If images are hard to read due to pixelization, it may be due to browser compression. Click/press on the image to see a full screen image.
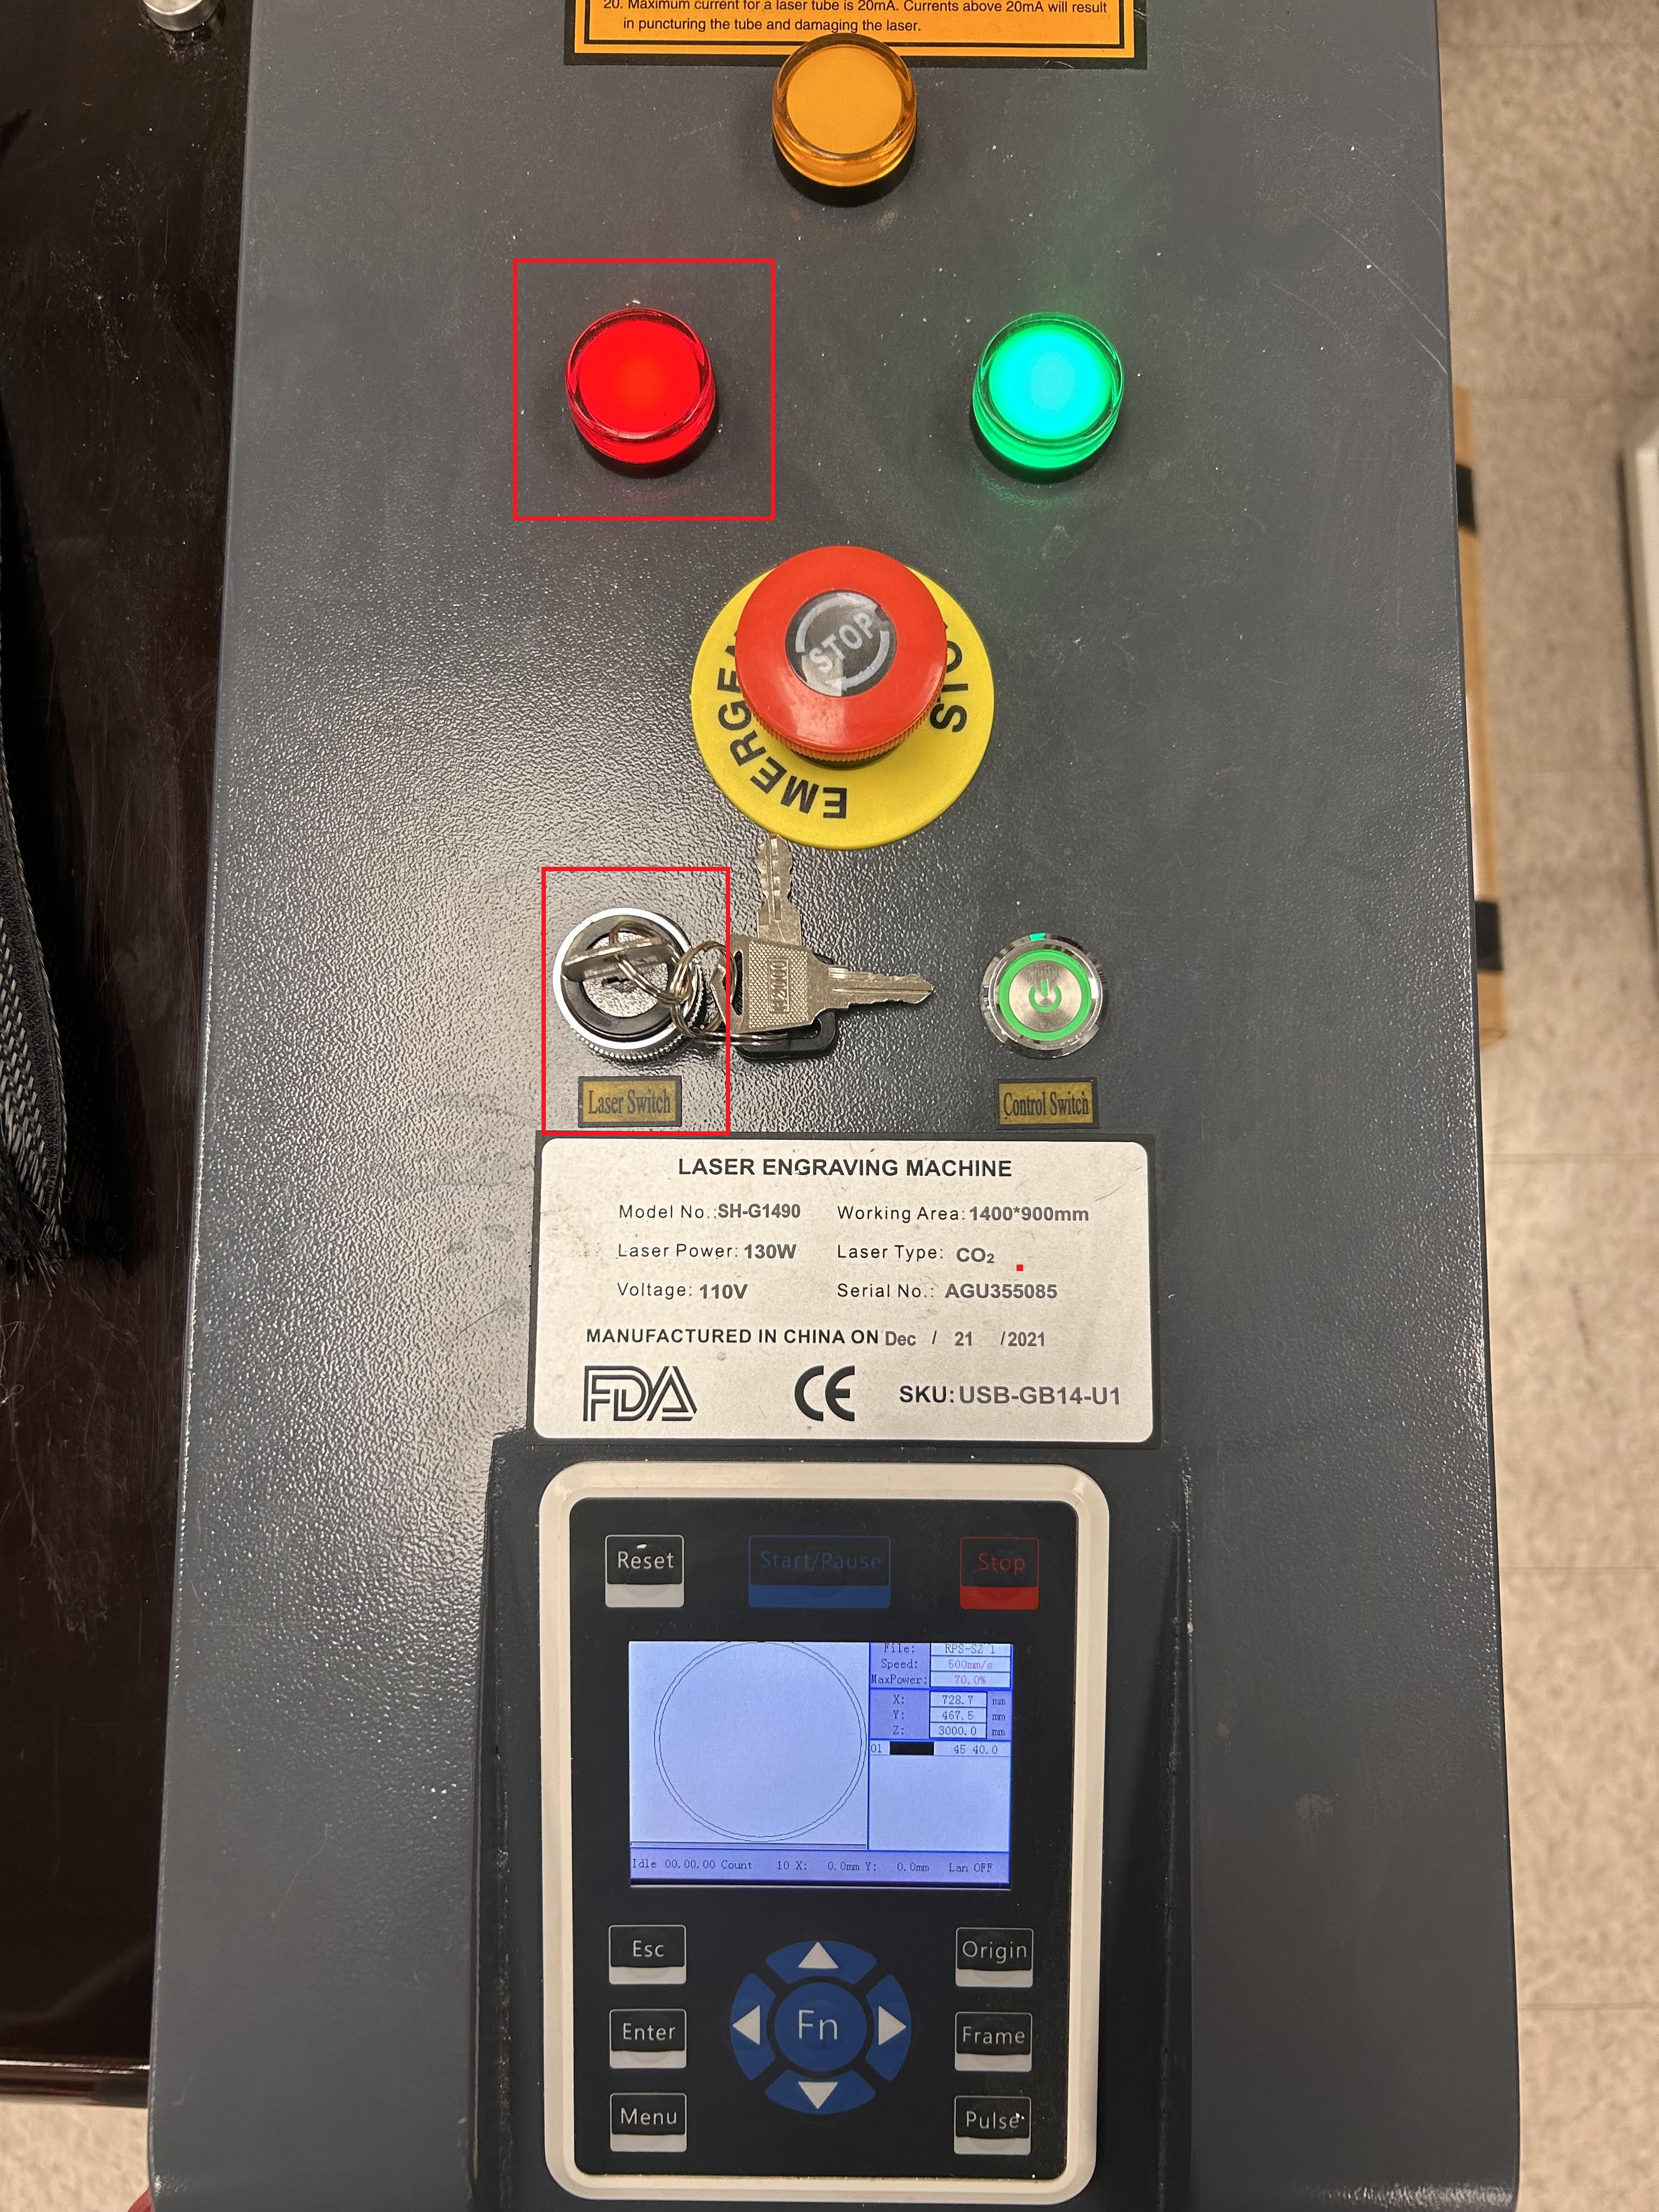
¶ Turning on the OMTech
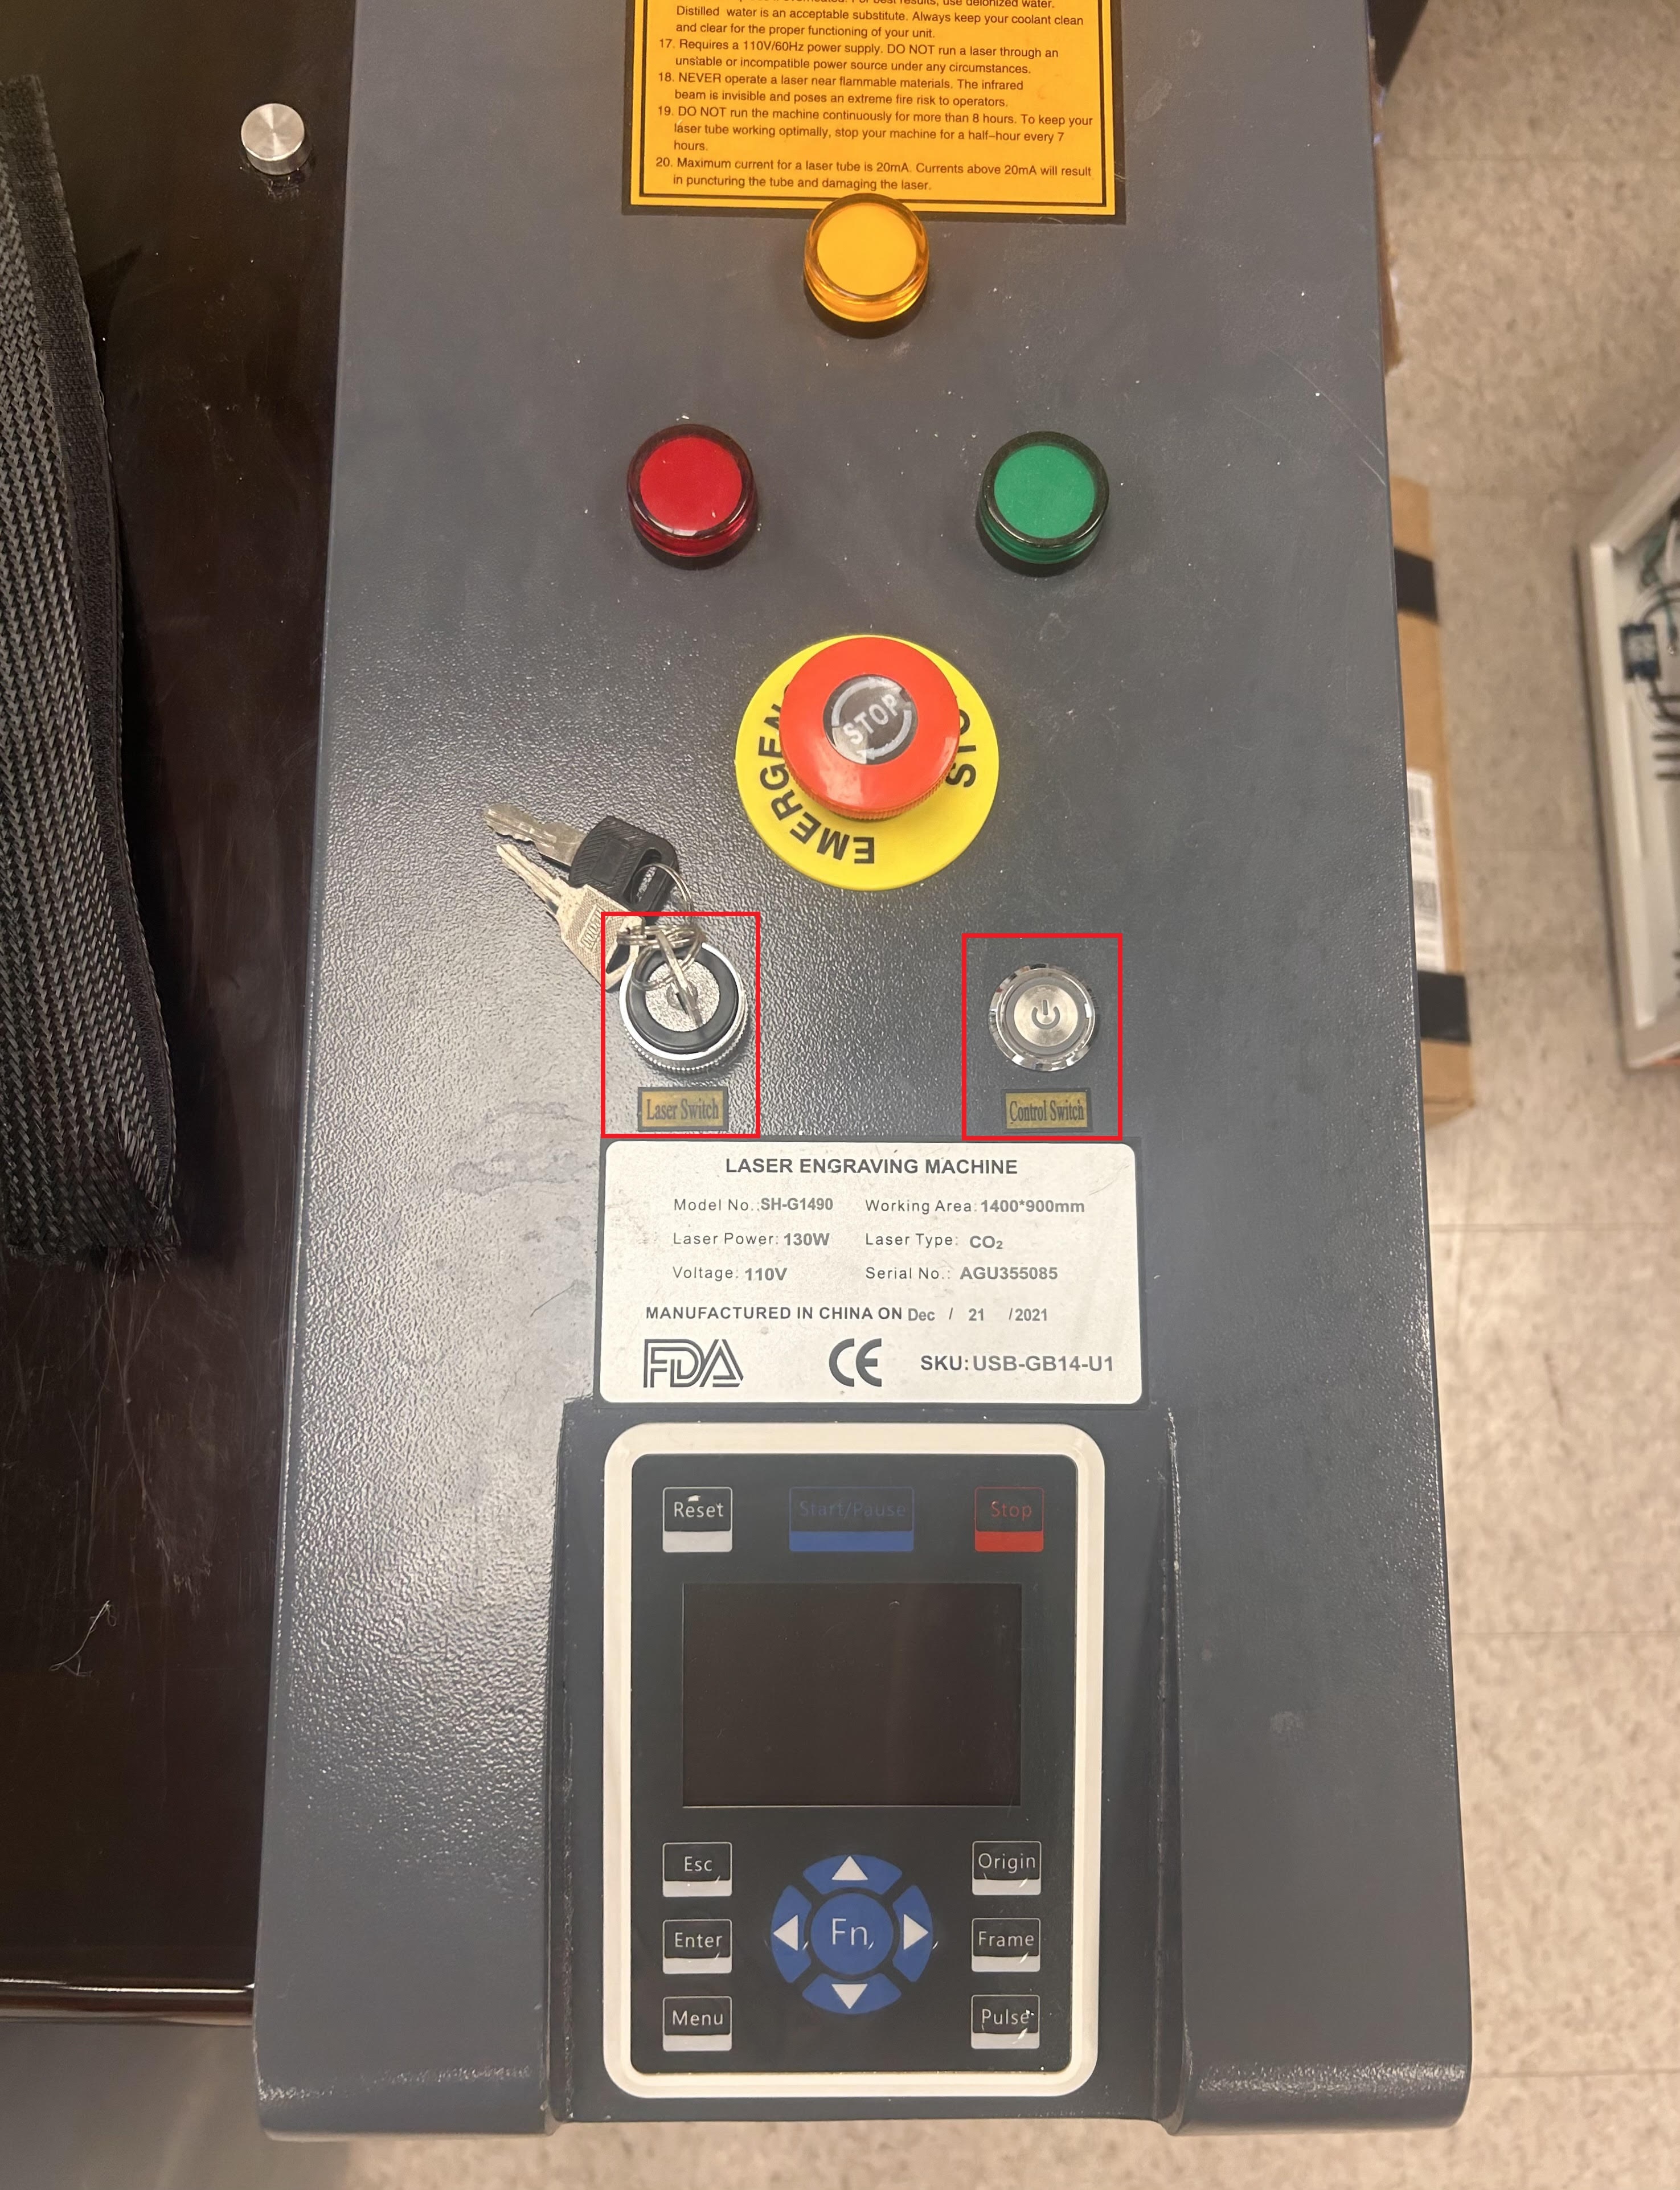
Press the Control Switch to power on the machine. Ensure that the Laser Switch is pointed left in the off postion in the picture below. The laser will automatically move to its last job's origin.
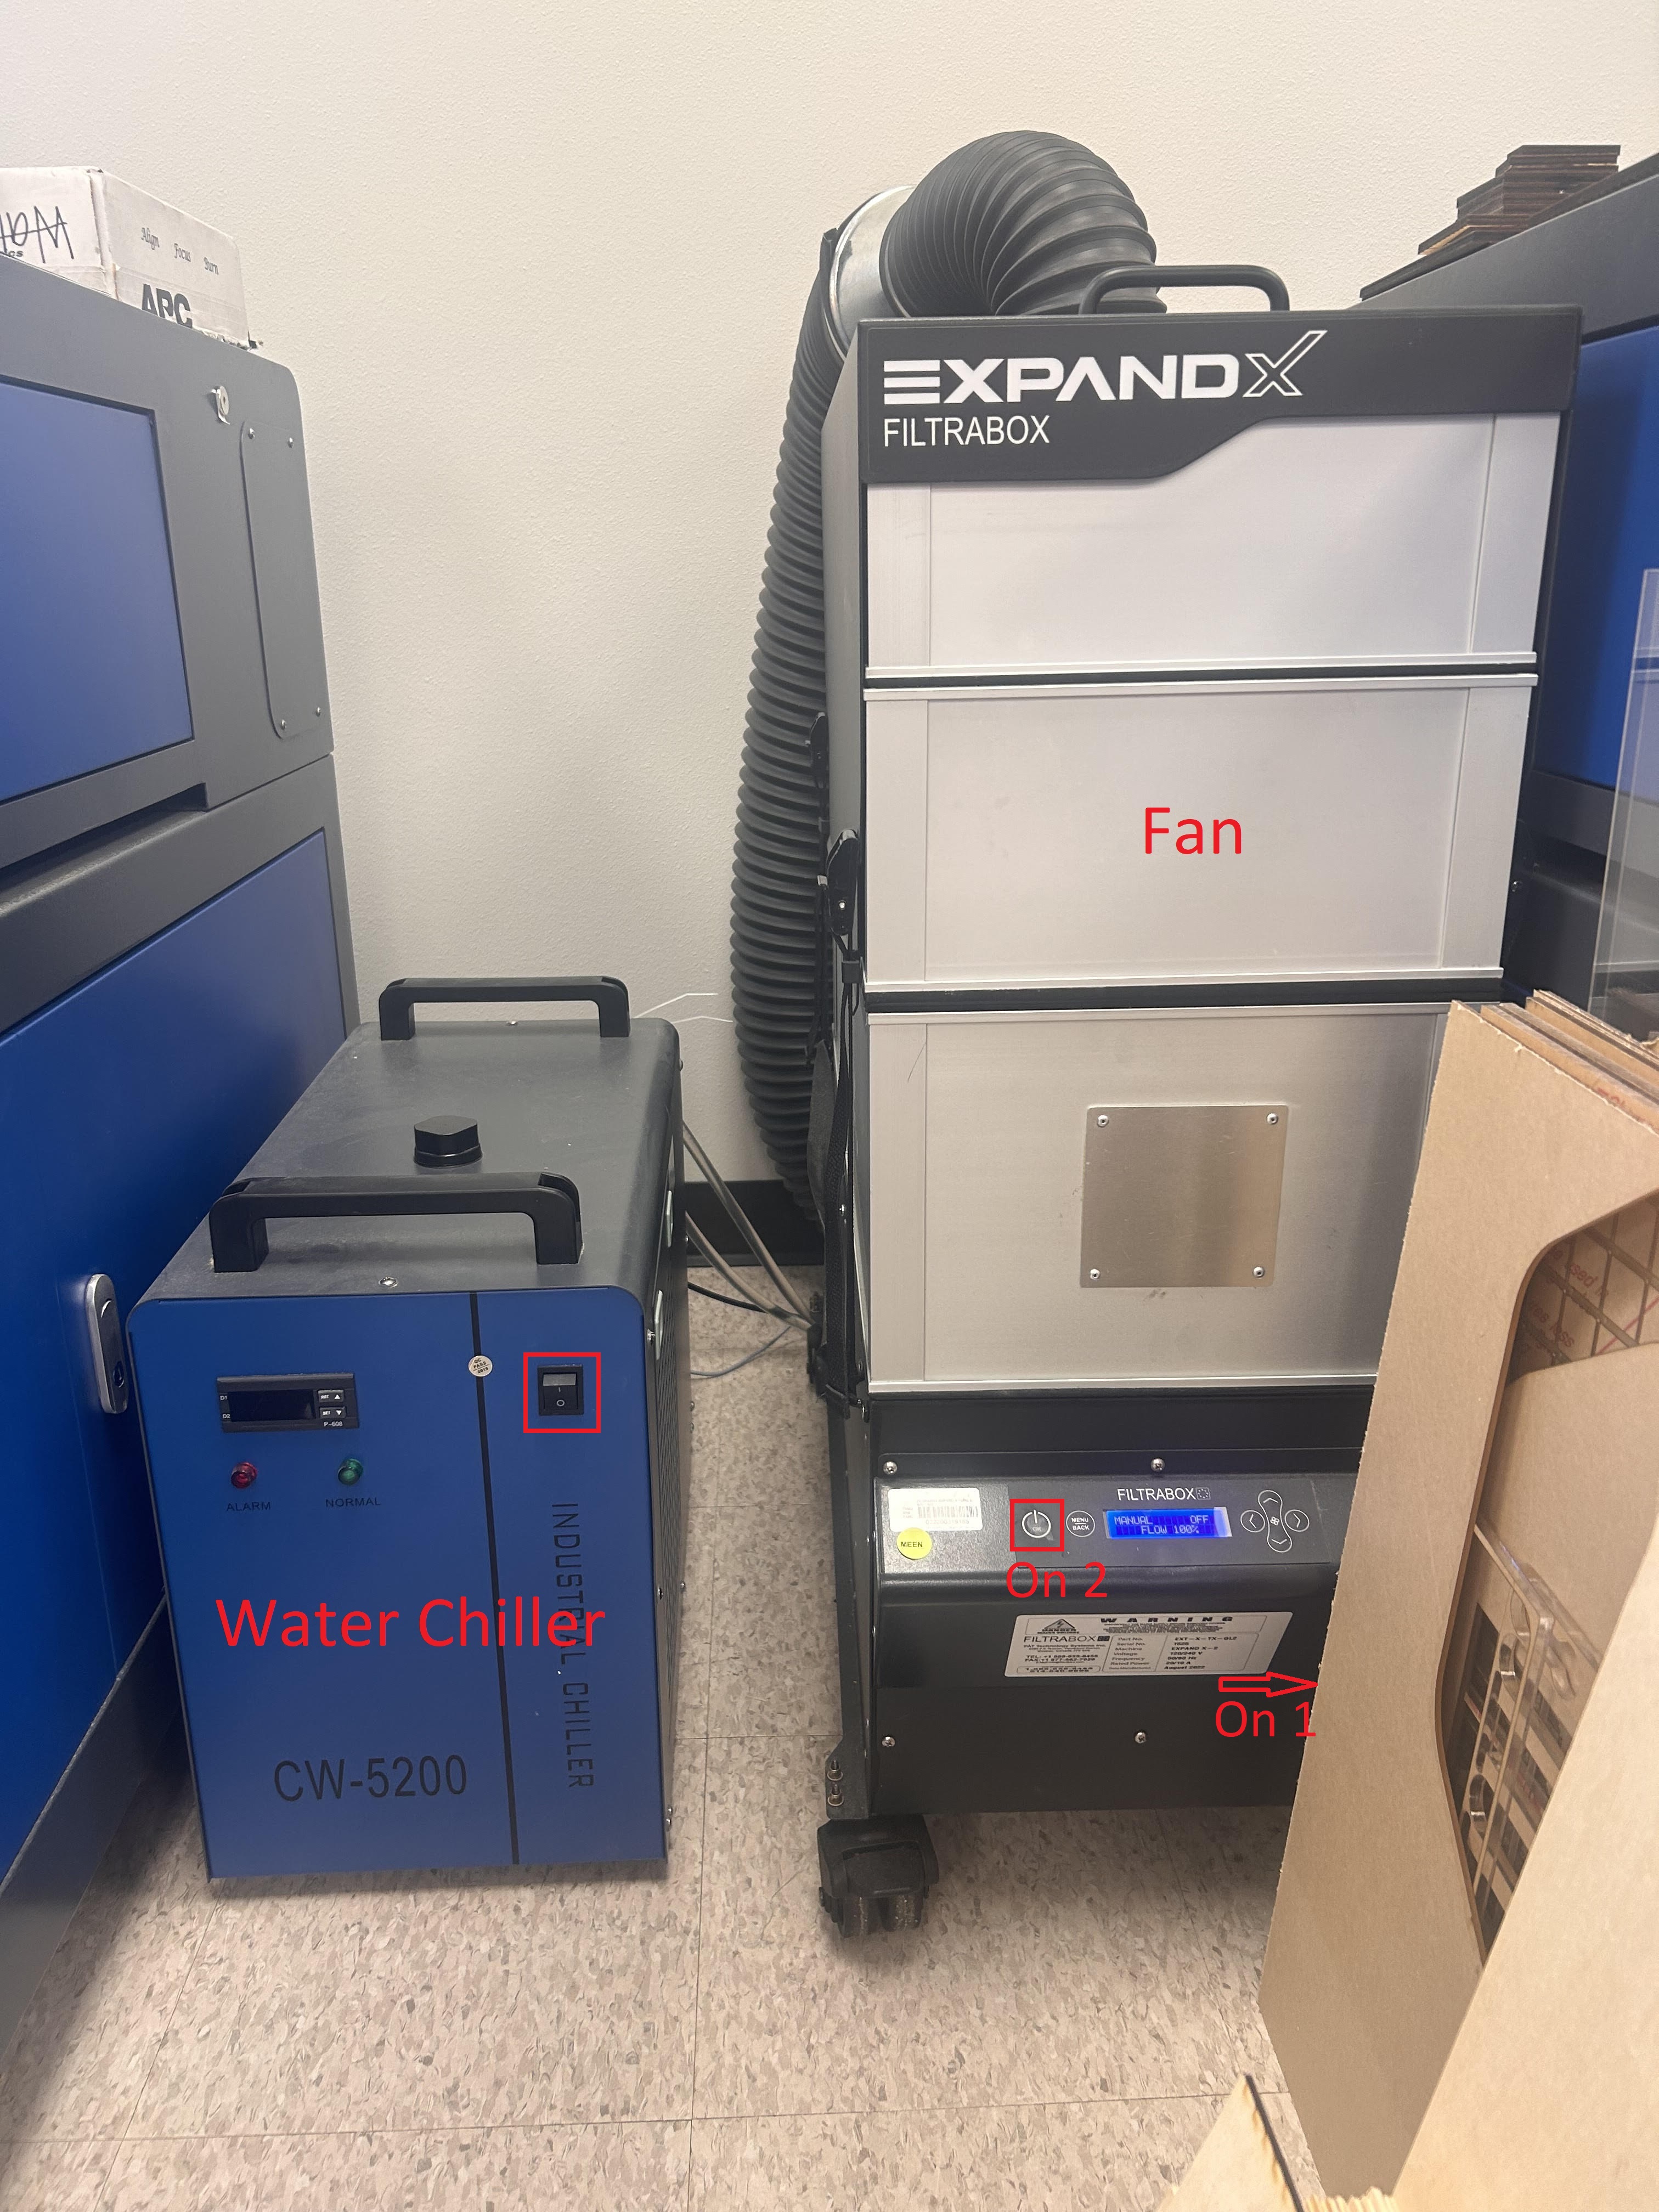
Turn on the water chiller's switch and the fan's first switch (On 1) and its second button (On 2) so that the screen says on. The water chiller should get below 20 C before any job is run.
¶ Focusing the laser
Place your material towards the center of the laser bed and use the arrows on the display screen to move the laser head and probe over the center of the material. PLEASE NOTE: The laser head and probe MUST be completely over the material. Failure to do so will result in damage to the laser head and grinding of the bed.
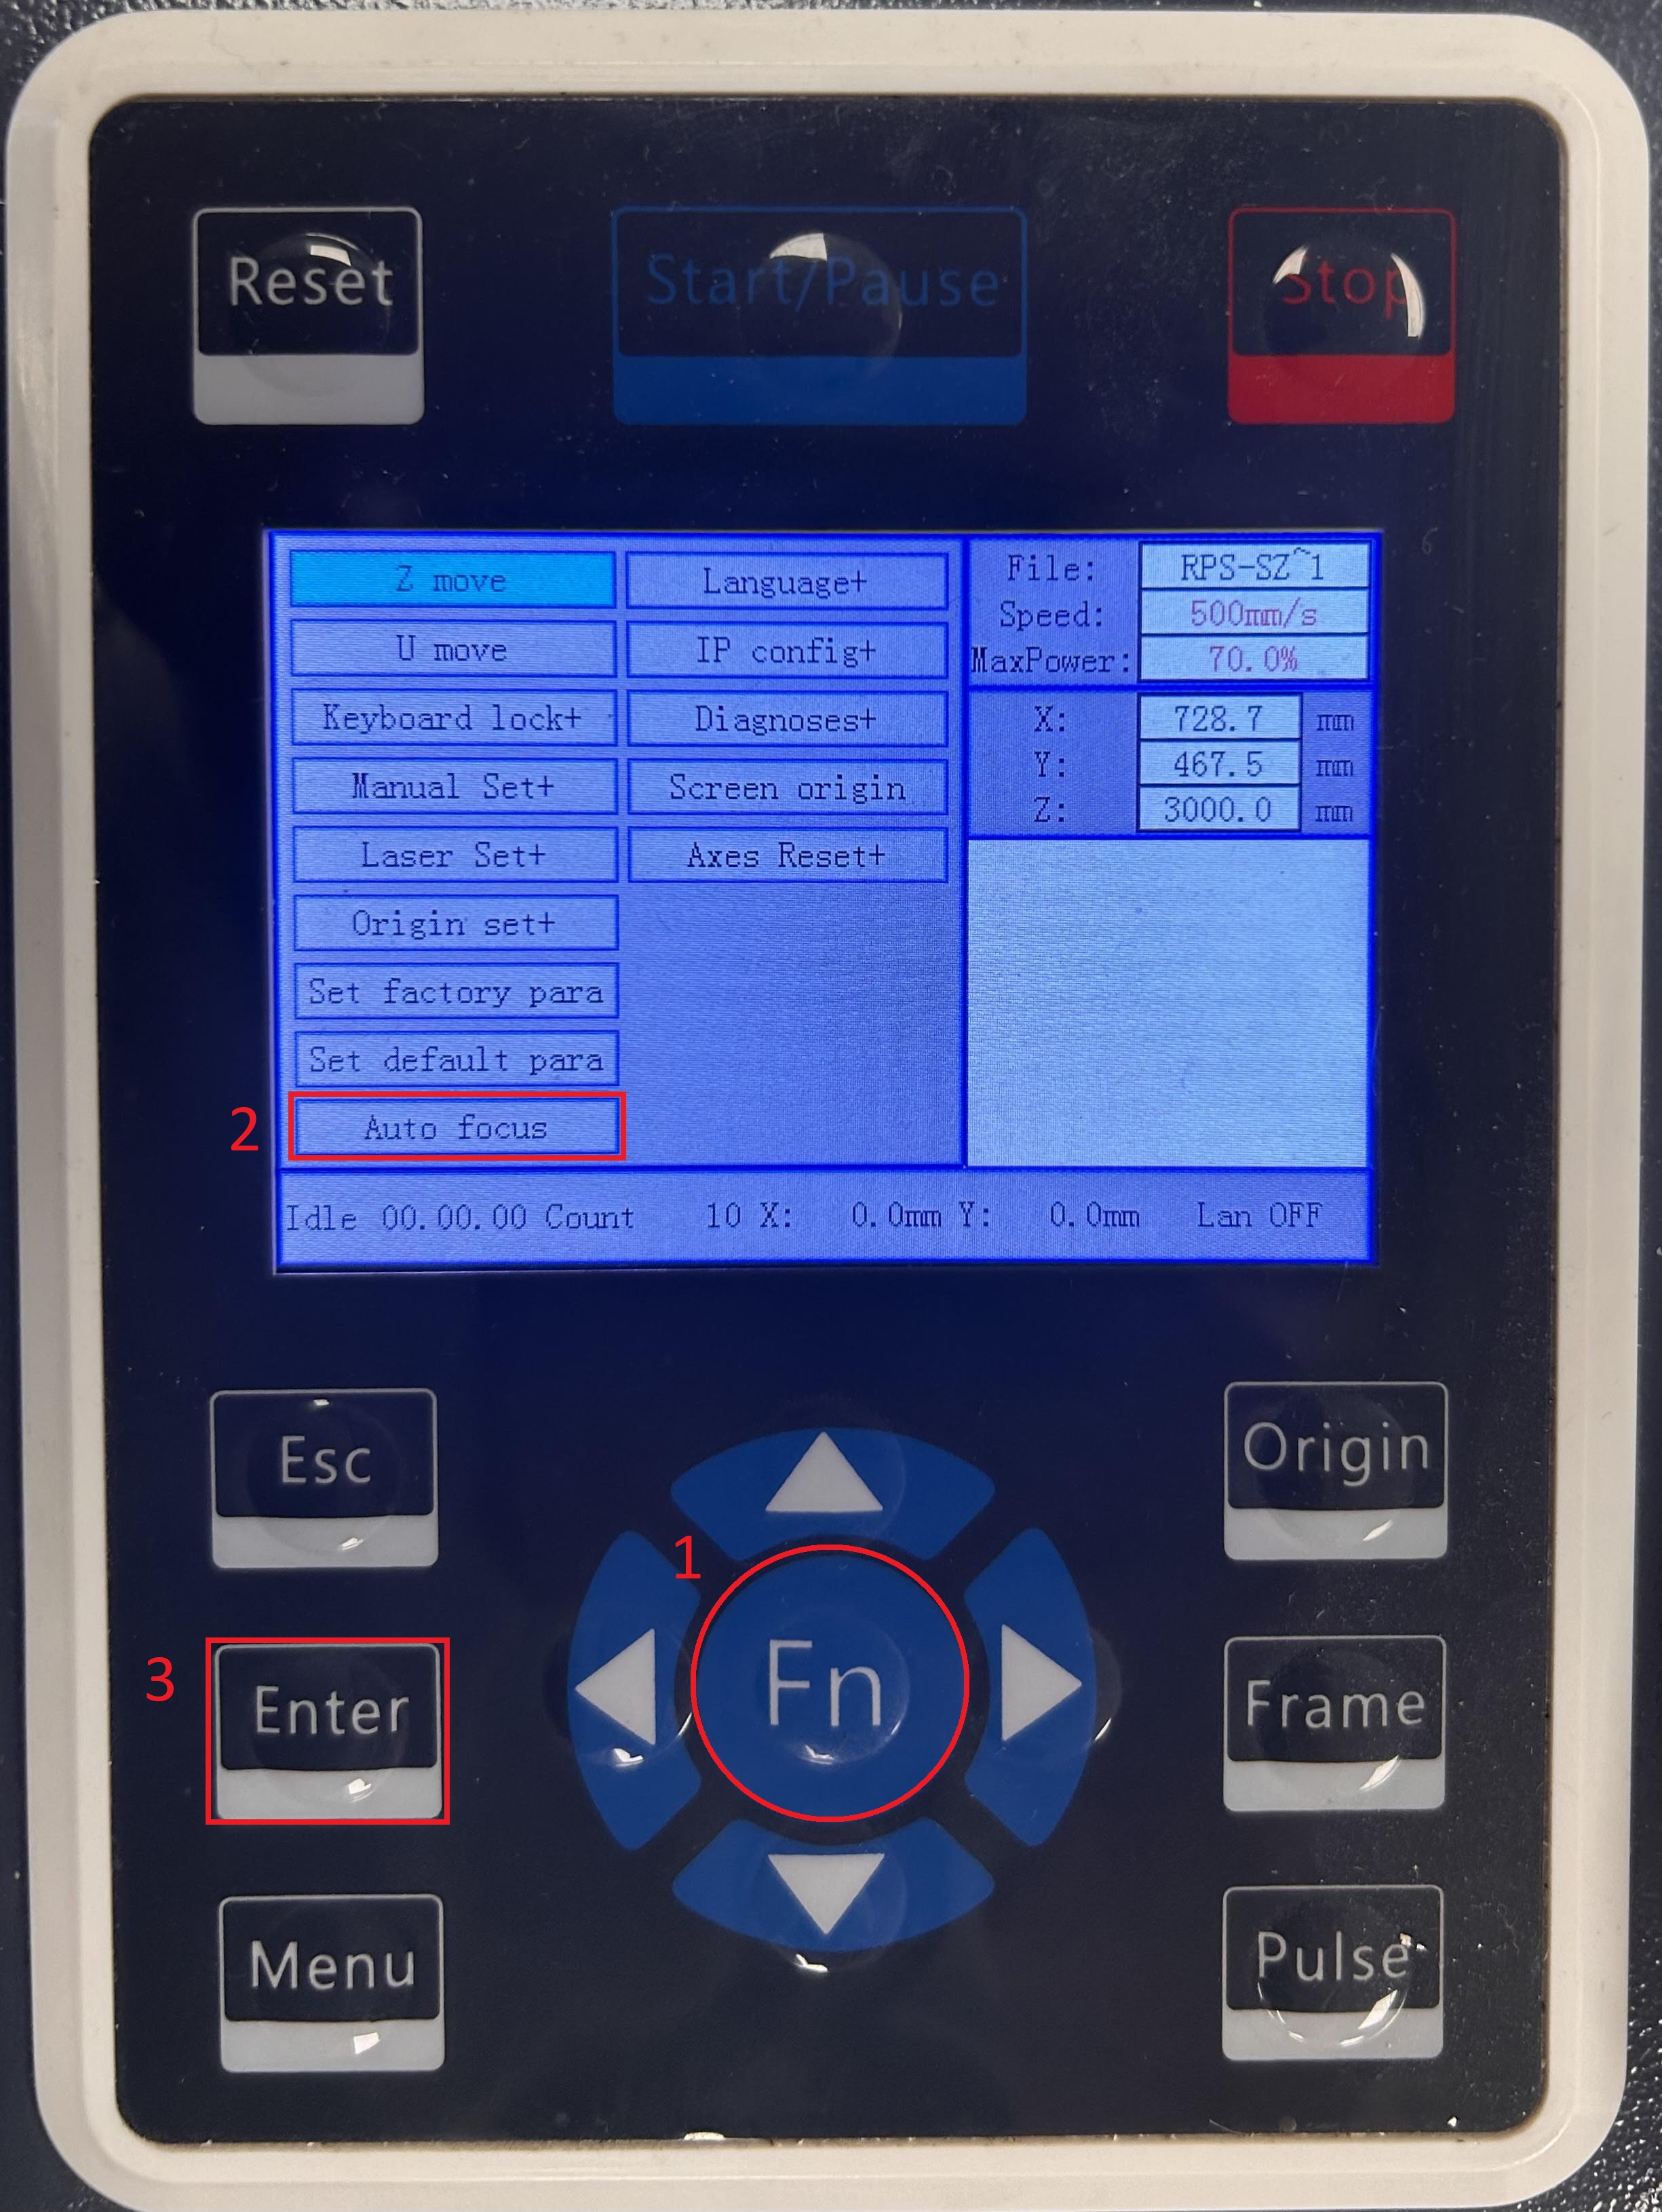
Once the laser head and probe are over the material, press Function (1), scroll down to Auto focus (2), and press Enter (3). The bed will raise until the probe touches the material, and then will lower back down.
If the material being cut is less than 1/16 in., please consult with one of the technicians before focusing.
If your material is not completely flat, use the small wood clamps in the container on the left hand side of the OMTech. Press them into the honeycomb bed mesh so that the clamp pushes down the material flush to the bed. Feel free to use as many as needed. Do note that the laser can and will cut through the clamps if the perimeter goes over them.
¶ Setting up your file via USB
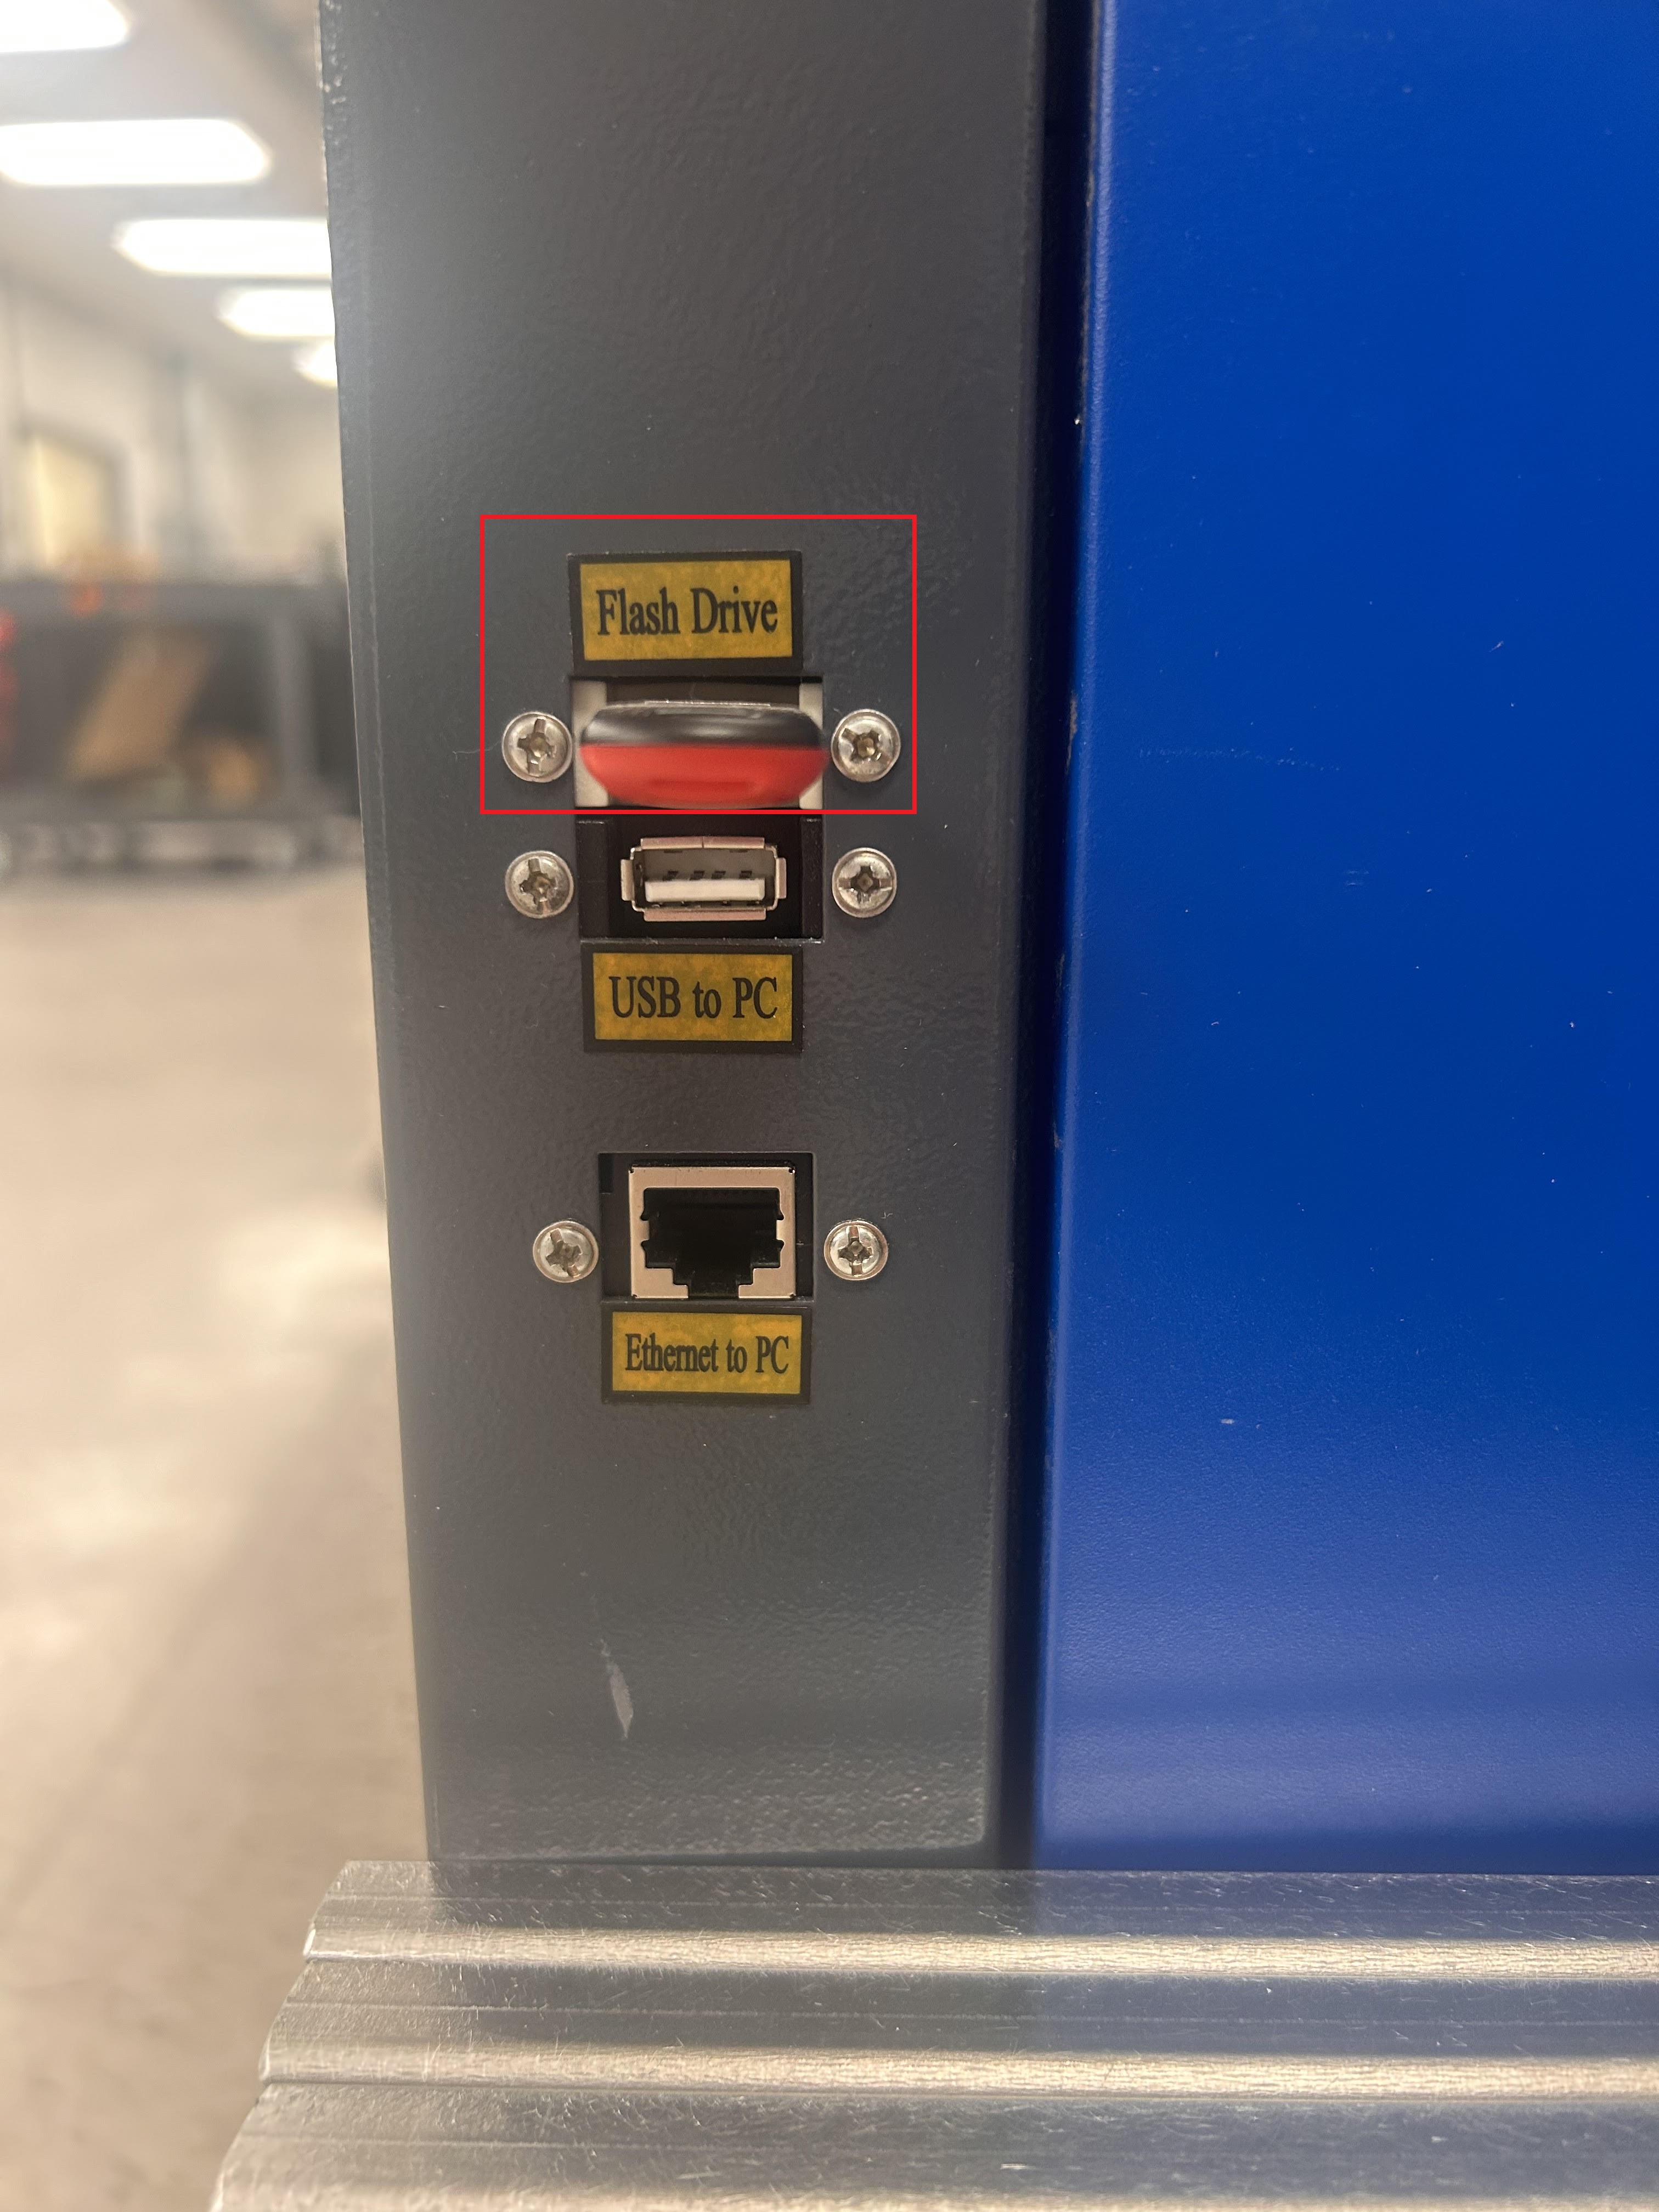
Insert the USB with your RD file on the right side of the laser cutter under Flash Drive.
The OMTech's software is very manual and requires precise directions to load your file into its system. Follow the steps below to load your file:
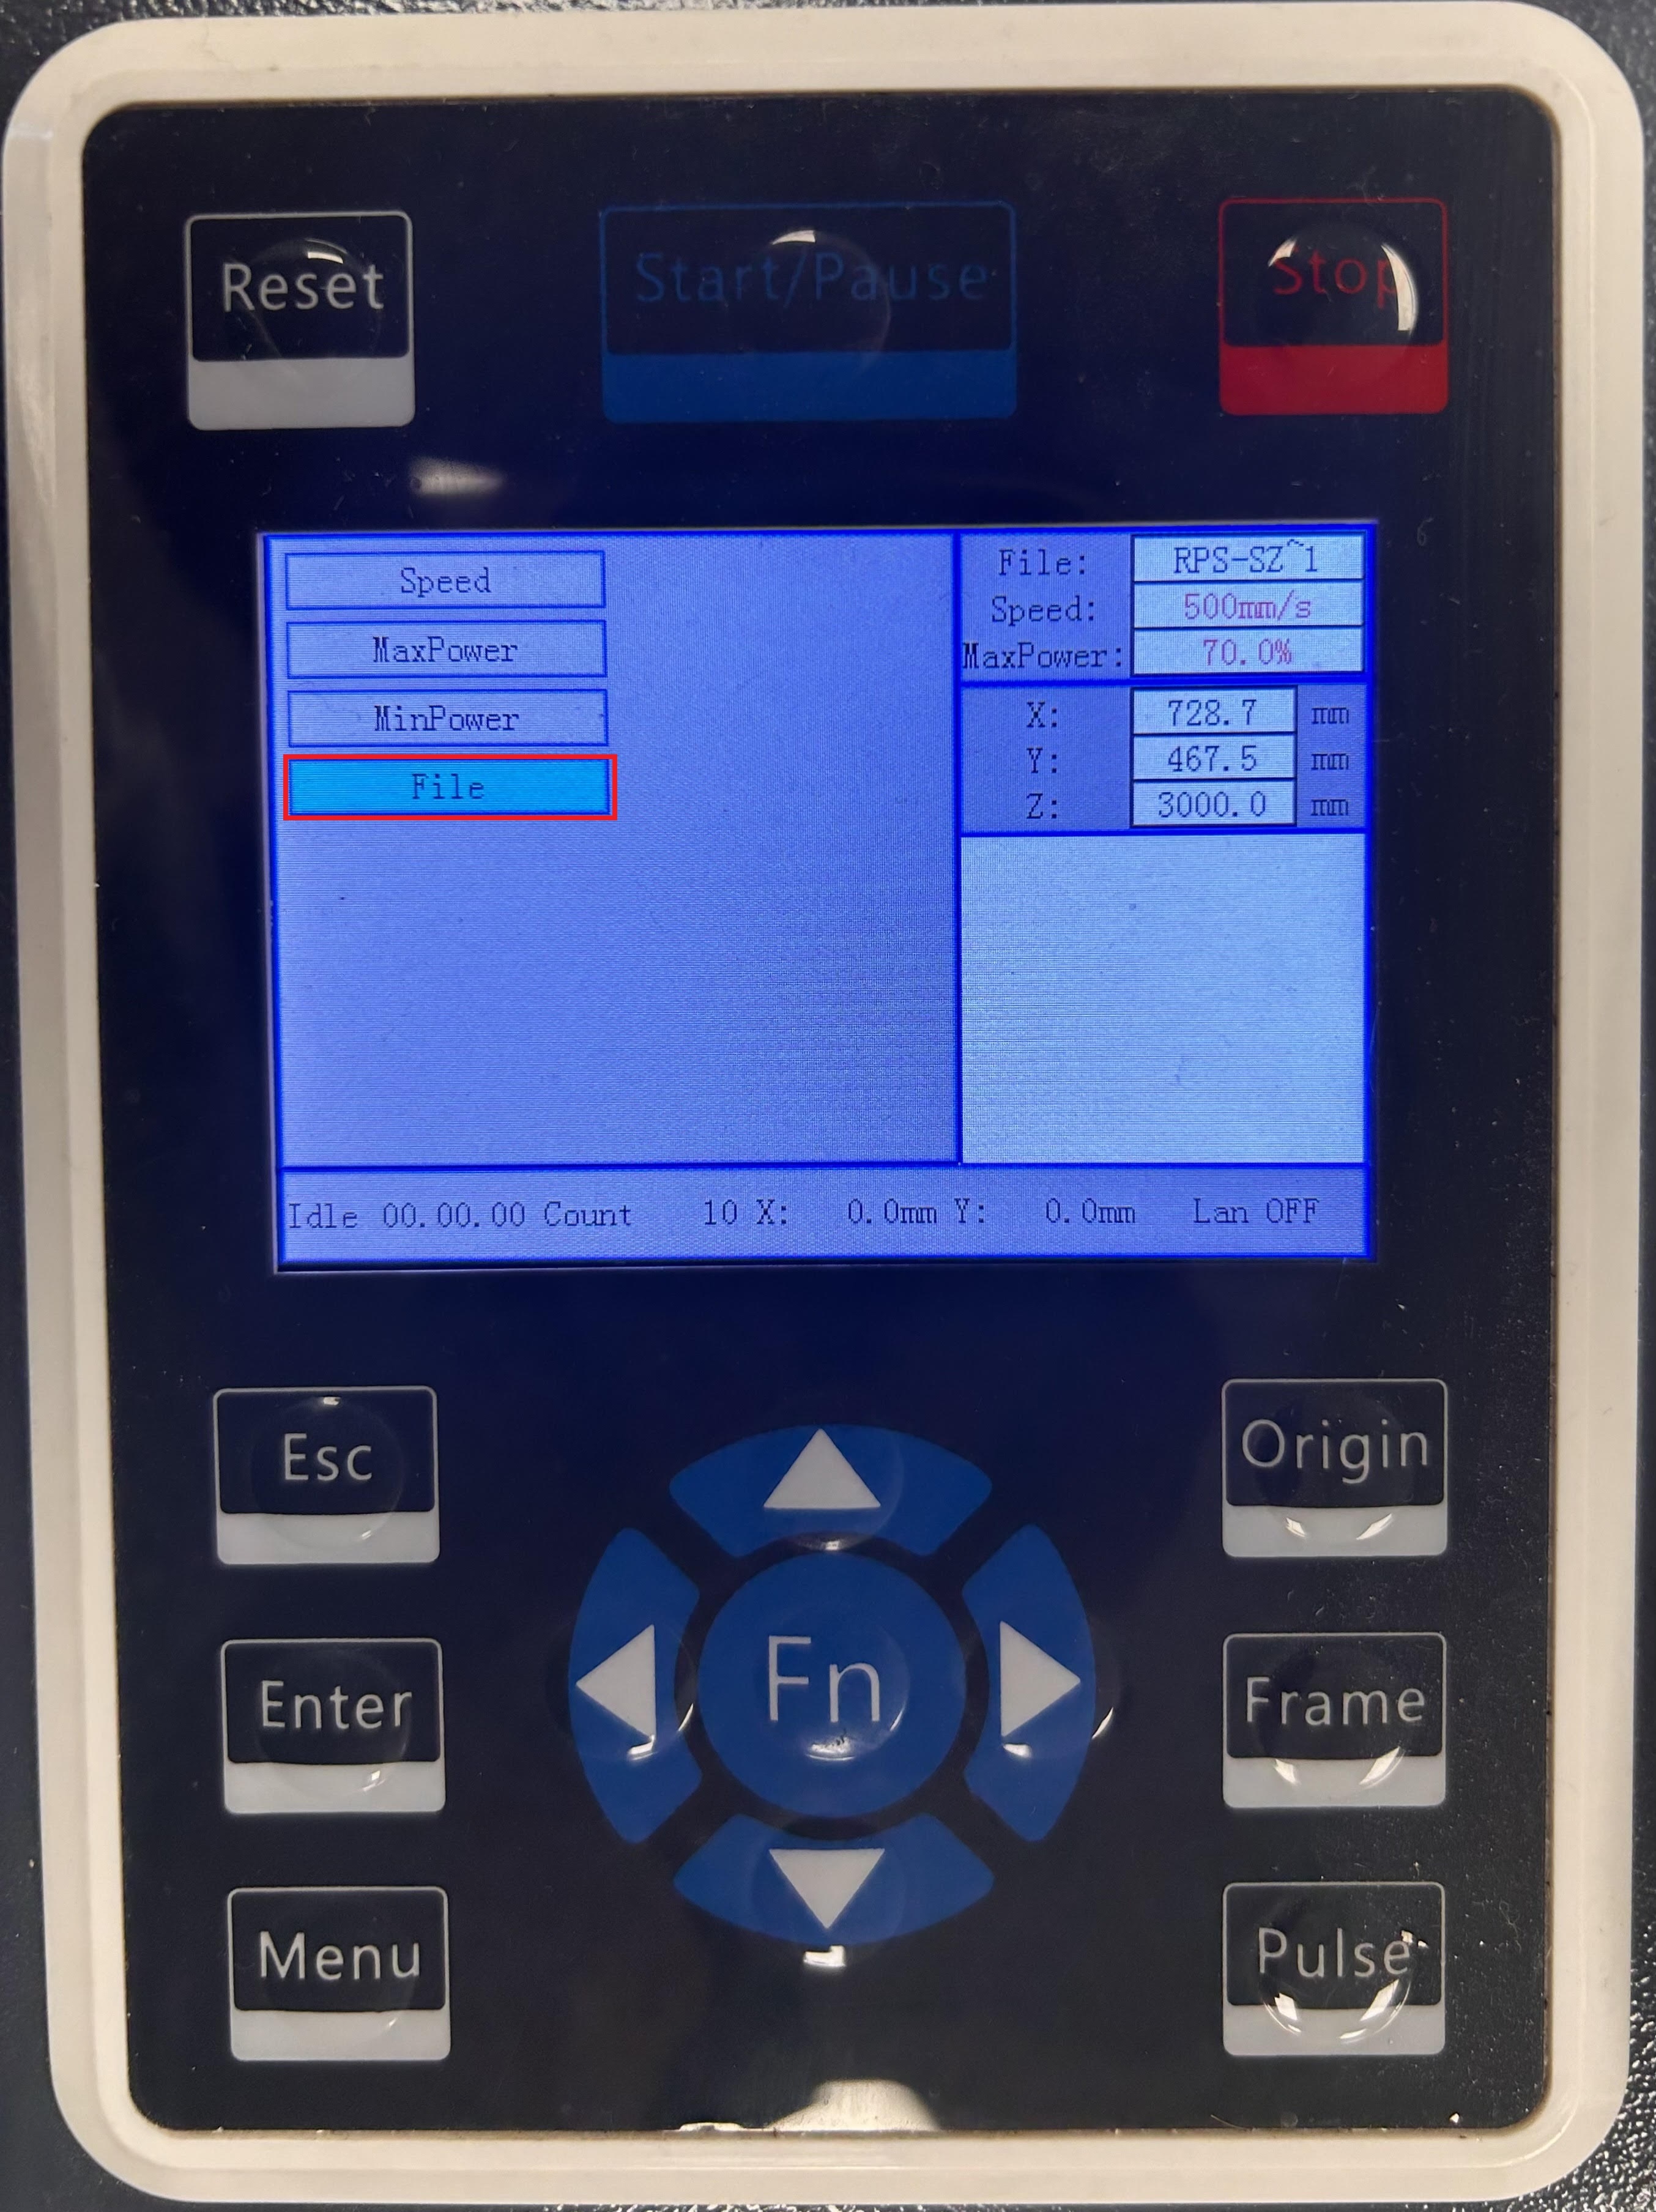
- Press Menu, scroll to File, press Enter
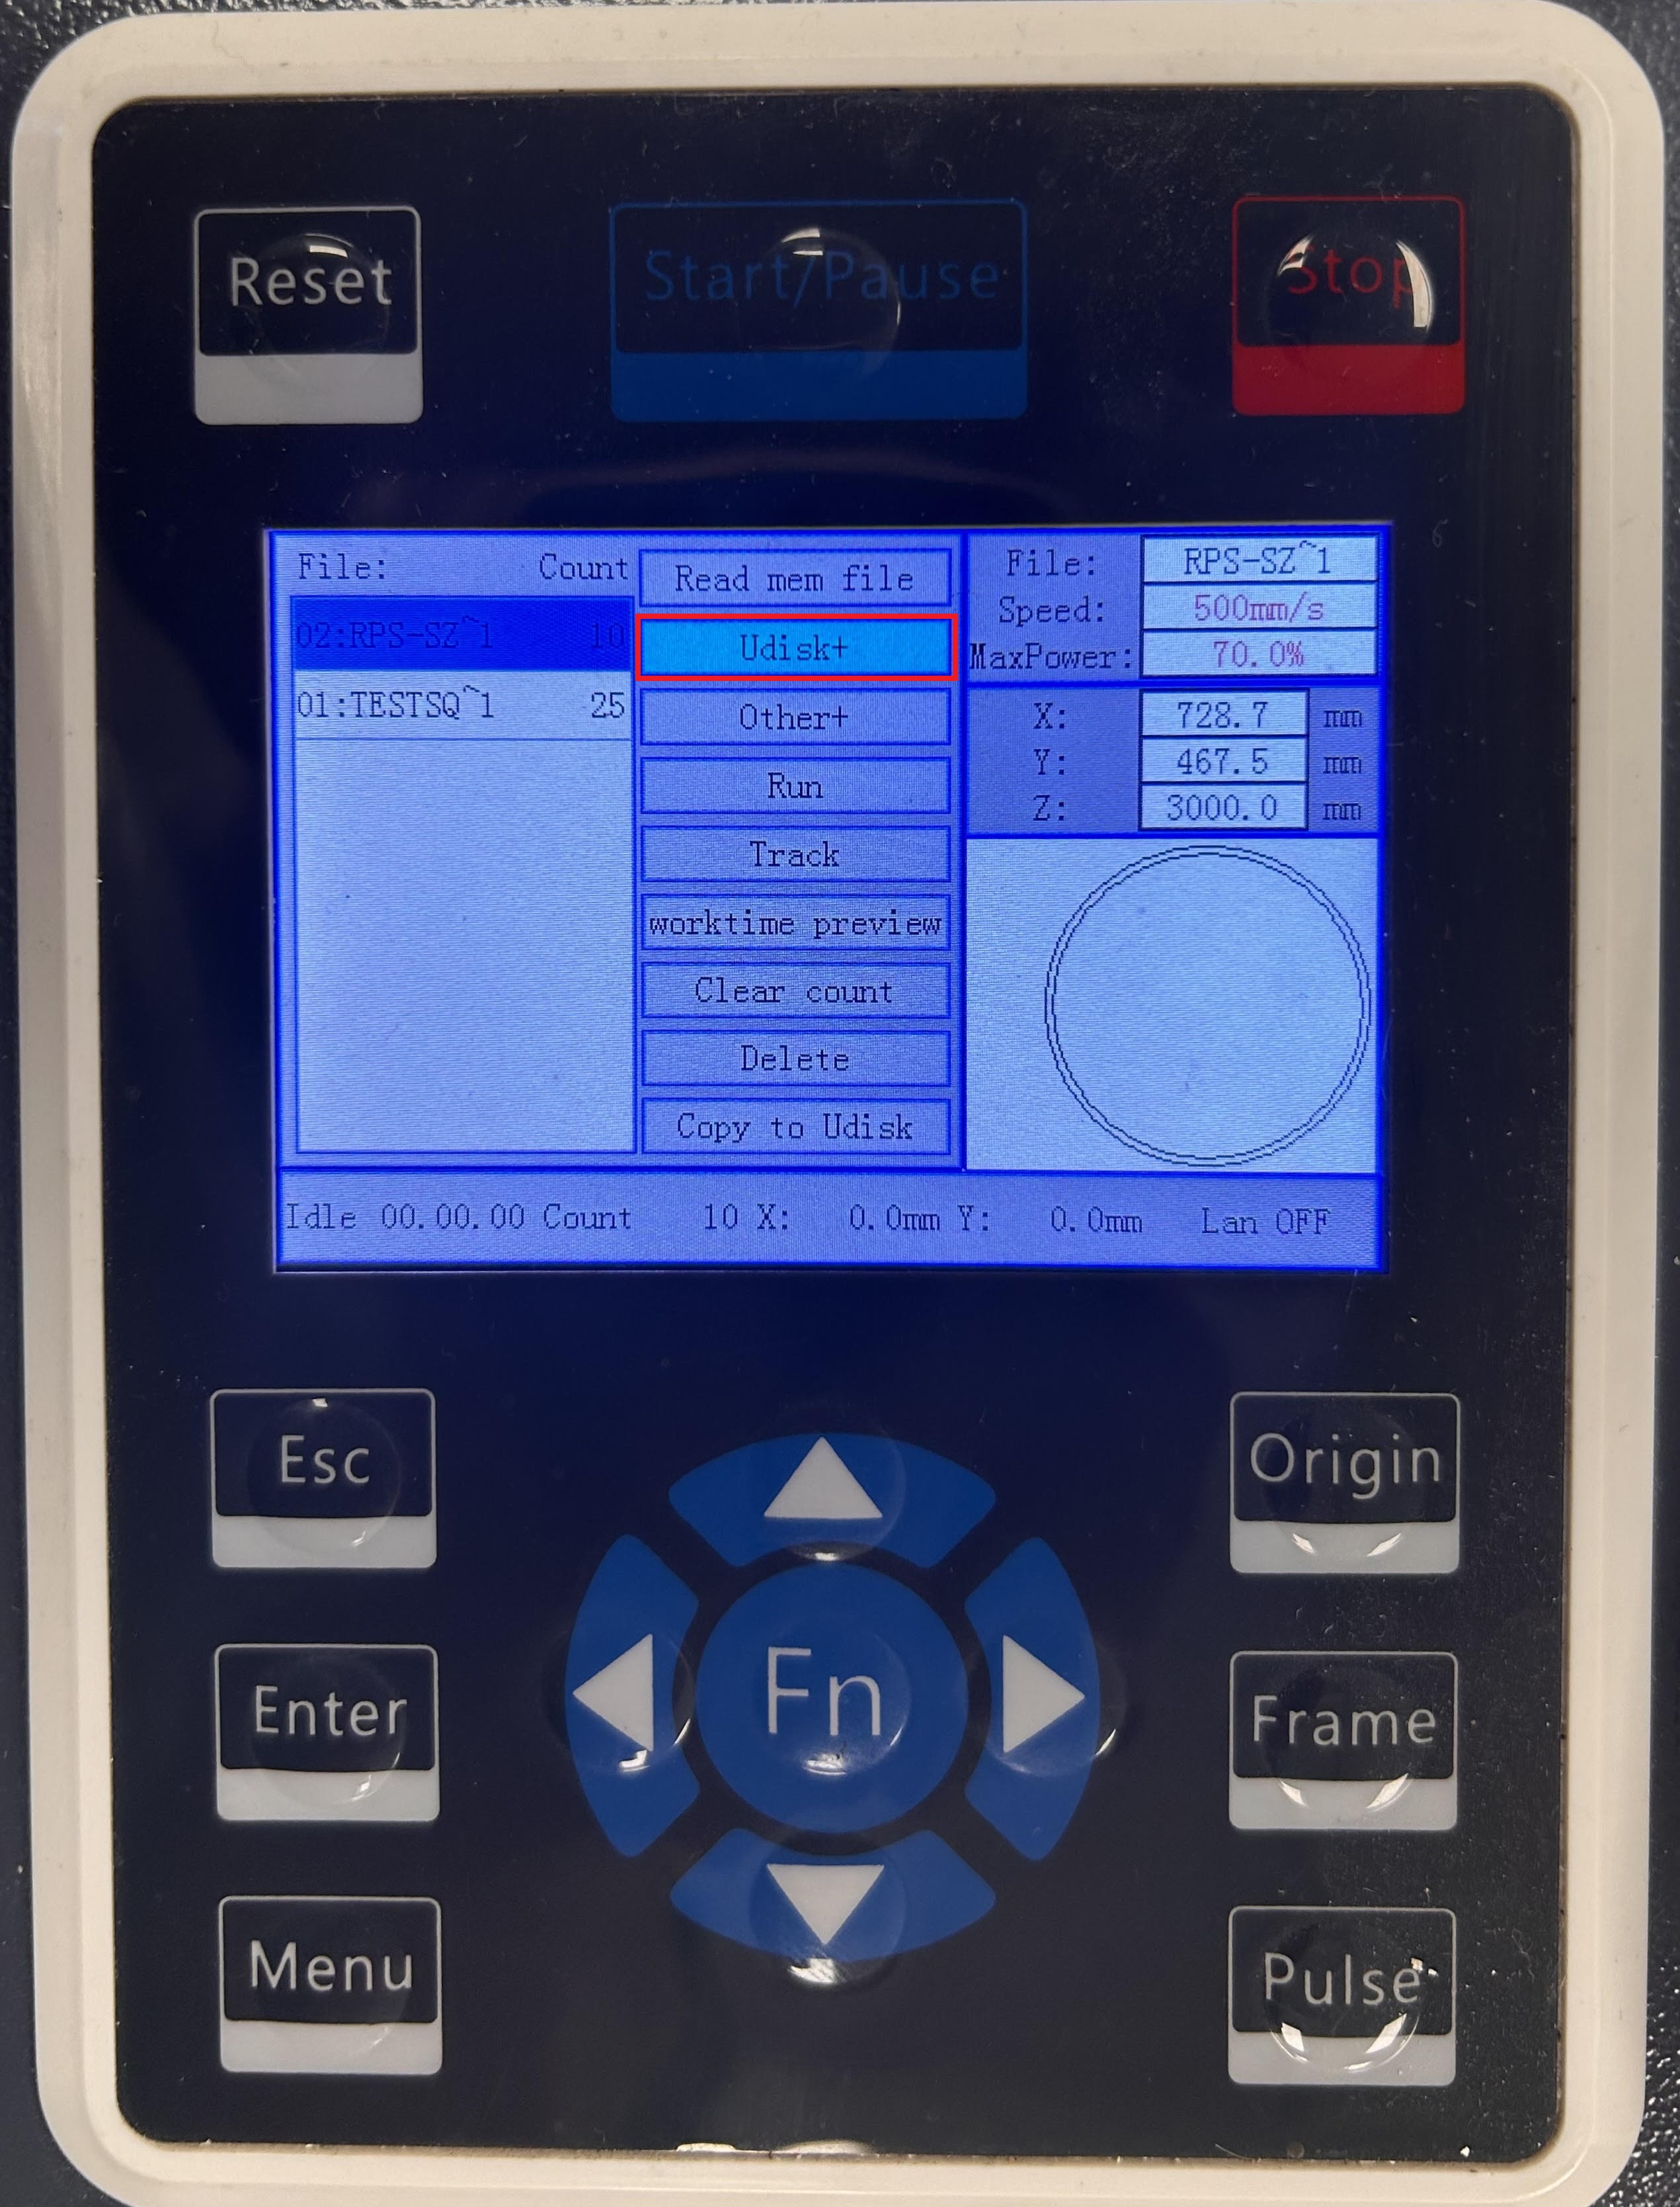
- Scroll to Udisk+, press Enter
- Scroll to Read Udisk file, press Enter
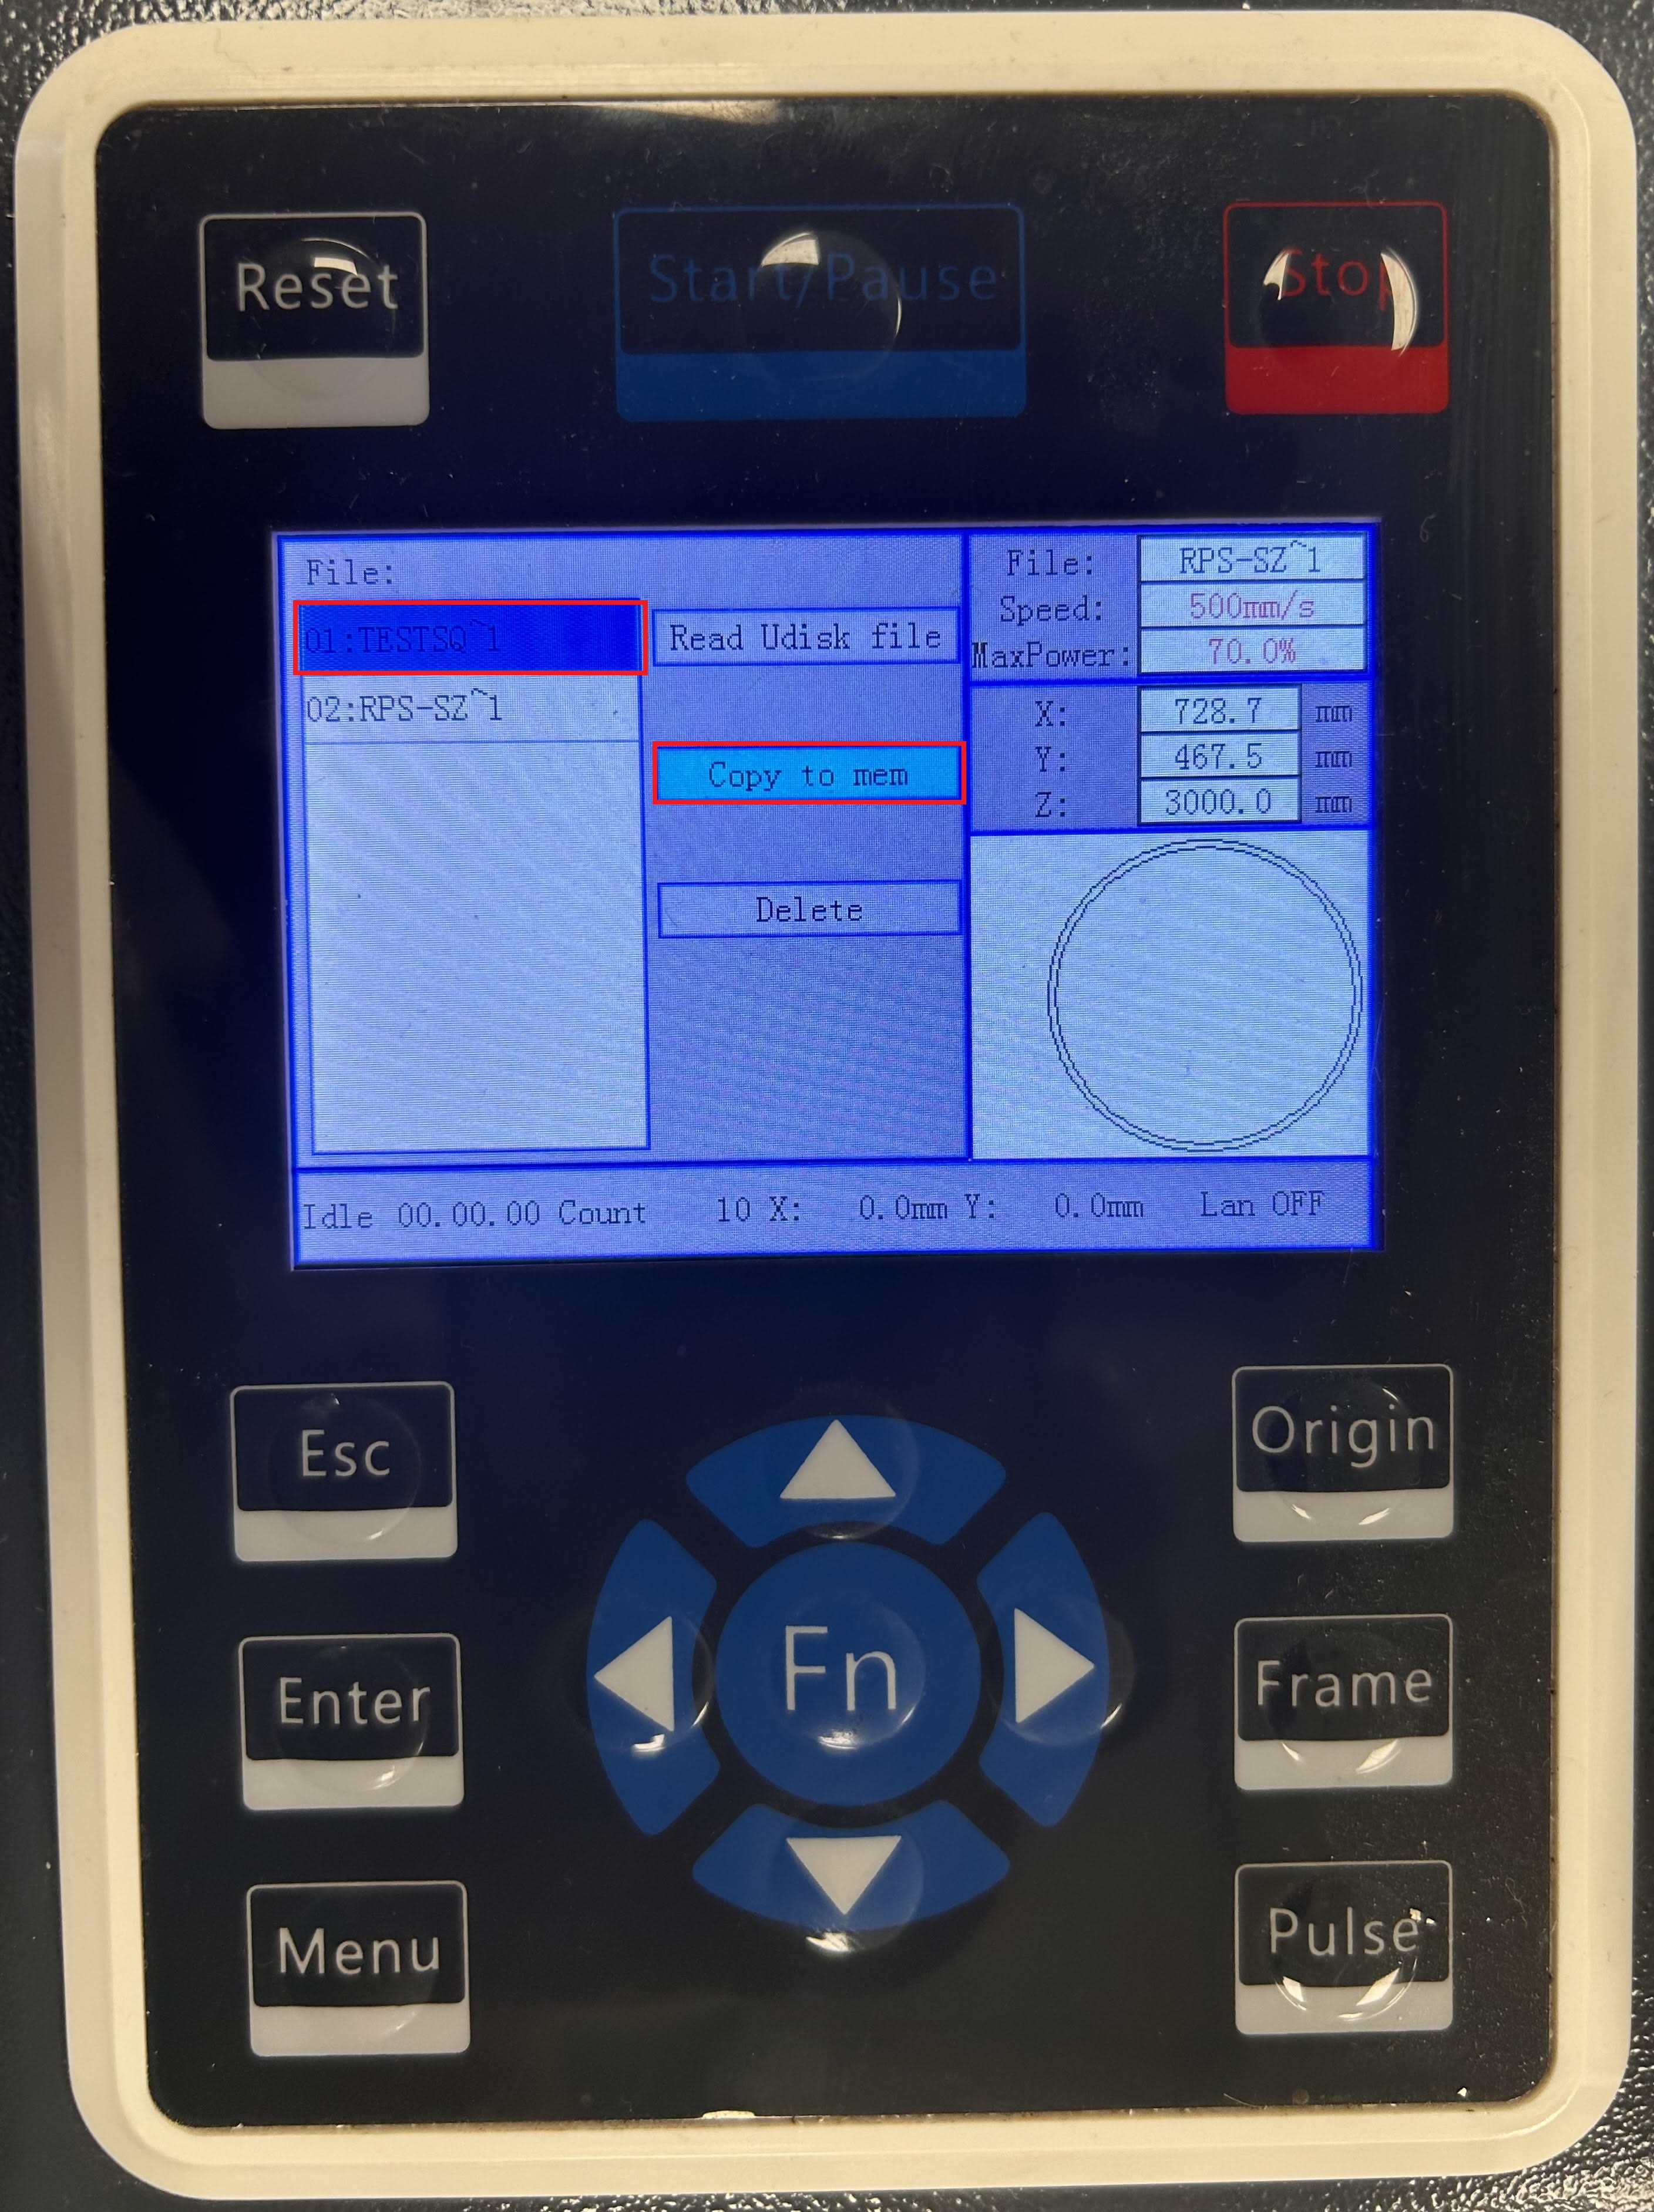
- Highlight the file you want to laser cut, scroll to Copy to mem, press Enter
- Press Esc
- Find your file (it should be at the top of the list) and press Enter
- Ensure the speed settings are correct
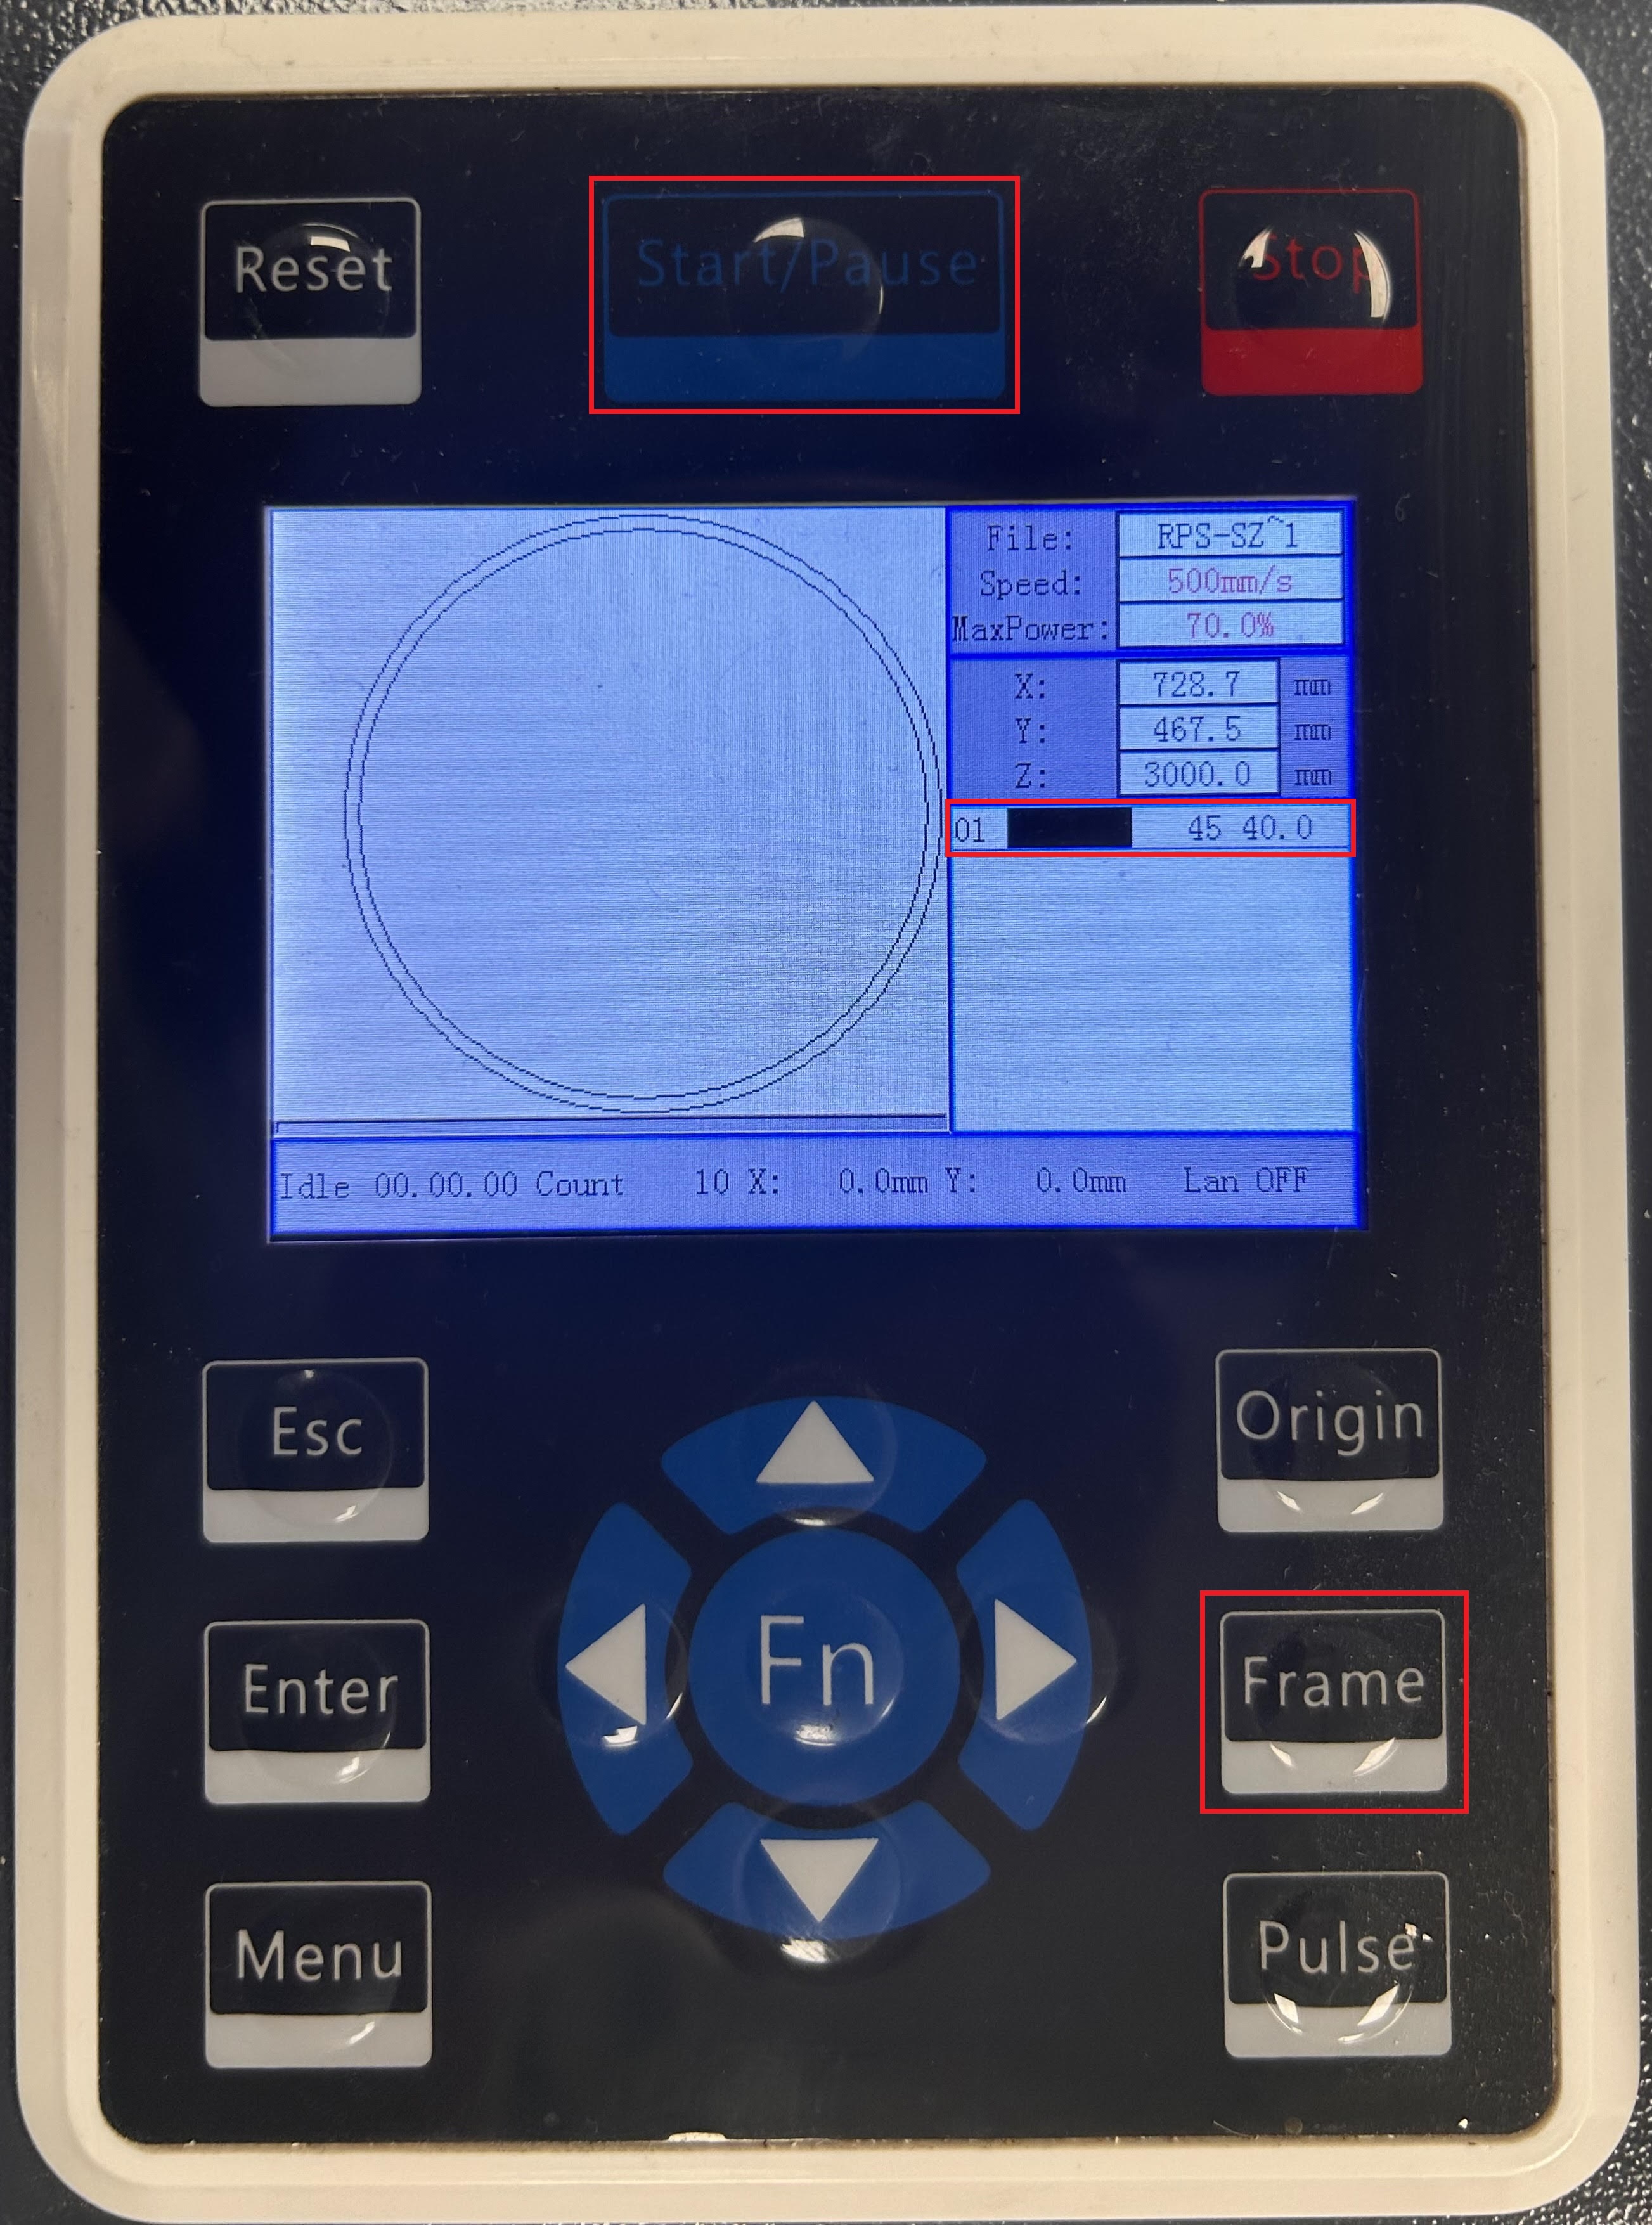
- Press Frame to see the perimeter of the job, readjust the origin if needed by pressing Origin
- Turn the key of the Laser Switch to the right in the on position so the red light will illuminate
- Close the cover and the green light will illuminate
- Press Start/Pause when ready
You must stay and watch your job laser cut/engrave for the entirety of the process.

¶ Setting up your file via Lightburn
Connect your laptop to the OMTech via the USB to PC port with a USB cable.